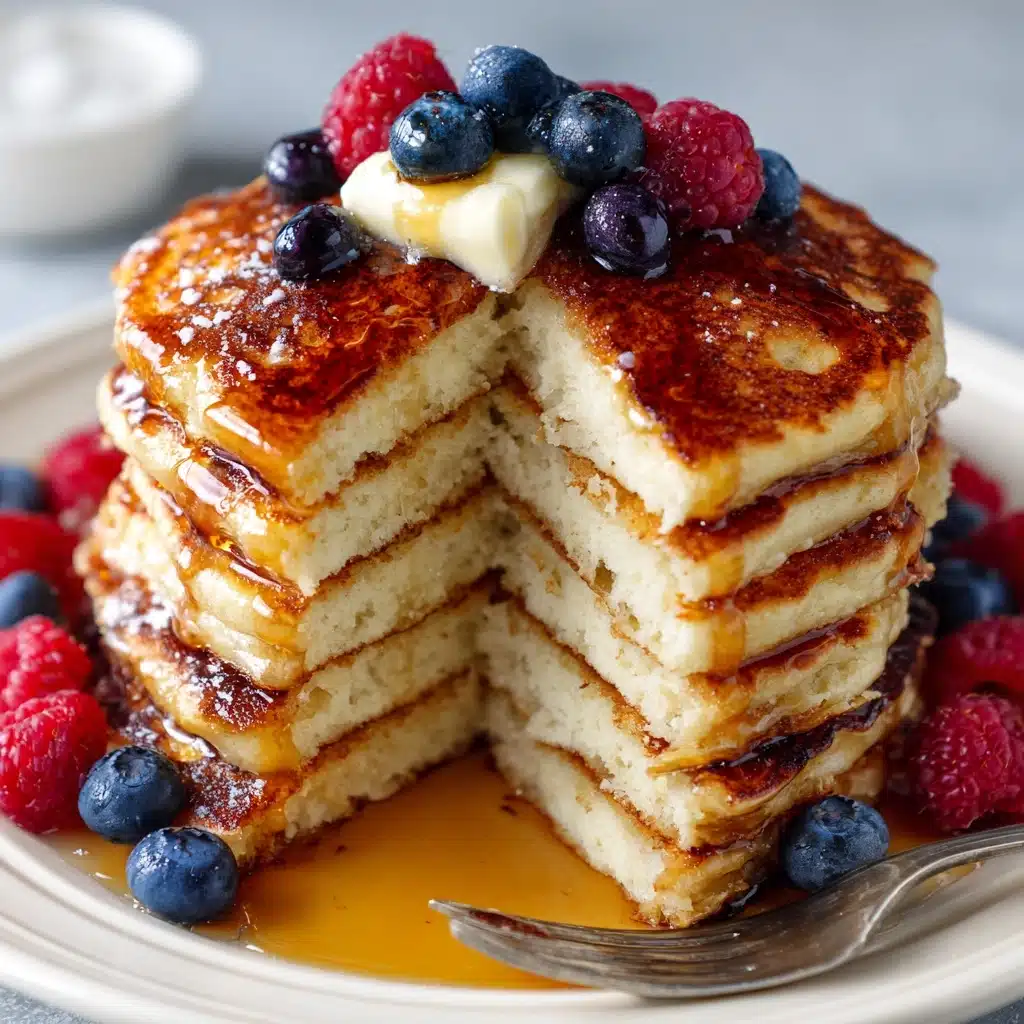
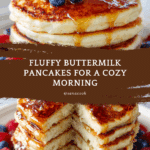
Buttermilk Pancakes Recipe
There’s something magically comforting about waking up to a freshly made stack of Buttermilk Pancakes. The edges are golden, the centers are impossibly light, and the tangy buttermilk flavor pulls you in for “just one more bite” every single time! Whether you’re chasing a leisurely weekend morning, fueling the crew before a busy day, or simply treating yourself, this classic recipe will quickly become your go-to. With simple ingredients and straightforward steps, these Buttermilk Pancakes bring bakery-level joy right to your kitchen table.

Ingredients You’ll Need
You’ll be amazed at how a handful of humble pantry staples turn into fluffy, craveable Buttermilk Pancakes. Each ingredient has its own role, from creating that melt-in-your-mouth crumb to adding layers of flavor—don’t skip a thing!
- All-purpose flour: The foundation of the pancakes, providing just the right structure and tenderness.
- Granulated sugar: A touch of sweetness to balance the tang of the buttermilk.
- Baking powder: Gives the pancakes their signature lift and lightness.
- Baking soda: Reacts with the buttermilk for extra rise and a subtle, lovely flavor.
- Salt: Enhances every flavor and keeps things from tasting flat—don’t omit!
- Buttermilk: The star of the show, lending moisture, tang, and that classic pancake texture.
- Large eggs: Bind everything together while adding richness and fluffiness.
- Unsalted butter, melted: Brings a buttery flavor and keeps the pancakes delightfully soft.
- Vanilla extract (optional): Adds a gentle warmth and depth to the batter—especially dreamy if you love vanilla.
- Butter or oil, for greasing: Helps crisp the edges and ensures nothing sticks to the pan.
How to Make Buttermilk Pancakes
Step 1: Whisk the Dry Ingredients
Start by grabbing a large mixing bowl and whisking together the flour, sugar, baking powder, baking soda, and salt. Take a moment to inhale that fresh, floury scent—it’s the start of something wonderful! This initial mix ensures all your leaveners and sweeteners are evenly distributed, setting your Buttermilk Pancakes up for tender, fluffy success.
Step 2: Combine the Wet Ingredients
In a separate bowl, crack in the eggs and give them a light beating. Then, whisk in the buttermilk, melted butter, and vanilla extract (if you’re using it). These wet ingredients are the secret to soft, wonderfully tangy pancakes. The smell of melted butter swirling with vanilla is guaranteed to get you excited for breakfast.
Step 3: Bring It All Together
Gently pour the wet mixture into the bowl with your dry ingredients. Using a spatula or wooden spoon, fold everything together until just combined—some lumps are totally normal and actually desirable! Avoid overmixing, as that’s the number one culprit of chewy, dense pancakes.
Step 4: Let the Batter Rest
Patience pays off here! Set the batter aside for 5 to 10 minutes while you preheat your pan or griddle to medium heat. This short rest allows the flour to fully hydrate and the leavening agents to start working, resulting in extra-tender Buttermilk Pancakes.
Step 5: Prep Your Pan
Lightly grease your hot pan or griddle with butter or oil. You want just enough to create golden, crisp edges, but not so much that the pancakes are swimming in fat. Swirl it around so every spot gets a little love.
Step 6: Pour and Shape
Scoop about 1/4 cup of batter onto the cooking surface for each pancake. For perfectly round Buttermilk Pancakes, try ladling the batter from the center and letting it spread naturally. Give each one enough space—they’ll puff up beautifully!
Step 7: Watch for Bubbles
Let the pancakes cook for 2 to 3 minutes without peeking. Once bubbles start to form on the surface and the edges begin to set, it’s time for that oh-so-satisfying flip.
Step 8: Flip and Finish Cooking
Flip gently and cook for another 1 to 2 minutes, until the opposite side is a golden dream and the centers are cooked through. There’s nothing quite like that first waft of caramelized, buttery pancake hitting your nose!
Step 9: Keep Them Warm
Transfer finished pancakes to a warm plate or tuck them in a low oven (200°F/95°C) as you work through the rest of the batter. This way, everyone gets hot, fluffy Buttermilk Pancakes at serving time.
Step 10: Serve with Your Favorites
Now comes the best part—serve the pancakes with maple syrup, fruit, whipped cream, or any toppings your heart desires. Don’t be shy; pile it all on for a plate that’s as stunning as it is scrumptious!
How to Serve Buttermilk Pancakes
Garnishes
You can dress up your Buttermilk Pancakes with a dusting of powdered sugar, a melting pat of salted butter, or a cascade of fresh berries. Maple syrup is classic, but honestly, almost any sweet sauce, citrus zest, toasted nuts, or dollops of homemade whipped cream will take your short stack to the next level.
Side Dishes
Pair these pancakes with crispy bacon, breakfast sausage, or scrambled eggs for a hearty, diner-style feast. For something lighter, add a bowl of Greek yogurt, citrus fruit, or even a smoothie on the side to balance the richness of the Buttermilk Pancakes.
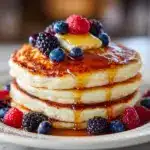
Creative Ways to Present
Stack your pancakes high and top with an artful drizzle of syrup, or layer them with fruit compote for a brunchy, restaurant-style look. If you’re serving a crowd, try making mini pancakes for a playful, bite-sized treat, or create a pancake board with an array of toppings and let everyone build their perfect bite.
Make Ahead and Storage
Storing Leftovers
If you’re lucky enough to have leftover Buttermilk Pancakes, cool them to room temperature and stash them in an airtight container in the fridge. They’ll hold their flavor and texture for up to three days—perfect for quick weekday breakfasts!
Freezing
Buttermilk Pancakes freeze beautifully. Lay cooled pancakes in a single layer on a baking sheet to freeze individually, then transfer to a freezer bag. They’ll keep for up to two months, ready to rescue any rushed morning or pancake craving.
Reheating
To reheat, pop the pancakes in the toaster for crispy edges or microwave for 20–30 seconds for a soft, just-baked feel. If you’re reheating several at once, warm them in a low oven, loosely covered with foil, until heated through—easy, hands-off, and always delicious.
FAQs
Can I make Buttermilk Pancakes if I don’t have real buttermilk?
Absolutely! Just add 1 tablespoon of lemon juice or white vinegar to 1 1/4 cups of milk, let it sit for five minutes, and you’ve got a quick buttermilk substitute that brings all the same tangy magic.
Why are my pancakes turning out flat?
Flat pancakes usually mean the baking powder or baking soda wasn’t fresh, or the batter was overmixed. Always use fresh leaveners and stir the batter gently for fluffy, pillow-soft results.
Can I add extras, like blueberries or chocolate chips, to the batter?
Of course! Sprinkle mix-ins over each pancake right after ladling batter onto the griddle for even distribution. Blueberries, mini chocolate chips, sliced bananas, or chopped nuts all work beautifully in Buttermilk Pancakes.
What’s the secret to flipping pancakes perfectly?
Patience and the right heat! Wait until you see bubbles and the edges look set before flipping. Use a thin, wide spatula and a confident wrist. A little practice, and you’ll be flipping like a pro.
Can I make the batter ahead of time?
For best results, mix dry and wet ingredients separately and combine them just before cooking. Mixed batter can rest in the fridge for an hour or two, but too long and the pancakes may lose their rise.
Final Thoughts
If you’ve been dreaming of the perfect breakfast, it’s time to give these Buttermilk Pancakes a try. Every fluffy bite is packed with comfort and nostalgia, and you’ll love how easy they are to make. Share them with family and friends, or whip up a batch just for you—you’ll be smiling all morning!
PrintButtermilk Pancakes Recipe
Fluffy and delicious buttermilk pancakes that are perfect for a cozy breakfast or brunch. These pancakes are easy to make and always a crowd-pleaser.
- Prep Time: 15 minutes
- Cook Time: 15 minutes
- Total Time: 30 minutes
- Yield: Makes about 12 pancakes 1x
- Category: Breakfast/Brunch
- Method: Pan-frying
- Cuisine: American
- Diet: Vegetarian
Ingredients
Dry Ingredients:
- 1 1/2 cups all-purpose flour
- 2 tablespoons granulated sugar
- 1 teaspoon baking powder
- 1/2 teaspoon baking soda
- 1/2 teaspoon salt
Wet Ingredients:
- 1 1/4 cups buttermilk
- 2 large eggs
- 3 tablespoons unsalted butter, melted
- 1 teaspoon vanilla extract (optional)
For Cooking:
- Butter or oil, for greasing the pan
Instructions
- In a large mixing bowl, whisk together the flour, sugar, baking powder, baking soda, and salt. Combine until well mixed.
- In a separate bowl, beat the eggs lightly, then whisk in the buttermilk, melted butter, and vanilla extract. Mix until smooth.
- Pour the wet mixture into the dry ingredients and gently mix until just combined. Do not overmix. A few lumps are okay.
- Let the batter rest for 5–10 minutes while you preheat your pan or griddle over medium heat. This allows the ingredients to meld.
- Lightly grease the cooking surface with butter or oil.
- Pour 1/4 cup of batter per pancake onto the pan.
- Cook for 2–3 minutes, until bubbles form and the edges start to look set.
- Flip and cook for another 1–2 minutes until golden brown and cooked through.
- Transfer to a warm plate or oven while you finish the remaining pancakes.
- Serve with maple syrup, fruit, whipped cream, or your favorite toppings.
Nutrition
- Serving Size: 1 pancake
- Calories: 150
- Sugar: 5g
- Sodium: 250mg
- Fat: 6g
- Saturated Fat: 3.5g
- Unsaturated Fat: 2.5g
- Trans Fat: 0g
- Carbohydrates: 20g
- Fiber: 1g
- Protein: 4g
- Cholesterol: 50mg
Keywords: Buttermilk Pancakes, Pancake Recipe, Breakfast, Brunch, Comfort Food
