Boneyard Brownies Recipe
Introduction
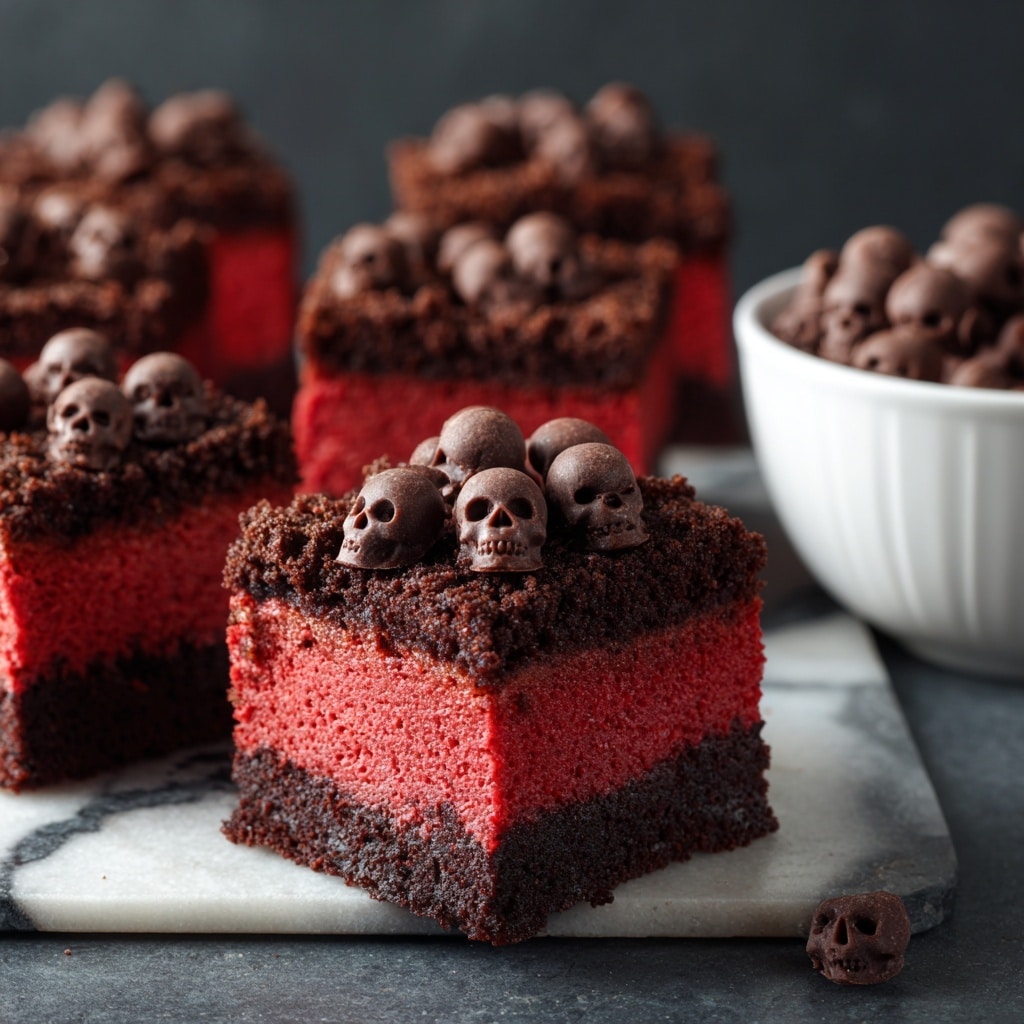
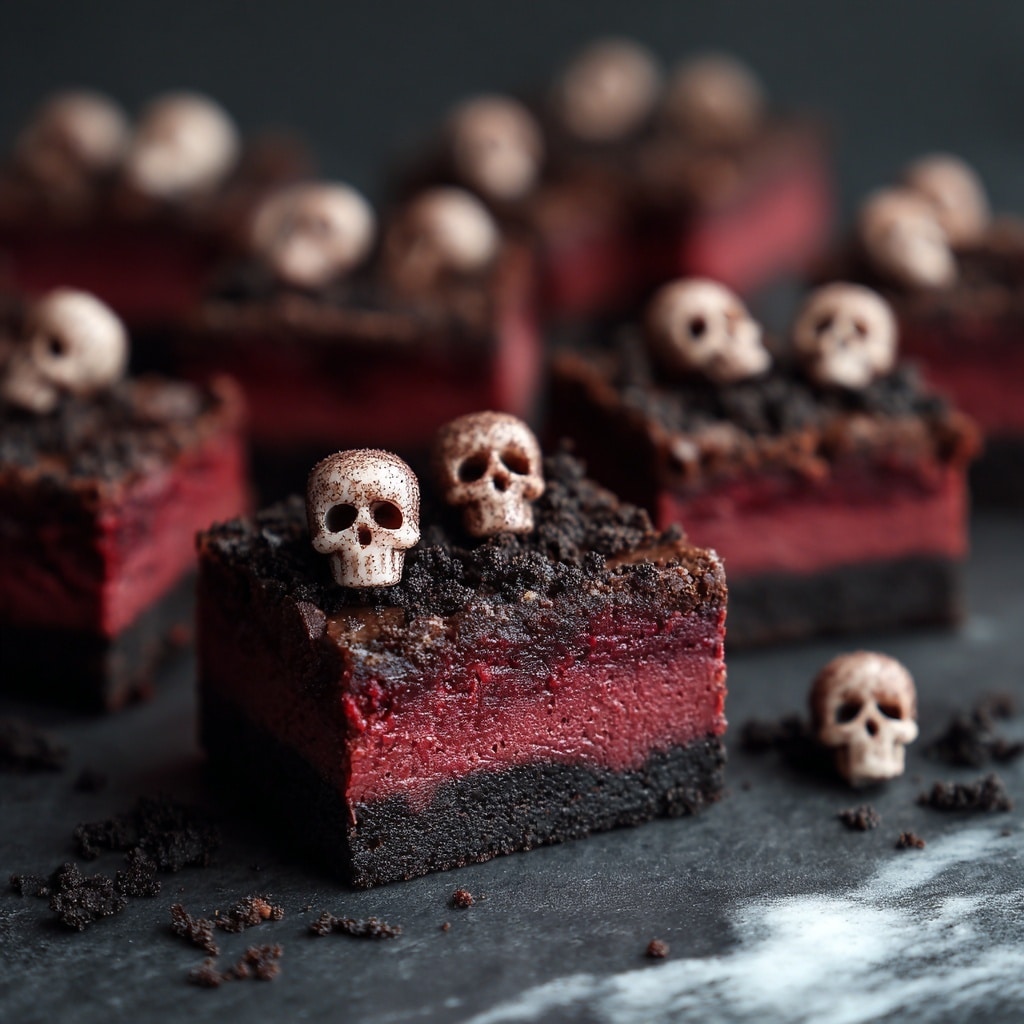
Boneyard Brownies are a deliciously rich and festive treat perfect for Halloween or any spooky occasion. These red velvet-inspired brownies are topped with chocolate, Oreo crumbs, and spooky chocolate skulls for a fun and impressive dessert.
Ingredients
- 1 cup all purpose flour
- 3 tbsp cocoa powder
- ½ tsp salt
- ½ cup butter, room temperature
- 1 cup sugar
- ½ cup brown sugar
- 3 large eggs
- 2 tsp vanilla extract
- 1 tbsp red food coloring
- 1 cup milk chocolate melting wafers, divided (such as Stover & Company)
- 8 Oreo cookies, crumbs
- Chocolate skull chips (for garnish)
Instructions
- Step 1: Make the skull chips ahead of time by placing ½ cup of the milk chocolate melting wafers into a small piping bag. Melt in the microwave according to package directions. Snip the end of the bag and pipe small amounts of chocolate into a tiny skull mold. Freeze for 3-5 minutes, then unmold. Repeat melting and piping with the remaining chocolate as needed.
- Step 2: Preheat your oven to 350℉. Line an 8 x 8 x 2-inch brownie pan with parchment paper for easy removal.
- Step 3: Pulse the Oreo cookies in a food processor until they form coarse crumbs. Set aside.
- Step 4: In a stand mixer, cream together the butter, sugar, and brown sugar until smooth.
- Step 5: Lightly whisk the eggs, vanilla extract, and red food coloring in a small bowl. Add this mixture to the stand mixer and mix on low until fully incorporated.
- Step 6: Sift the flour, cocoa powder, and salt into a medium bowl. Add these dry ingredients to the stand mixer and mix on low until just combined. Be careful not to overmix.
- Step 7: Pour the batter into the prepared pan and bake for 30-40 minutes, or until a toothpick inserted in the center comes out clean.
- Step 8: Remove the brownies from the oven. Immediately sprinkle the remaining ½ cup of chocolate chips over the top. Let sit for 2 minutes to soften, then smooth the chocolate with the back of a spoon.
- Step 9: Sprinkle the Oreo crumbs evenly over the melted chocolate. Allow the brownies to cool for 15 minutes.
- Step 10: Garnish with the prepared chocolate skull chips on top of the cookie crumbs. Let the brownies cool completely before slicing into 16 pieces, each about 2 inches square.
Tips & Variations
- Use a stand mixer or hand mixer to cream the butter and sugars well for a lighter texture.
- If you don’t have a skull mold, try using any small silicone mold in fun shapes like pumpkins or bats.
- For extra richness, add a handful of chopped nuts or chocolate chunks to the batter before baking.
- Adjust the red food coloring according to your desired shade or omit for traditional chocolate brownies.
Storage
Store leftover brownies in an airtight container at room temperature for up to 3 days. For longer storage, keep them in the refrigerator for up to 1 week. Reheat gently in the microwave for 10-15 seconds if desired, though they are best enjoyed at room temperature.
How to Serve
Serve this delicious recipe with your favorite sides.
FAQs
Can I make these brownies without the red food coloring?
Yes, you can omit the red food coloring to make classic chocolate brownies. The flavor and texture will remain delicious, though the festive red hue will be missing.
How do I melt milk chocolate melting wafers properly?
Microwave the wafers on half power in 30-second intervals, stirring between each until smooth. This prevents overheating and ensures even melting for piping or dipping.
PrintBoneyard Brownies Recipe

These Boneyard Brownies combine the rich flavors of classic red velvet brownies with a decadent chocolate topping and crunchy Oreo cookie crumbs, finished with festive chocolate skull decorations. Perfect for Halloween or any occasion that calls for a spooky yet delicious treat.
- Prep Time: 20 minutes
- Cook Time: 35 minutes
- Total Time: 55 minutes
- Yield: 16 brownies 1x
- Category: Dessert
- Method: Baking
- Cuisine: American
Ingredients
Brownies
- 1 cup all purpose flour
- 3 tbsp cocoa powder
- ½ tsp salt
- ½ cup butter, room temperature
- 1 cup sugar
- ½ cup brown sugar
- 3 large eggs
- 2 tsp vanilla extract
- 1 tbsp red food coloring
- 1 cup milk chocolate melting wafers, divided (e.g., Stover & Company)
- 8 Oreo cookies, crumbs
Skull Chips Garnish
- ½ cup milk chocolate melting wafers
Instructions
- Make Skull Chips: Place ½ cup of milk chocolate melting wafers into a small piping bag and secure it with a rubber band. Melt the chocolate in the microwave following package instructions. Snip the tip of the bag and carefully pipe small amounts into a tiny skull mold. Freeze the mold for 3-5 minutes until set. Unmold the chocolate skulls. Repeat the melting and molding process as needed, microwaving chocolate at half power in 30-second intervals to prevent hardening.
- Prepare Brownie Pan: Preheat your oven to 350℉ (175℃). Line an 8 x 8 x 2-inch brownie pan with parchment paper for easy removal.
- Make Oreo Crumbs: Pulse Oreo cookies in a food processor until coarse crumbs form. Set aside for topping.
- Cream Butter and Sugars: Using a stand mixer, cream together the room temperature butter, granulated sugar, and brown sugar until light and fluffy.
- Add Wet Ingredients: In a small bowl, lightly whisk together the eggs, vanilla extract, and red food coloring. Slowly add this mixture to the stand mixer and blend on low speed until just incorporated.
- Combine Dry Ingredients: Sift the flour, cocoa powder, and salt together into a medium bowl. Gradually add these dry ingredients to the stand mixer on low speed, mixing carefully to avoid overmixing the batter.
- Pour Batter and Bake: Pour the brownie batter evenly into the prepared pan. Bake in the preheated oven for 30-40 minutes, or until a toothpick inserted in the center comes out clean.
- Add Chocolate Topping: Remove the brownies from the oven and immediately sprinkle the remaining ½ cup of milk chocolate melting wafers over the hot brownies. Let sit for 2 minutes to allow the chips to melt, then smooth the melted chocolate evenly over the top using the back of a spoon.
- Add Oreo Crumbs and Cool: Sprinkle the reserved Oreo crumbs over the melted chocolate layer. Allow the brownies to cool for 15 minutes.
- Decorate with Skull Chips and Chill: Garnish the brownies with the prepared chocolate skull chips over the Oreo crumbs. Let the brownies cool completely before cutting.
- Serve: Cut the brownies into 16 pieces, each about 2 inches square, and enjoy your festive Boneyard Brownies!
Notes
- Make the chocolate skull chips ahead of time for easy garnish application.
- Do not overmix the batter to keep brownies tender and moist.
- If you don’t have a stand mixer, a hand mixer or mixing by hand works fine; just ensure ingredients are well combined.
- For cleaner cuts, cool brownies completely and consider refrigerating them before slicing.
- Use parchment paper with overhang to easily lift brownies from pan.
Keywords: red velvet brownies, Halloween brownies, red velvet dessert, Oreo brownies, chocolate brownies, festive brownies, Halloween treats, chocolate skull garnish


