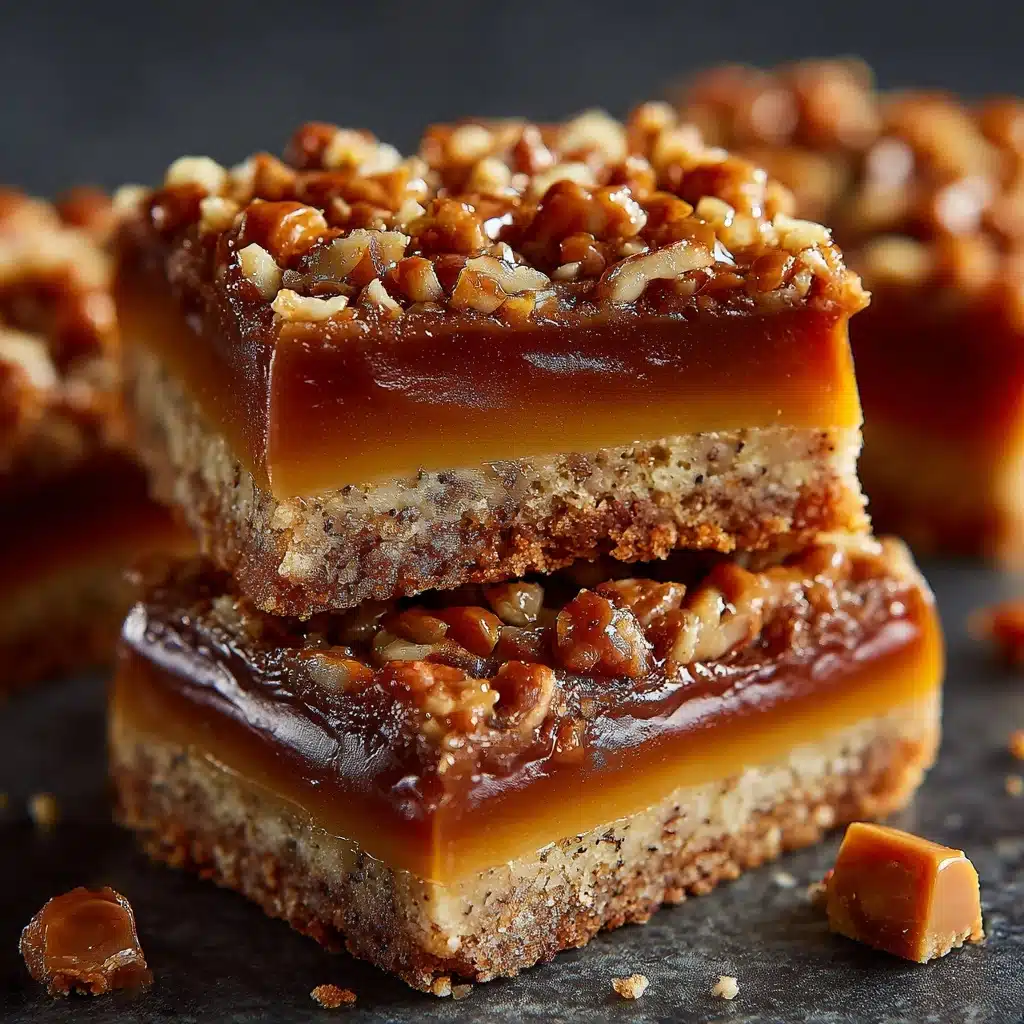
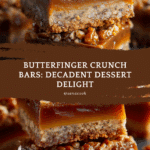
Butterfinger Crunch Bars Recipe
Imagine the ultimate marriage of crispy, gooey, salty-sweet goodness, and you’ll end up with these Butterfinger Crunch Bars. This treat brings together the nostalgic flavors of graham crackers, gooey marshmallows, luscious caramel, and the unmistakable crunch of Butterfinger bites, all finished with a glossy drizzle of chocolate. Each bite bursts with layers of texture and flavor that simply demand a second helping. Butterfinger Crunch Bars are a breeze to assemble and sure to become your go-to for bake sales, movie nights, or any time you want to wow a crowd. If you’re a fan of irresistible, shareable desserts, you’re about to fall in love!

Ingredients You’ll Need
You don’t need a mile-long ingredient list for Butterfinger Crunch Bars—just a handful of basics, each chosen for its role in building those crave-worthy layers. Every element is essential, so splurge on the good stuff and get ready to delight your tastebuds!
- Graham crackers (6 ½ sheets, crushed): These form the cookie crust, adding that classic crunch and a light honey aroma as the foundation.
- Mini marshmallows (2 cups): These create pockets of gooey sweetness and melt just enough to bring the whole bar together.
- Caramel bits (1 bag, 11 oz): They melt into a rich, sweet layer that brings luxurious chewiness to the bars.
- Milk (2 tablespoons): A splash softens the caramel, helping it pour smoothly into every nook.
- Butterfinger bites (1 bag, 10 oz, coarsely chopped): These are the signature star, giving the bars their unforgettable peanut-buttery crunch.
- Semi-sweet chocolate (2 oz, melted): With just a drizzle, chocolate ties all the flavors together and makes each square irresistible.
- Cooking spray and foil: Not edible, but crucial for bar-removal ease and keeping cleanup a breeze!
How to Make Butterfinger Crunch Bars
Step 1: Prepare the Pan
First things first: line a 9×9-inch baking pan with foil, making sure there’s enough hanging over the edges so you can lift out the finished bars with no fuss. Give the foil a light coating of cooking spray—this little step is the secret to flawless, stick-free bars every single time.
Step 2: Add Crust
Sprinkle your crushed graham crackers evenly over the bottom of the prepared pan. Don’t press too firmly; a light touch helps keep the crust a bit crumbly, which melds beautifully into the gooey layers above.
Step 3: Add Marshmallows
Scatter the mini marshmallows over the graham cracker layer, creating a fluffy blanket of sweet goodness. They’ll soften and slightly melt once the warm caramel goes on, so don’t worry if they’re uneven at this point.
Step 4: Melt Caramel
Grab a microwave-safe bowl and combine the caramel bits with milk. Heat on high for one minute, stir, and repeat in 30-second bursts until the caramel is gorgeously smooth and pourable. The milk keeps it silky so you can easily coat every marshmallow.
Step 5: Add Caramel Layer
Quickly pour the melted caramel over the marshmallows, then use a spatula to nudge it into the corners. The heat from the caramel will begin to soften the mini marshmallows, fusing the marshmallow and caramel together into the ultimate gooey layer.
Step 6: Add Butterfinger
Sprinkle those glorious, coarsely chopped Butterfinger bites over the warm caramel layer. Press gently so they nestle into the sticky caramel without sinking all the way in. This is where Butterfinger Crunch Bars get their personality—crunchy, salty, and sweet.
Step 7: Drizzle Chocolate
Drizzle the melted semi-sweet chocolate over the Butterfinger layer. You can use a spoon for rustic ribbons or a piping bag for neater stripes. Either way, this finish adds a polished look and a perfect hit of chocolate in every bite.
Step 8: Chill
Refrigerate the pan for about an hour, or until the bars are firm to the touch and the chocolate has set. Patience is tough here, but trust me, cutting the bars is so much easier once they’re fully chilled.
Step 9: Serve
Lift the slab from the pan using those handy foil edges, then peel back the foil and slice into squares or bars—whatever fits your mood or crowd. The marbled chocolate, golden Butterfinger, and gooey layers will get everyone reaching for seconds!
How to Serve Butterfinger Crunch Bars
Garnishes
Give your Butterfinger Crunch Bars a mouthwatering upgrade with just a sprinkle of extra chopped Butterfinger bites or a pinch of flaky sea salt on top. If you’re feeling festive, a drizzle of white chocolate or a dusting of powdered sugar adds a beautiful finishing touch—utterly irresistible!
Side Dishes
Although Butterfinger Crunch Bars are definite standouts, they pair so well with a scoop of vanilla ice cream or a glass of cold milk. For a dessert platter, surround them with fresh strawberries or some salted pretzels for an extra pop of color and flavor contrast.
Creative Ways to Present
Jazz up your dessert spread by stacking the bars in playful towers or arranging them on a cake stand lined with parchment. Individually wrapping them in parchment and tying with twine makes charming take-home treats for guests—perfect for parties, picnics, or little gift bags.
Make Ahead and Storage
Storing Leftovers
Store leftover Butterfinger Crunch Bars in an airtight container at room temperature for up to three days—they’ll stay just as chewy and crunchy as day one. If your kitchen is especially warm, pop the container in the fridge to help maintain the chocolate’s shape and prevent any mess.
Freezing
Want to make a batch ahead? Absolutely! Freeze the cut bars on a baking sheet until solid, then transfer them to a zip-top bag or airtight container. They’ll keep for up to three months; just let them thaw at room temperature before serving.
Reheating
These bars are best enjoyed at room temperature, but if you like your marshmallows extra gooey, microwave a square for just 10–15 seconds. The chocolate will get soft and the caramel melty, turning your Butterfinger Crunch Bars into a warm, decadent treat!
FAQs
Can I use homemade caramel instead of caramel bits?
Definitely! Homemade caramel sauce works beautifully—just make sure it’s thick enough to set as a layer. If yours is very runny, let it cool and firm up a bit before pouring it over the marshmallows.
Do I have to use Butterfinger bites, or can I chop up regular Butterfinger bars?
Both work perfectly! If you can’t find Butterfinger bites, just coarsely chop up full-size Butterfinger bars—the flavor and crunch will be the same, and you can control the size of each peanut-buttery chunk.
How do I keep the bars from sticking to the pan?
Using foil with overhang and greasing it well with cooking spray is key. This way, you can lift out the entire pan of Butterfinger Crunch Bars once chilled and cut them easily with minimal mess.
Can I double the recipe for a crowd?
Absolutely! Double all the ingredients and use a 9×13-inch pan. They may take a touch longer to firm up in the fridge, but everything else stays the same—more bars for everyone!
Can these bars be made nut-free?
Since Butterfinger candies contain peanuts, these bars aren’t easily adapted to be nut-free while keeping the original flavor. For an allergy-friendly version, try swapping in toffee bits or your favorite nut-free candy bar.
Final Thoughts
If you’re searching for a dessert that’s both show-stopping and wonderfully simple, Butterfinger Crunch Bars are your answer. They’re layered, craveable, and come together in a flash. I hope you’ll give them a try next time you want a treat that’s guaranteed to delight every sweet tooth in the room!
PrintButterfinger Crunch Bars Recipe
Indulge in the delightful combination of graham crackers, marshmallows, caramel, Butterfinger bites, and chocolate in these irresistible Butterfinger Crunch Bars.
- Prep Time: 15 minutes
- Cook Time: 5 minutes
- Total Time: 1 hour 20 minutes
- Yield: 12 bars 1x
- Category: Dessert
- Method: Baking
- Cuisine: American
- Diet: Vegetarian
Ingredients
Graham Cracker Crust:
- 6 ½ sheets graham crackers, crushed
Marshmallow Layer:
- 2 cups mini marshmallows
Caramel Layer:
- 1 (11 oz) bag caramel bits
- 2 tablespoons milk
Butterfinger Topping:
- 1 (10 oz) bag Butterfinger bites, coarsely chopped
- 2 oz semi-sweet chocolate, melted
Instructions
- Prepare Pan: Line a 9×9-inch baking pan with foil, leaving overhang for easy removal. Lightly coat with cooking spray.
- Add Crust: Arrange the crushed graham crackers in an even layer at the bottom of the pan.
- Add Marshmallows: Spread mini marshmallows evenly over the graham cracker layer.
- Melt Caramel: In a microwave-safe bowl, heat the caramel bits with milk on high for 1 minute. Stir, then continue heating in 30-second intervals until fully melted.
- Add Caramel Layer: Pour the melted caramel over the marshmallows and spread evenly.
- Add Butterfinger: Sprinkle the chopped Butterfinger bites on top of the caramel layer, pressing them down gently to ensure they stick.
- Drizzle Chocolate: Drizzle the melted semi-sweet chocolate over the Butterfinger layer.
- Chill: Refrigerate for about 1 hour until the bars are firm.
- Serve: Once set, use the foil overhang to lift the bars out of the pan. Cut into squares and enjoy!
Nutrition
- Serving Size: 1 bar
- Calories: 280
- Sugar: 22g
- Sodium: 120mg
- Fat: 12g
- Saturated Fat: 6g
- Unsaturated Fat: 4g
- Trans Fat: 0g
- Carbohydrates: 40g
- Fiber: 1g
- Protein: 2g
- Cholesterol: 5mg
Keywords: Butterfinger Crunch Bars, dessert recipe, sweet treats, easy dessert, candy bar dessert
