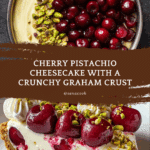
Cherry Pistachio Cheesecake – A Luscious Dessert Recipe
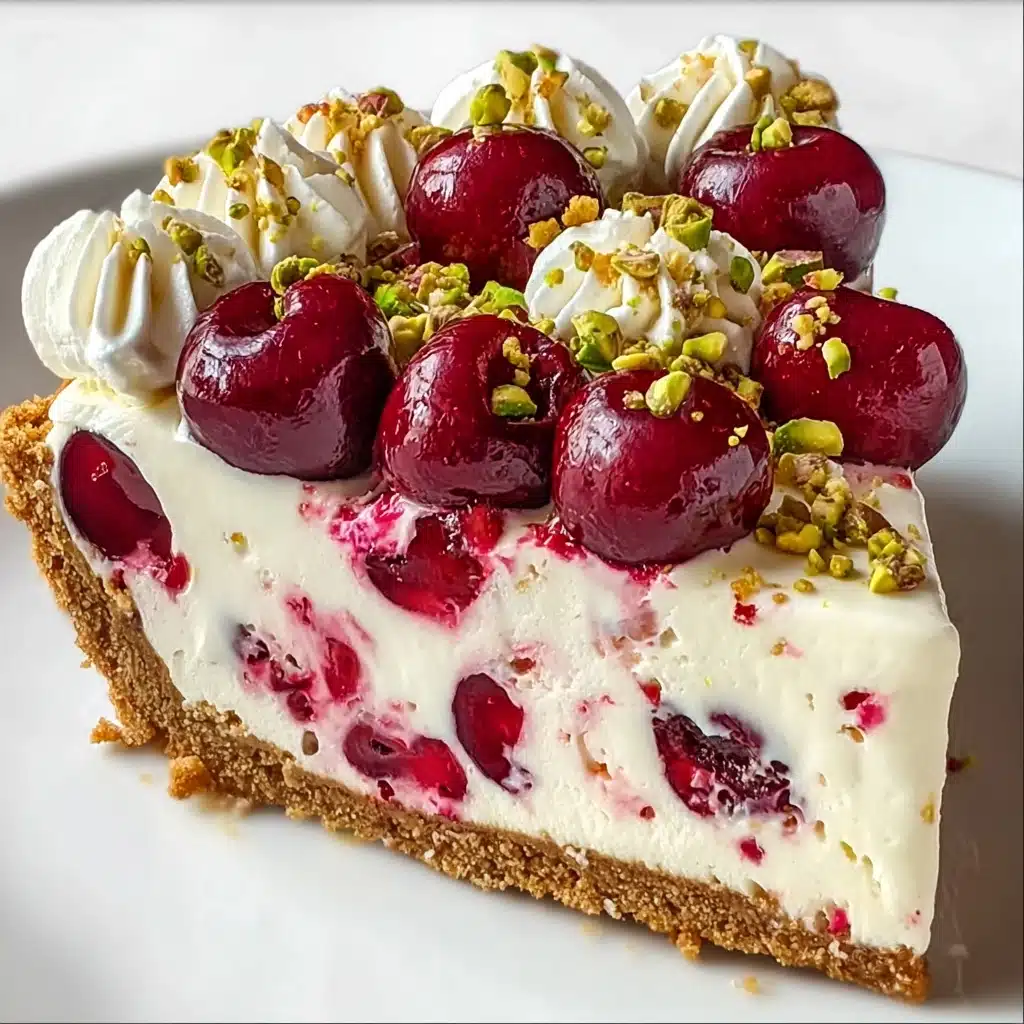
If you have a hankering for something truly spectacular that will wow your friends and family, the Cherry Pistachio Cheesecake – A Luscious Dessert Recipe is your ticket to a memorable dessert experience. This cheesecake combines a buttery, crunchy crust studded with earthy pistachios, a luxuriously creamy filling infused with a subtle hint of pistachio pudding, and a vibrant cherry topping that bursts with juicy sweetness. Each bite is a perfect harmony of textures and flavors, proving that a stunning dessert can be both indulgent and approachable. Trust me, once you make this cheesecake, it will become your new favorite way to celebrate any occasion or simply treat yourself to something extraordinary.
Ingredients You’ll Need
The magic of this cheesecake lies in its simple yet thoughtfully selected ingredients. Each component plays a crucial role—whether adding texture, balancing sweetness, or creating that signature pistachio-berry flavor combination. You don’t need anything fancy, just a few pantry staples and a couple of special touches to bring the dish to life.
- Graham cracker crumbs: The classic base providing buttery crunch and a hint of honeyed flavor to the crust.
- Ground pistachios: Adds a wonderful nutty earthiness and a subtle green hue to the crust, making it extra special.
- Sugar: Essential for sweetness in the crust and filling, balancing tart and nutty notes perfectly.
- Melted butter: Binds the crust together while enriching it with a smooth, luscious texture.
- Cream cheese: The creamy heart of the cheesecake, delivering that classic rich and velvety base.
- Eggs: Provide structure and a silky texture to the filling while keeping it light.
- Sour cream: Adds tang and creaminess, lifting the filling with a slight tangy depth.
- Pistachio pudding mix (dry powder): A secret ingredient that infuses the filling with authentic pistachio flavor and a delicate green tint.
- Vanilla extract: Brings warmth and rounds out all the flavors in the filling.
- Cherry pie filling: The jewel on top, bursting with bright cherry flavor and a glossy finish.
- Chopped pistachios (optional): For that gorgeous finishing touch and a little crunch on top.
How to Make Cherry Pistachio Cheesecake – A Luscious Dessert Recipe
Step 1: Preheat and Prep
Start by setting your oven to 325°F (160°C). Preparing your pan is key; grease a 9-inch springform pan or line its bottom with parchment paper. This small step ensures your cheesecake will release beautifully when it’s time to serve.
Step 2: Create the Crust
In a mixing bowl, combine graham cracker crumbs, ground pistachios, sugar, and melted butter. Stir until the mixture looks wet and holds together when pressed. Press this evenly into the bottom of your pan, making a firm, even layer. Bake for 8 minutes to lightly toast the crust—this amplifies the nuttiness and gives a lovely crunch. Let it cool slightly while you prepare the filling.
Step 3: Mix the Filling
Beat softened cream cheese and sugar until super smooth and free of lumps—that’s where creamy bliss begins. One at a time, add in your eggs, mixing carefully after each addition so the batter stays silky. Fold in sour cream, pistachio pudding mix, and vanilla extract, stirring gently just until combined. This mixture is where the cheesecake’s signature pistachio richness really shines.
Step 4: Bake the Cheesecake
Pour the luscious filling over your cooled crust and spread it evenly with a spatula. Bake the cheesecake for 45 to 50 minutes. You’re aiming for the edges to be set but the center to slightly jiggle when you gently shake the pan. That wobble means creamy perfection. After turning off the oven, leave the cheesecake inside with the door cracked for about an hour to cool slowly—this helps prevent cracks and keeps the texture just right.
Step 5: Chill Thoroughly
Refrigerate your cheesecake for at least 4 hours or, if you can plan ahead, overnight. This chilling time allows flavors to meld beautifully and the filling to firm up for clean slices.
Step 6: Add the Cherry Topping
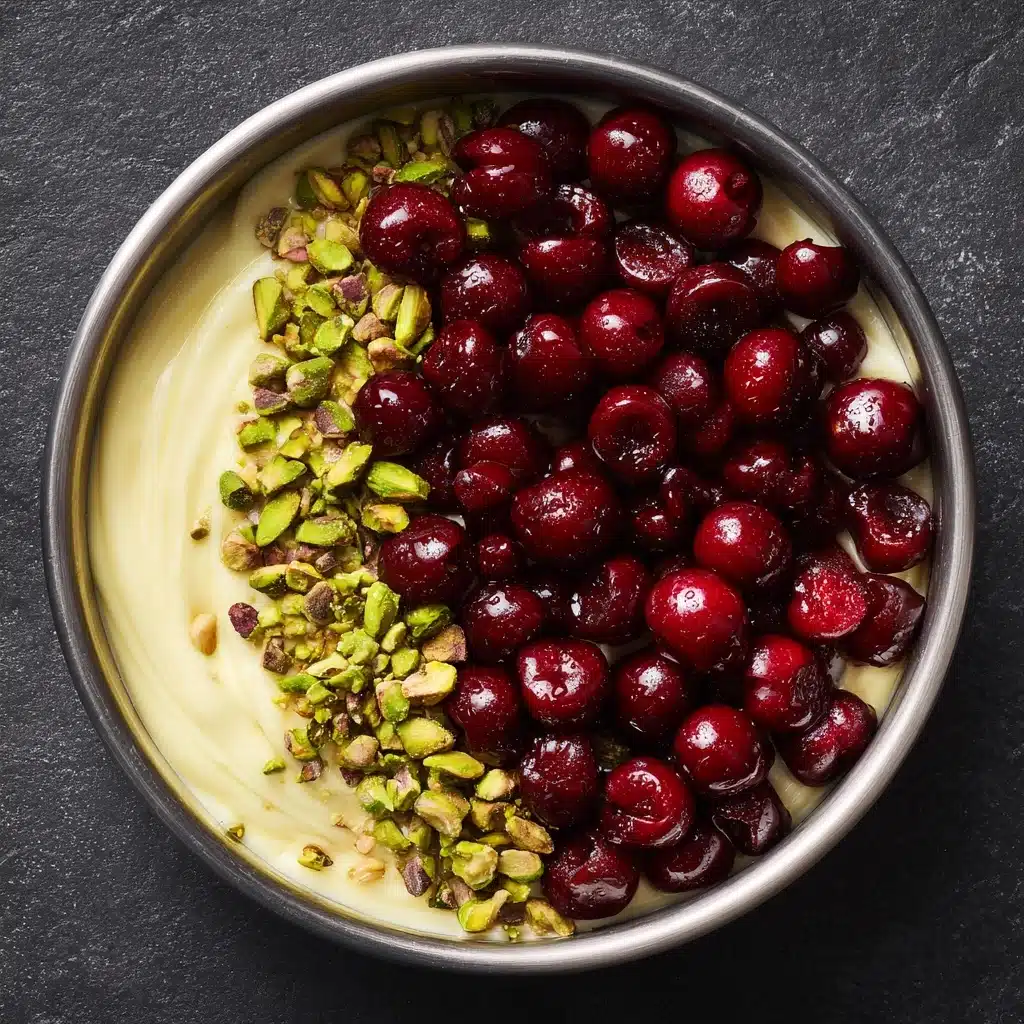
Once chilled, generously spoon the cherry pie filling over the top, letting it cascade naturally around the edges for a juicy, vibrant look. For an added wow factor, scatter some chopped pistachios over the cherries—they add lovely color contrast and a tempting crunch.
How to Serve Cherry Pistachio Cheesecake – A Luscious Dessert Recipe
Garnishes
Don’t be shy with your garnishes! A sprinkle of chopped pistachios not only heightens the pistachio flavor but also adds beautiful texture and visual appeal. If you want to get creative, a dollop of freshly whipped cream or a fresh mint leaf can add freshness and a pop of color.
Side Dishes
This cheesecake sings on its own, but pairing it with a simple fresh fruit salad or a tangy raspberry coulis can complement the creamy richness magnificently. A lightly brewed cup of black coffee or green tea also balances the sweetness beautifully, bringing a pleasant harmony to your dessert course.
Creative Ways to Present
If you want to impress at your next gathering, consider serving the cheesecake in individual jars layered with cherries and pistachios, or cut into rustic wedges with cherries drizzled artfully around the plate. Using a decorative springform pan with a fluted edge can also make simple slices look extra special.
Make Ahead and Storage
Storing Leftovers
Once your Cherry Pistachio Cheesecake – A Luscious Dessert Recipe is sliced, cover it tightly with plastic wrap or store in an airtight container. It keeps beautifully in the refrigerator for up to 4 days, maintaining creamy texture and fresh flavors.
Freezing
If you want to prepare the cheesecake ahead of time for a big event, freezing is your friend. Wrap the whole cake in plastic wrap, then aluminum foil to prevent freezer burn. It freezes well for up to one month. Thaw overnight in the fridge before topping with cherry filling and serving.
Reheating
This cheesecake is best enjoyed cold or at room temperature. If needed, let slices sit out for about 15 minutes to slightly soften for the best flavor and texture. Avoid microwaving as it can alter the creamy texture and melt the cherry topping.
FAQs
Can I use fresh cherries instead of canned pie filling?
Absolutely! Fresh cherries can be cooked down with a bit of sugar and lemon juice to create a lovely homemade topping. This lets you control sweetness and texture while keeping things fresh and bright.
What if I am allergic to pistachios?
You can swap pistachios for almonds or walnuts in the crust and filling for a slightly different flavor but similar texture. Just note that the signature pistachio flavor will be missing, so choose a nut you love instead.
Can I make this cheesecake gluten-free?
Yes! Use gluten-free graham cracker crumbs or substitute with ground nuts for the crust. Just make sure your pudding mix and other ingredients are labeled gluten-free to keep the dessert safe and delicious.
Why does the cheesecake need to cool in the oven with the door cracked?
Allowing the cheesecake to cool gradually prevents cracks by avoiding sudden temperature changes. It helps maintain that smooth, flawless top that’s so pleasing to the eye.
Can I double the recipe for a bigger cheesecake?
You can, but consider using a larger pan (like a 10 or 12-inch springform) and slightly adjusting baking time. Watch for doneness carefully since a bigger cheesecake can take longer to bake through.
Final Thoughts
There’s just something truly special about the combination of cherries and pistachios in this cheesecake that feels both elegant and warmly comforting. Whipping up the Cherry Pistachio Cheesecake – A Luscious Dessert Recipe is a wonderful way to bring joy into your kitchen and onto your table. I can’t wait for you to taste it, share it, and maybe make it your go-to dessert for years to come!
PrintCherry Pistachio Cheesecake – A Luscious Dessert Recipe

This Cherry Pistachio Cheesecake is a luscious and creamy dessert featuring a nutty pistachio crust and filling, topped with vibrant cherry pie filling. Perfect for special occasions or an indulgent treat, this cheesecake combines the richness of cream cheese with the unique flavor of pistachios and a sweet cherry topping for a delightful balance of taste and texture.
- Prep Time: 20 minutes
- Cook Time: 50 minutes
- Total Time: 5 hours 10 minutes
- Yield: 8 servings 1x
- Category: Dessert
- Method: Baking
- Cuisine: American
- Diet: Vegetarian
Ingredients
For the crust:
- 1½ cups graham cracker crumbs
- ¼ cup ground pistachios
- 3 tbsp sugar
- 5 tbsp melted butter
For the filling:
- 16 oz cream cheese, softened
- ½ cup sugar
- 2 large eggs
- ½ cup sour cream
- ¼ cup pistachio pudding mix (dry powder)
- 1 tsp vanilla extract
For the topping:
- 1 can (21 oz) cherry pie filling
- Optional: extra chopped pistachios for garnish
Instructions
- Preheat oven: Set your oven to 325°F (160°C) and grease a 9-inch springform pan or line the bottom with parchment paper to prevent sticking.
- Make the crust: In a mixing bowl, combine graham cracker crumbs, ground pistachios, sugar, and melted butter. Press this mixture evenly into the bottom of the prepared pan to form the crust. Bake for 8 minutes, then remove and let it cool to set properly.
- Prepare the filling: Beat the softened cream cheese and sugar together until smooth and creamy. Add the eggs one at a time, mixing after each addition. Then add sour cream, pistachio pudding mix, and vanilla extract, mixing just until everything is smoothly combined without overmixing.
- Bake: Pour the filling over the cooled crust and smooth the surface with a spatula. Bake in the preheated oven for 45–50 minutes, or until the center is just set but still slightly jiggly. Once done, turn off the oven and leave the cheesecake inside with the door cracked to cool gradually, preventing cracks.
- Chill: Refrigerate the cheesecake for at least 4 hours, preferably overnight, to allow it to set fully and develop flavors.
- Top and serve: Before serving, spread the cherry pie filling evenly over the chilled cheesecake. Optionally, garnish with extra chopped pistachios for added texture and visual appeal. Slice and enjoy!
Notes
- For best results, ensure cream cheese is softened to room temperature to avoid lumps.
- Do not overmix the filling to prevent a dense cheesecake.
- Use a water bath if desired to prevent cracks in the cheesecake.
- Chilling overnight improves the texture and flavor.
- Chopped pistachios on top add a lovely crunch and garnish.
Nutrition
- Serving Size: 1 slice (1/8 of cheesecake)
- Calories: 380 kcal
- Sugar: 26 g
- Sodium: 210 mg
- Fat: 25 g
- Saturated Fat: 10 g
- Unsaturated Fat: 13 g
- Trans Fat: 0.5 g
- Carbohydrates: 34 g
- Fiber: 1.5 g
- Protein: 6 g
- Cholesterol: 90 mg
Keywords: cherry pistachio cheesecake, pistachio cheesecake, cherry cheesecake, creamy dessert, nutty crust, holiday dessert
