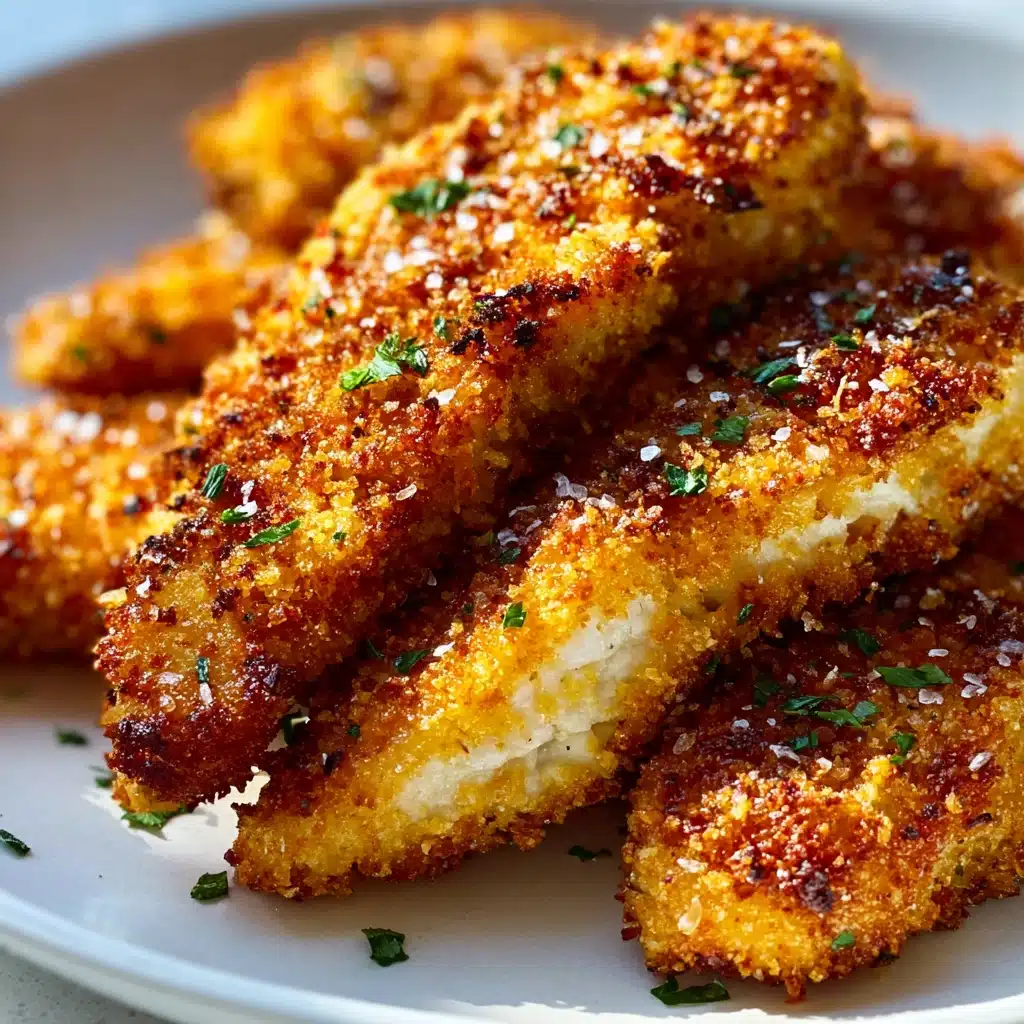
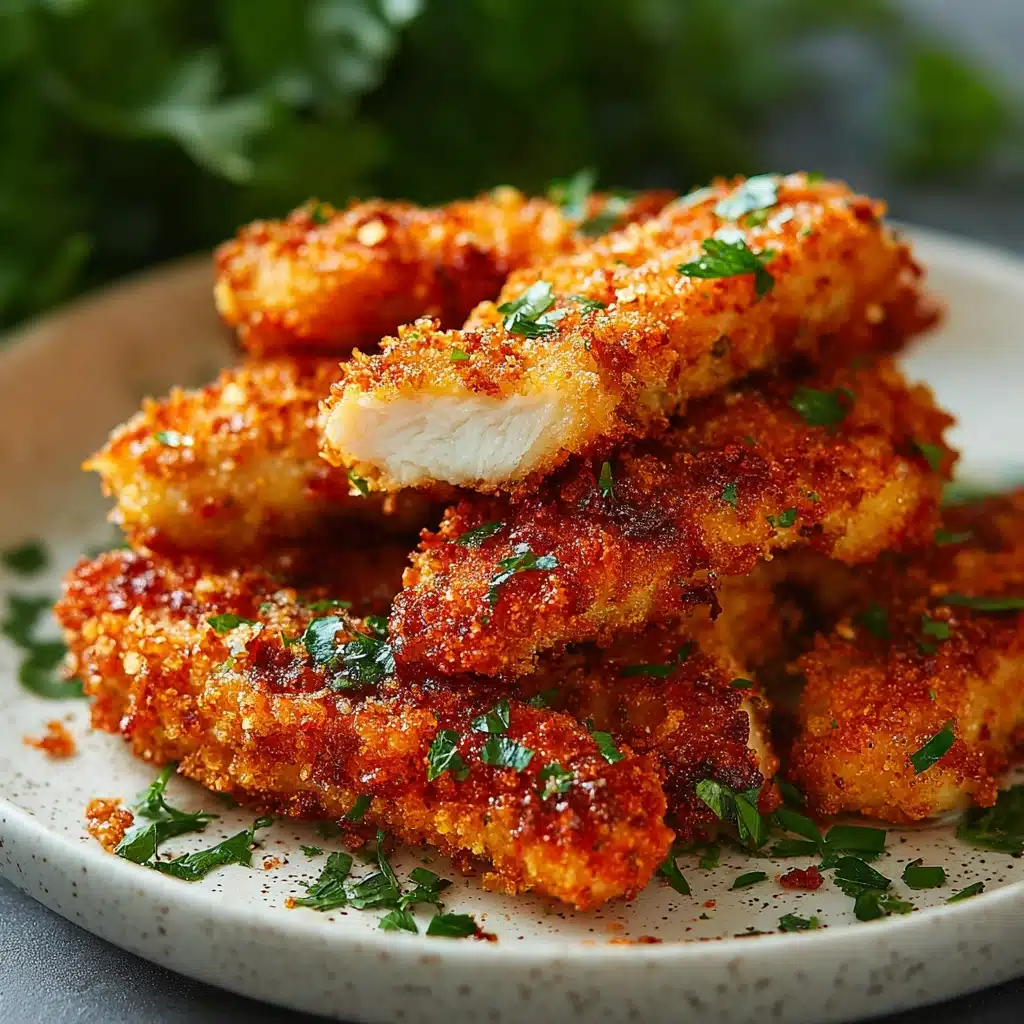
Crispy Baked Chicken Tenders Recipe
Get ready to discover your new favorite weeknight dinner with these Crispy Baked Chicken Tenders! This recipe transforms humble chicken strips into a golden, crunchy delight without ever frying, thanks to a clever combination of seasonings, panko breadcrumbs, and a quick bake at high heat. You’ll love how the tenders emerge irresistibly crisp on the outside while remaining juicy and flavorful inside. Whether you’re whipping up a kid-friendly meal, prepping finger food for a party, or simply craving a cozy comfort dish, these tenders are sure to become a repeat request around your table.
Ingredients You’ll Need
Ingredients You’ll Need
The beauty of these Crispy Baked Chicken Tenders lies in their straightforward ingredient list. Each component is chosen as much for flavor as for the magic it works on texture and color, ensuring a gorgeous crunch and deep, savory taste with minimal fuss.
- Chicken breasts or chicken tenders: The heart of the dish! Use pre-cut tenders for easy prep, or slice chicken breasts into strips for even cooking.
- Large eggs: Beaten eggs are the key to getting that breading to cling for maximum crunch.
- Panko breadcrumbs: These Japanese-style breadcrumbs add unbeatable lightness and crispness; swap for regular breadcrumbs in a pinch, but the panko is worth it.
- Parmesan cheese (optional): Adds an irresistible savory note and helps create a deeply golden, flavorful crust.
- Garlic powder: Essential for a subtle aromatic kick that complements the chicken without overpowering it.
- Paprika: Brings warmth and a hint of color to the breadcrumb coating.
- Onion powder: Boosts flavor and gives every bite a savory depth.
- Salt: Brings the whole seasoning blend together and highlights all the other flavors.
- Black pepper: Adds a touch of heat and aromatic bite.
- Olive oil spray: A light mist ensures super crispy chicken tenders without the need for deep frying.
How to Make Crispy Baked Chicken Tenders
Step 1: Prep the Chicken
If you’re starting with whole chicken breasts, slice them into uniform strips, about one inch wide, so they bake evenly and become perfectly tender. If you’re using ready-cut chicken tenders, you can jump right into the fun—no prep required!
Step 2: Prepare the Breading Stations
Get your assembly line ready: In one shallow bowl, beat your eggs until thoroughly combined. In a second bowl, mix your panko breadcrumbs with Parmesan (if using), plus all the seasonings: garlic powder, paprika, onion powder, salt, and pepper. This breadcrumb bowl is where all the flavor magic begins.
Step 3: Season the Chicken
Lay your chicken strips out and give them a quick sprinkle of salt and pepper. This simple seasoning step makes all the difference—it ensures every bite is flavorful from the inside out.
Step 4: Bread the Chicken
Now the fun begins! Dip each chicken strip into the beaten egg, letting any excess drip off. Next, coat it in the seasoned breadcrumb mixture, pressing gently to get the crumbs to stick. For the most outrageously crunchy baked tenders, repeat the egg and breadcrumb step for a double coating.
Step 5: Prepare the Baking Sheet
Line a large baking sheet with parchment paper or pop down a silicone baking mat for effortless cleanup. If you have a wire rack, place it on the baking sheet—this step is optional but helps the Crispy Baked Chicken Tenders get perfectly golden and crunchy all around by allowing air circulation.
Step 6: Arrange and Bake
Lay out the breaded tenders on your prepared baking sheet (or rack), leaving a little space between each piece for even crisping. Give them a light spray of olive oil—this helps them reach that mouthwatering, fried-like finish. Bake in a preheated 400°F (200°C) oven for 20–25 minutes, flipping halfway through. The tenders should be deeply golden and delightfully crisp when done. Double-check that the chicken hits an internal temp of 165°F (74°C) for safety.
Step 7: Serve and Enjoy
When the Crispy Baked Chicken Tenders are finished baking, let them rest for a couple of minutes—this helps keep the coating extra crunchy. Plate them up and serve right away with your favorite dipping sauces!
How to Serve Crispy Baked Chicken Tenders
Garnishes
For an extra pop of color and flavor, try adding a sprinkle of freshly chopped parsley over the hot tenders. A dash of flaky sea salt right after they come out of the oven adds both crunch and shine. For a little zing, squeeze some fresh lemon juice over the top, or even scatter thinly sliced green onions—they bring freshness to every bite.
Side Dishes
Crispy Baked Chicken Tenders love classic sides. Think a heap of golden roasted potato wedges, a vibrant garden salad, or buttery corn on the cob. For a twist, pair with creamy coleslaw or sweet potato fries. Serving with a trio of dipping sauces—like honey mustard, smoky BBQ, or classic ranch—will turn your meal into a fun, dippable feast.
Creative Ways to Present
Turn these tenders into a standout party appetizer by skewering them on mini sticks and serving with a dipping platter. Or, slice them up and toss into a crispy chicken salad with crunchy lettuce and your favorite toppings. For a family movie night, serve in paper cones alongside fries, or place them in warm tortillas with slaw for impromptu chicken tender tacos.
Make Ahead and Storage
Storing Leftovers
If you find yourself with extra Crispy Baked Chicken Tenders, allow them to cool completely before transferring to an airtight container. They’ll keep in the fridge for up to 3 days. Be sure to store them in a single layer, or place parchment paper between layers to keep the coating from turning soggy.
Freezing
Yes, you can freeze these! Arrange cooked and cooled tenders on a lined baking sheet and freeze until solid, about 1 hour. Then transfer to a freezer-safe bag or container. They’ll keep beautifully for up to 2 months—perfect for quick lunches or after-school snacks.
Reheating
To bring those Crispy Baked Chicken Tenders back to their crunchy best, reheat in a 375°F (190°C) oven or toaster oven for about 10 minutes. If reheating from frozen, add an extra 5–7 minutes—no need to thaw first. Avoid the microwave, as it tends to soften the coating.
FAQs
Can I use gluten-free breadcrumbs for this recipe?
Absolutely! Swap the panko for your favorite gluten-free breadcrumbs. Just keep an eye on the bake time, as some gluten-free varieties brown a little faster.
What dipping sauces go best with Crispy Baked Chicken Tenders?
Classic choices like honey mustard, ranch, and BBQ are always a hit. For something different, try spicy buffalo sauce, creamy garlic aioli, or a tangy sriracha mayo.
Why aren’t my chicken tenders as crispy as I’d like?
A wire rack on your baking sheet really helps with airflow and extra crispness. Also, don’t skip the olive oil spray—it’s key for that crispy finish. Overcrowding the pan can also make them steam instead of bake, so leave room between each piece.
Can I prep these ahead and bake later?
Yes—you can bread the chicken tenders and arrange them on your baking sheet, then cover and refrigerate for up to 6 hours before baking. Wait to add the olive oil spray just before they go into the oven.
Is there a way to make these dairy-free?
Definitely! Simply skip the Parmesan cheese. You’ll still end up with deliciously crisp and flavorful baked chicken tenders.
Final Thoughts
There’s just something magical about Crispy Baked Chicken Tenders—they’re simple, crowd-pleasing, and endlessly versatile. Whether you’re serving them up for dinner, packing leftovers for lunch, or dishing them out at your next get-together, they’ll always bring smiles. Give them a try and see just how quickly this recipe becomes a household favorite!
PrintCrispy Baked Chicken Tenders Recipe

Crispy Baked Chicken Tenders are a healthier twist on the classic fried favorite, delivering the same crunch and flavor without the extra oil. Tender strips of chicken are coated in a seasoned panko and Parmesan breadcrumb mixture, then baked to golden perfection. Quick to prepare with simple ingredients, these tenders are perfect as an appetizer, snack, or main course for the whole family.
- Prep Time: 15 minutes
- Cook Time: 25 minutes
- Total Time: 40 minutes
- Yield: 4 servings 1x
- Category: Main-course
- Method: Baking
- Cuisine: American
- Diet: Low Fat
Ingredients
For the Chicken
- 1 lb chicken breasts or chicken tenders (cut into 1-inch wide strips)
For the Egg Wash
- 2 large eggs, beaten
For the Breading
- 1 cup panko breadcrumbs (or regular breadcrumbs)
- 1/2 cup grated Parmesan cheese (optional)
- 1 tsp garlic powder
- 1 tsp paprika
- 1/2 tsp onion powder
- 1/2 tsp salt
- 1/4 tsp black pepper
For Baking
- Olive oil spray (for coating)
Instructions
- Prep the Chicken: If using chicken breasts, cut them into 1-inch wide strips to create even pieces that will cook uniformly. If you’re using pre-cut chicken tenders, you can skip this step.
- Prepare the Breading Stations: Set up two shallow bowls. In the first, beat the eggs until smooth. In the second, combine the panko breadcrumbs, Parmesan cheese (if using), garlic powder, paprika, onion powder, salt, and black pepper. Mix well to evenly distribute the seasonings.
- Season the Chicken: Sprinkle the chicken tenders with a pinch of salt and pepper on all sides to enhance their flavor before breading.
- Bread the Chicken: Dip each chicken strip into the beaten egg, allowing excess to drip off. Next, coat the chicken in the breadcrumb mixture, pressing lightly to help the coating adhere. For extra crunch, repeat the egg and breadcrumb steps for a double coating.
- Prepare the Baking Sheet: Line a baking sheet with parchment paper or a silicone baking mat for easy cleanup. If you have a wire rack, place it on the baking sheet; this allows air circulation under the tenders and ensures maximum crispiness.
- Arrange the Chicken: Place the coated chicken tenders in a single layer on the prepared baking sheet or wire rack, leaving space between each piece for even cooking.
- Bake the Chicken Tenders: Preheat your oven to 400°F (200°C). Lightly spray the chicken tenders with olive oil spray to help them crisp as they bake. Bake for 20-25 minutes, flipping the tenders halfway through cooking. The tenders are done when golden brown and a thermometer inserted into the middle reads 165°F (74°C).
- Serve and Enjoy: Allow the chicken tenders to rest for a few minutes out of the oven so the coating stays crisp. Serve hot with your favorite dipping sauces such as honey mustard, BBQ sauce, or ranch.
Notes
- For a gluten-free version, use gluten-free breadcrumbs.
- Double-coating the chicken makes the crust extra crispy.
- Using a wire rack prevents soggy bottoms and crisps up the entire tender.
- Try a mix of spices, such as cayenne or Italian seasoning, to change up the flavor.
- Leftovers can be stored in an airtight container and reheated in the oven to maintain crispiness.
Nutrition
- Serving Size: 1/4 of recipe (about 3-4 tenders)
- Calories: 250
- Sugar: 1g
- Sodium: 500mg
- Fat: 8g
- Saturated Fat: 2g
- Unsaturated Fat: 5g
- Trans Fat: 0g
- Carbohydrates: 14g
- Fiber: 1g
- Protein: 30g
- Cholesterol: 120mg
Keywords: chicken tenders, oven baked, panko crusted, healthy chicken strips, family friendly, easy chicken recipe
