Crispy Dill Chicken Sandwich Recipe
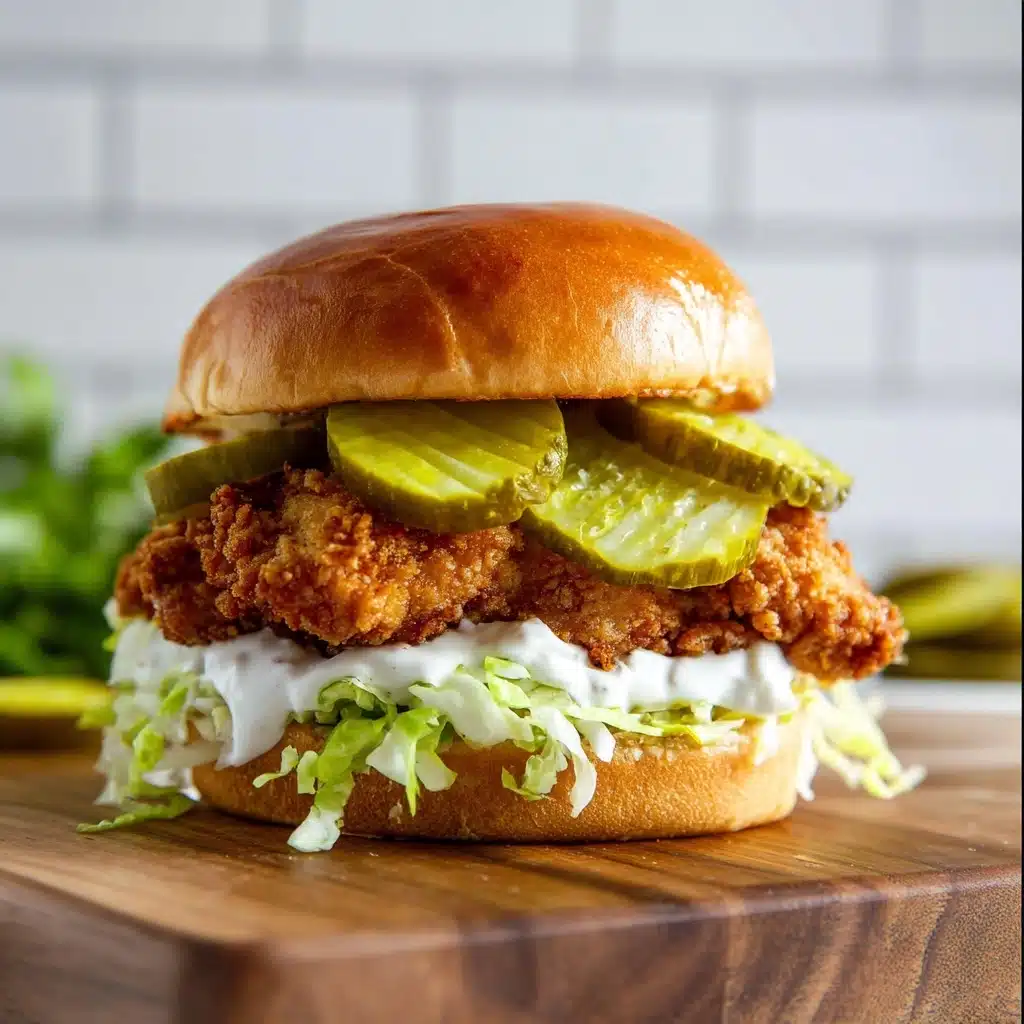
If you dream of the ultimate chicken sandwich—a juicy, golden crusted cutlet bursting with dill flavor, cooled down by a tangy ranch sauce, and loaded with crunchy pickles—then you need to try this Crispy Dill Chicken Sandwich. Every element is a flavor-packed party, from the crisp Panko coating to the creamy Greek yogurt sauce, all wrapped up in a warm, pillowy bun. It’s a sandwich that doesn’t just fill you up; it makes you grin with every bite.
Ingredients You’ll Need
This recipe leans on simple pantry staples and a few fresh touches. Each ingredient serves a clear purpose, giving extraordinary taste, crunch, or color to every bite of your Crispy Dill Chicken Sandwich.
- Ranch seasoning mix: Packs instant, zingy herb flavor into your sauce—just half a packet gets you there.
- Greek yogurt (or sour cream): The creamy, tangy base for your dreamy dill ranch sauce.
- Dried dill (or fresh): The unmistakable herb brings brightness and that classic dill pickle punch.
- Sliced dill pickles: Don’t be shy—these give snap and brine to every mouthful.
- Pickle juice: A splash in your sauce adds a secret layer of tangy, salty depth.
- Chicken breast: Pounded thin, it cooks quickly and stays juicy—just what you want.
- Panko breadcrumbs: The magic behind an ultra-crispy crust (trust me, it’s worth it!).
- Large egg: Helps keep the coating on the chicken, plus adds richness.
- Milk: Thins the egg for the perfect dipping consistency.
- All-purpose flour: Makes the first layer of your crunchy coating.
- Additional dried dill: Extra herby flavor in the breading, because you really can’t have too much.
- Salt and pepper: Don’t forget to season—these enhance all the flavors!
- Large sandwich buns: Soft, sturdy, and perfect for stacking your delicious fillings.
- Shredded iceberg lettuce: Adds classic, refreshing crunch to balance all that richness.
- Extra sliced dill pickles: Go big with the pickle presence—extra slices mean extra crunch.
How to Make Crispy Dill Chicken Sandwich
Step 1: Whip Up the Dill Pickle Ranch Sauce
This is where the zing begins! Stir together your ranch seasoning, Greek yogurt, dried dill, dill pickles, and that magical pickle juice in a small bowl. Cover and chill in the fridge for at least 30 minutes if you can manage to wait—letting everything mingle amps up the flavor. But if you’re in a hurry, just use it right away; the fresh tang still shines beautifully.
Step 2: Prepare the Chicken
Pat your chicken breasts dry with paper towels and grab a rolling pin or meat mallet to pound them to an even half-inch thickness. This little step ensures the chicken cooks uniformly and every bite is tender and juicy. If your pieces are large, simply cut them down to size so they’ll sit comfortably in the buns.
Step 3: Set Up Your Breading Station
Line up three shallow dishes: the first gets flour and dried dill whisked together, the second is your egg whisked with a splash of milk, and the third is a mountain of Panko breadcrumbs. This three-step coating is the secret to that shatteringly crisp crust!
Step 4: Dredge and Coat the Chicken
First, drape each piece of chicken in the flour mixture, making sure it’s fully covered and shaking off the excess. Next, dip it into the egg mixture for an even wash. Finally, press it firmly into the Panko, making sure every surface is coated. Don’t rush this—really press those crumbs in so you get maximum crunch later.
Step 5: Frying the Chicken
Heat about half a cup of vegetable oil in a sturdy skillet over medium-high heat. Once hot and shimmering, carefully lay each breaded chicken piece into the pan. Fry for 3 to 4 minutes per side, or until deep golden on the outside and no pink remains inside. Let the pieces rest on a wire rack so any excess oil drips away and the crust stays super-crisp.
Step 6: Oven-Baked Option
If you’d rather skip frying, baking works beautifully too. Preheat your oven to 400 degrees. Set a rack over a foil-lined baking sheet (for easy clean-up), and spray everything with nonstick spray. Bake the chicken for 15 to 20 minutes, flipping once, until golden and cooked through. For extra color and crackle, pop it under the broiler for a minute or two at the end.
Step 7: Rest, Then Assemble the Sandwiches
Give the chicken a few moments to rest—this locks in the juices and makes it easier to handle. Toast your buns (either under the broiler or with a quick zap in the microwave). Spread a swoosh of your chilled dill pickle ranch sauce on the bottom bun, pile on the crispy chicken, layer up those extra pickles and shredded lettuce, then crown it with more sauce and the top bun. There you have it: the perfect Crispy Dill Chicken Sandwich, ready to wow your tastebuds.
How to Serve Crispy Dill Chicken Sandwich
Garnishes
A finishing flourish makes all the difference! For a fresh pop, sprinkle a little extra chopped dill or parsley over the sandwich. A few extra pickle chips never hurt, and a pinch of flaky salt on top amps the flavor even more. If you’re feeling fancy, slide in a toothpick with a mini pickle on top for that classic deli look.
Side Dishes
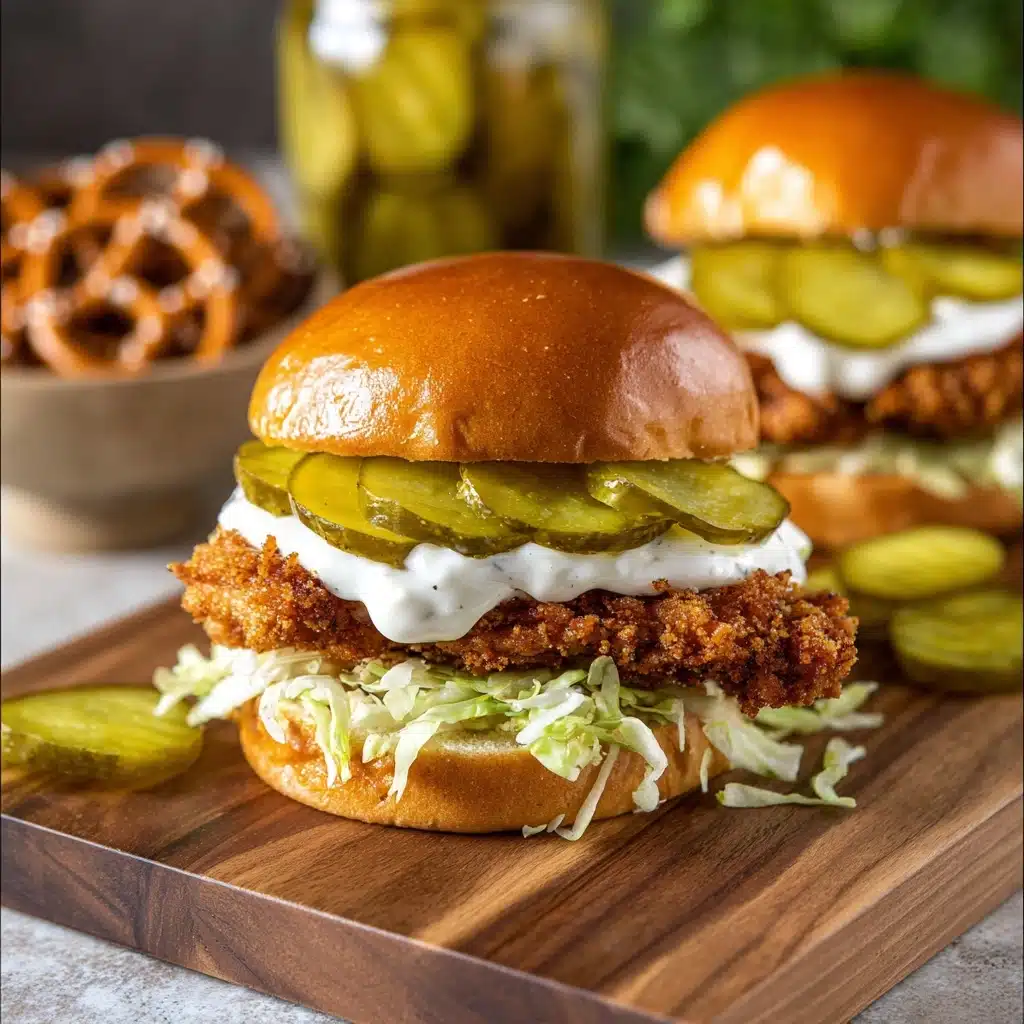
The Crispy Dill Chicken Sandwich loves good company. Pair it with a simple side of kettle-cooked chips, oven-baked fries, or a cool, crunchy coleslaw. Even a quick pickle salad or classic potato salad keeps things refreshingly crisp and perfectly compatible with all those savory, herby notes.
Creative Ways to Present
If you’re serving a crowd, try slicing the assembled sandwiches into halves or quarters and offering them on a big platter—perfect for parties or picnics. Better yet, set up a sandwich bar with buns, toppings, sauce, and chicken all on the side, so everyone can customize their own ultimate version of the Crispy Dill Chicken Sandwich. It’s fun, interactive, and oh-so photogenic.
Make Ahead and Storage
Storing Leftovers
If you have leftover chicken or sauce, stash them separately in airtight containers. The chicken stays crisp in the fridge for up to 3 days, and the sauce will keep for 4 to 5 days—great for extra snacking or quick lunch assembly.
Freezing
For longer storage, let the cooked chicken cool completely, then wrap tightly and freeze for up to one month. Reheat straight from frozen in the oven for best results—this helps restore that glorious crispy exterior.
Reheating
Skip the microwave so your breading doesn’t get soggy. Instead, arrange leftover chicken on a baking sheet and reheat in a hot oven (about 375 degrees) until warmed through and sizzling. Add fresh lettuce, pickles, and sauce after heating to keep the textures just right.
FAQs
Can I use chicken thighs instead of breasts?
Absolutely! Chicken thighs are juicy and flavorful, and they’ll work beautifully here—just make sure to pound them to an even thickness so they cook evenly.
What’s the best way to keep the breading from falling off?
Be sure to pat your chicken very dry before breading, and press the Panko into the cutlets firmly. Letting the breaded chicken rest for a few minutes before frying helps the coating adhere even better.
Can I make the sauce in advance?
Yes! The dill pickle ranch sauce can be made up to 2 days ahead. The flavor improves with a bit of time, so making it early is actually a smart move.
What if I don’t have ranch seasoning mix?
If you’re out of ranch mix, you can make a quick substitute with a blend of garlic powder, onion powder, dried parsley, dried dill, and a pinch of salt. It won’t be identical, but it’ll get you close.
Is there a gluten-free option?
For a gluten-free Crispy Dill Chicken Sandwich, use gluten-free Panko, swap in your favorite all-purpose gluten-free flour, and pick gluten-free buns. The rest of the recipe remains the same and is every bit as delicious!
Final Thoughts
If you’re craving something truly satisfying, this Crispy Dill Chicken Sandwich is about to become your new favorite. It’s easy, crave-able, and bursting with bold flavor and crunch. Don’t wait for the next takeout run—bring this sandwich masterpiece to your own kitchen and wow yourself (and everyone you share it with). Let me know if you fall in love at first bite!
PrintCrispy Dill Chicken Sandwich Recipe

This Crispy Dill Chicken Sandwich recipe features juicy chicken coated in Panko breadcrumbs, served on a bun with a zesty dill pickle ranch sauce.
- Prep Time: 20 minutes
- Cook Time: 15 minutes (frying) or 20 minutes (baking)
- Total Time: 40 minutes
- Yield: 2 sandwiches 1x
- Category: Main Dish
- Method: Frying or Baking
- Cuisine: American
- Diet: None
Ingredients
Dill Pickle Ranch Sauce
- 1 tablespoon ranch seasoning mix (half of a packet)
- 6 ounces Greek Yogurt (or sour cream)
- 1 teaspoon dried dill (or 2 teaspoons fresh)
- 8 sliced dill pickles
- 2 teaspoons pickle juice
Crispy Chicken Sandwiches
- 1/2 pound chicken breast ((2 small breasts) pounded to 1/2-inch thick)
- 1/2 cup Panko breadcrumbs
- 1 large egg
- 1 tablespoon milk
- 1/2 cup all-purpose flour
- 1 teaspoon dried dill
- Salt and pepper to taste
- 2 large sandwich buns
- 1 cup shredded iceberg lettuce
- 16 sliced dill pickles
Instructions
- Dill Pickle Ranch Sauce Combine all ingredients in a small bowl. Refrigerate for at least 30 minutes.
- Crispy Chicken Sandwiches Pat chicken dry, coat with flour, egg, and Panko. Fry or bake until crispy. Assemble sandwiches with sauce, chicken, lettuce, and pickles.
Nutrition
- Serving Size: 1 sandwich
- Calories: 540
- Sugar: 7g
- Sodium: 1030mg
- Fat: 24g
- Saturated Fat: 6g
- Unsaturated Fat: 14g
- Trans Fat: 0g
- Carbohydrates: 44g
- Fiber: 3g
- Protein: 36g
- Cholesterol: 145mg
Keywords: Crispy Dill Chicken Sandwich, Chicken Sandwich Recipe, Dill Pickle Ranch Sauce, Panko Crusted Chicken
