Easy Christmas Brownies Recipe
Introduction
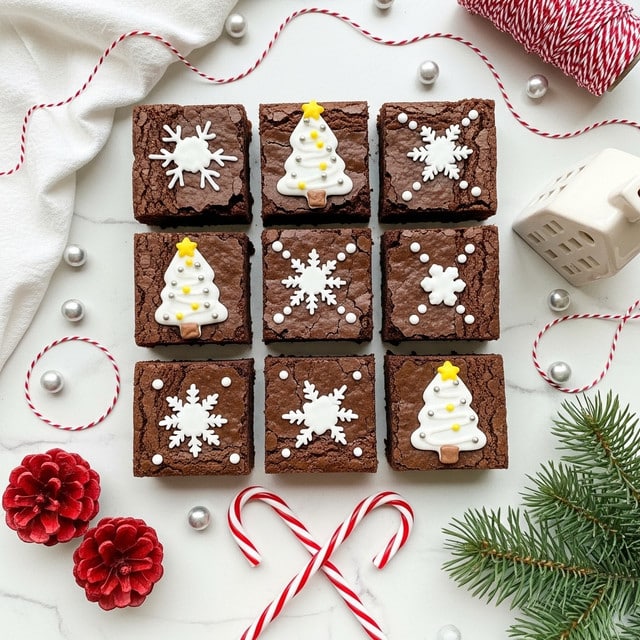
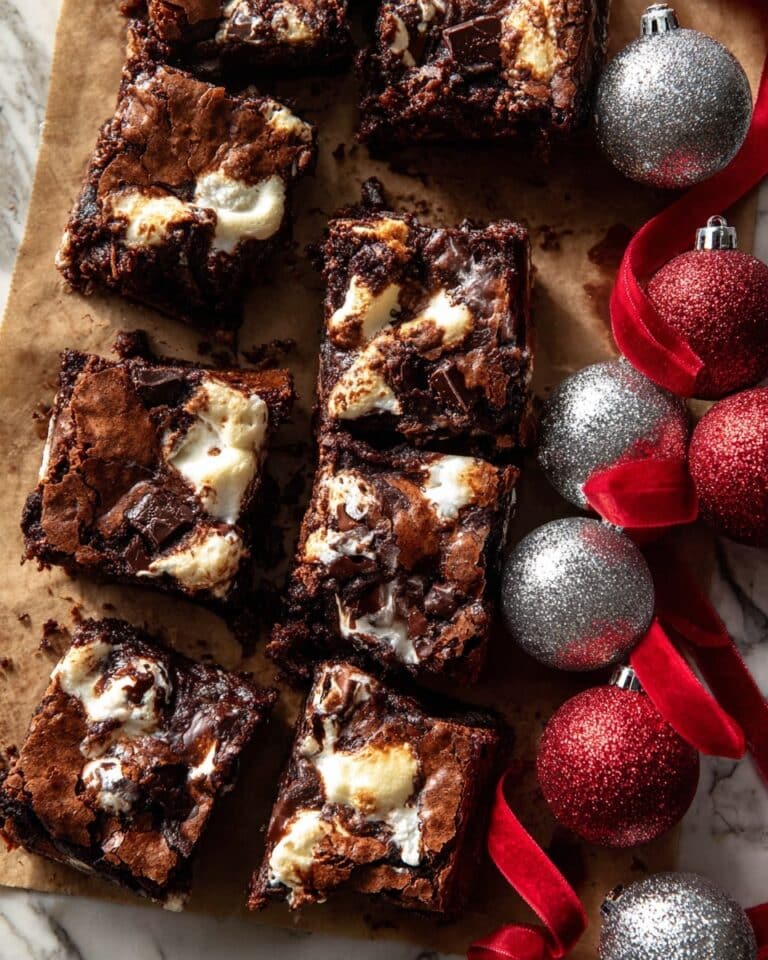
These easy Christmas brownies are perfect for holiday gatherings, combining rich chocolate flavor with festive royal icing decorations. Simple to make and delightfully moist, they bring classic holiday cheer to any dessert table.
Ingredients
- 3/4 cup cocoa powder
- 1/2 teaspoon baking soda
- 3/4 cup unsalted butter, melted
- 1/2 cup boiling water
- 1 teaspoon granulated coffee (diluted in boiling water)
- 2 cups granulated sugar
- 2 large eggs, room temperature
- 1 1/3 cups all-purpose flour
- 2 teaspoons vanilla extract
- 1/4 teaspoon salt
- 1/2 cup semi-sweet chocolate chips
- 1/2 cup walnuts
- 2 cups confectioners sugar, sifted
- 3 tablespoons meringue powder
- 6 tablespoons water, room temperature
- 1-2 drops food coloring (optional)
- Decorative sprinkles or crushed candy (optional)
Instructions
- Step 1: Preheat your oven to 350°F. Grease a square baking pan or line it with parchment paper, then lightly dust with cocoa powder to prevent sticking.
- Step 2: In a large bowl, stir together the cocoa powder and baking soda to bloom the cocoa powder.
- Step 3: Add half of the melted butter and the brewed coffee mixture to the bowl. Stir until slightly thickened and glossy.
- Step 4: Mix in the granulated sugar, egg yolks, and remaining melted butter until smooth.
- Step 5: Add the flour, salt, and vanilla extract, mixing just until combined. Some streaks are okay—avoid overmixing.
- Step 6: Gently fold in the semi-sweet chocolate chips and walnuts. Pour the batter evenly into the prepared pan.
- Step 7: Bake for 30–35 minutes, or until the top is set and a toothpick inserted comes out with moist crumbs.
- Step 8: Allow the brownies to cool completely in the pan. Once cooled, cut into 16 squares or use cookie cutters for festive shapes.
- Step 9: For the royal icing, combine the confectioners sugar, meringue powder, vanilla extract, and a little water in a small bowl. Add food coloring here if desired, then adjust water to reach smooth piping consistency.
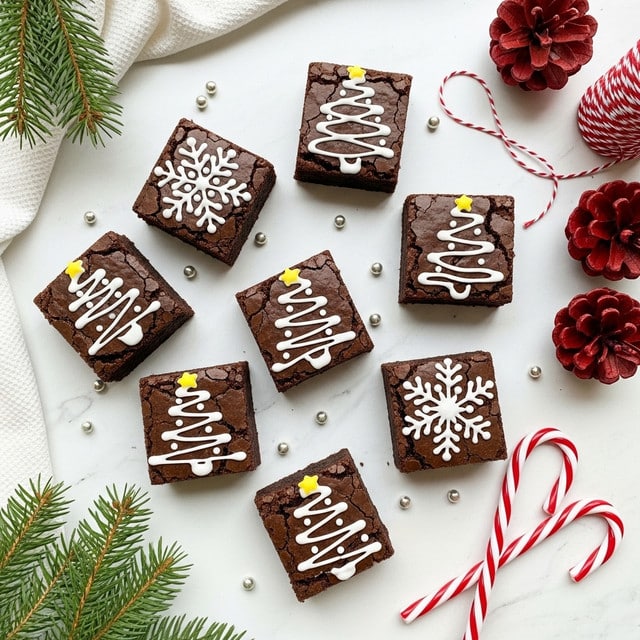
- Step 10: Transfer the icing to a piping bag fitted with a star tip. Decorate each brownie with Christmas trees, snowflakes, or other festive designs.
- Step 11: Add sprinkles or crushed candy canes for extra color and texture.
- Step 12: Let the icing set at room temperature before stacking or storing.
Tips & Variations
- Substitute walnuts with pecans or omit nuts for a nut-free version.
- Use espresso powder instead of granulated coffee for a richer mocha flavor.
- Try different food colors or edible glitter to match your holiday theme.
- Line the pan with parchment paper extending beyond the edges for easy removal of brownies.
Storage
Store cooled and decorated brownies in an airtight container at room temperature for up to 4 days. For longer storage, keep them refrigerated for up to a week, allowing them to come to room temperature before serving. Avoid refrigerating if you prefer soft icing, as it can harden in cool conditions.
How to Serve
Serve this delicious recipe with your favorite sides.
FAQs
Can I make these brownies ahead of time?
Yes, you can bake the brownies a day or two in advance. Store them undecorated and frost just before serving to keep the icing fresh.
Can I use a different kind of chocolate for the chips?
Absolutely. Milk chocolate or dark chocolate chips work well too, depending on your preference for sweetness and intensity.
PrintEasy Christmas Brownies Recipe
These Easy Christmas Brownies are rich, fudgy, and perfectly festive with decorative royal icing. Featuring a deep cocoa flavor enhanced by brewed coffee and finished with a drizzle of smooth royal icing, they make a delightful holiday treat. Walnut chunks and semi-sweet chocolate chips add texture and richness, while optional sprinkles or crushed candy canes bring a cheerful seasonal touch.
- Prep Time: 15 minutes
- Cook Time: 35 minutes
- Total Time: 50 minutes
- Yield: 16 brownies 1x
- Category: Dessert
- Method: Baking
- Cuisine: American
Ingredients
Brownies
- 3/4 Cup cocoa powder
- 1/2 teaspoon baking soda
- 3/4 Cup unsalted butter (melted)
- 1/2 Cup boiling water + 1 teaspoon granulated coffee (diluted)
- 2 Cups granulated sugar
- 2 large eggs (room temperature)
- 1 1/3 Cup all-purpose flour
- 2 teaspoons vanilla extract
- 1/4 teaspoon salt
- 1/2 Cup semi-sweet chocolate chips
- 1/2 Cup walnuts
Royal Icing
- 2 Cups confectioners sugar (sifted)
- 3 Tablespoons meringue powder
- 6 Tablespoons water (room temperature)
- 1–2 drops food coloring (optional)
- Decorative sprinkles or crushed candy (optional)
Instructions
- Preheat and Prepare Pan: Preheat your oven to 350°F (175°C). Grease a square baking pan or line it with parchment paper for easy cleanup and lightly dust the pan with cocoa powder to prevent sticking.
- Mix Cocoa and Baking Soda: In a large bowl, stir together the cocoa powder and baking soda to help bloom the cocoa and deepen the flavor in your brownies.
- Add Butter and Coffee: Add half of your melted butter and the brewed coffee to the cocoa mixture. Stir until the mixture thickens slightly and gains a glossy appearance.
- Incorporate Sugar, Eggs, and Remaining Butter: Mix in the granulated sugar, egg yolks, and the remaining melted butter. Stir the mixture until fully smooth.
- Combine Dry Ingredients: Add the all-purpose flour, salt, and vanilla extract. Mix just until combined; it’s okay to leave a few streaks to avoid cakey brownies.
- Fold in Chocolate Chips and Walnuts: Gently fold in the semisweet chocolate chips and walnuts to evenly distribute them without overmixing.
- Pour and Spread Batter: Pour the batter into your prepared baking pan and spread it evenly to all corners for uniform baking.
- Bake the Brownies: Bake for 30 to 35 minutes or until the top appears set and a toothpick inserted in the center comes out with moist crumbs.
- Cool and Cut: Let the brownies cool completely in the pan. Once cooled, carefully remove and cut into 16 squares or use cookie cutters for festive shapes.
- Prepare Royal Icing: In a small bowl, stir together sifted confectioners sugar, meringue powder, vanilla extract, and a small amount of water until smooth. If desired, add 1-2 drops of food coloring before adjusting the consistency with water.
- Decorate Brownies: Transfer the royal icing to a piping bag fitted with a star tip. Pipe festive designs such as Christmas trees or snowflakes on top of each brownie.
- Add Final Decorations: Decorate the iced brownies with sprinkles or crushed candy canes for a festive and colorful finish.
- Set Icing: Allow the icing to set at room temperature before stacking or storing the brownies to prevent smudging.
Notes
- Use room temperature eggs to ensure smooth batter.
- Do not overmix after adding flour to keep brownies fudgy.
- Cooling brownies completely before icing is crucial to prevent melting.
- Optional food coloring and decorations can be adjusted according to your holiday theme.
- For a stronger coffee flavor, increase coffee granules slightly but keep water amount constant.
- Store decorated brownies in an airtight container at room temperature for up to 5 days.
Keywords: Christmas brownies, fudgy brownies, holiday dessert, royal icing brownies, chocolate walnut brownies, festive treats

