Freezer-Friendly Sourdough Pizza Dough Recipe
Introduction
This freezer-friendly sourdough pizza dough is perfect for homemade pizzas anytime without the wait. Prepared in advance and stored in the freezer, it allows you to enjoy fresh, flavorful sourdough crusts whenever the pizza craving strikes.

Ingredients
- 100 g sourdough starter, active and bubbly
- 500 g all-purpose flour
- 100 g whole wheat flour
- 350 g water
- 10 g salt
- 30 g olive oil
Instructions
- Step 1: In the bowl of a stand mixer, combine all of the ingredients.
- Step 2: Mix on low speed with a dough hook until combined, scraping the sides of the bowl if necessary.
- Step 3: Increase to medium speed and knead until the dough is smooth, elastic, and passes the windowpane test. If it is too sticky, add flour one tablespoon at a time until manageable.
- Step 4: Place the dough in an oiled bowl and allow it to bulk ferment for 8 hours or until doubled and domed on top.
- Step 5: Turn the dough out onto a clean work surface and use a bench scraper to divide it into 4 equal portions.
- Step 6: Shape each piece into a ball by turning clockwise while pulling it slightly toward yourself on the countertop.
- Step 7: Lightly flour the tops of the dough balls to prevent sticking in the next step.
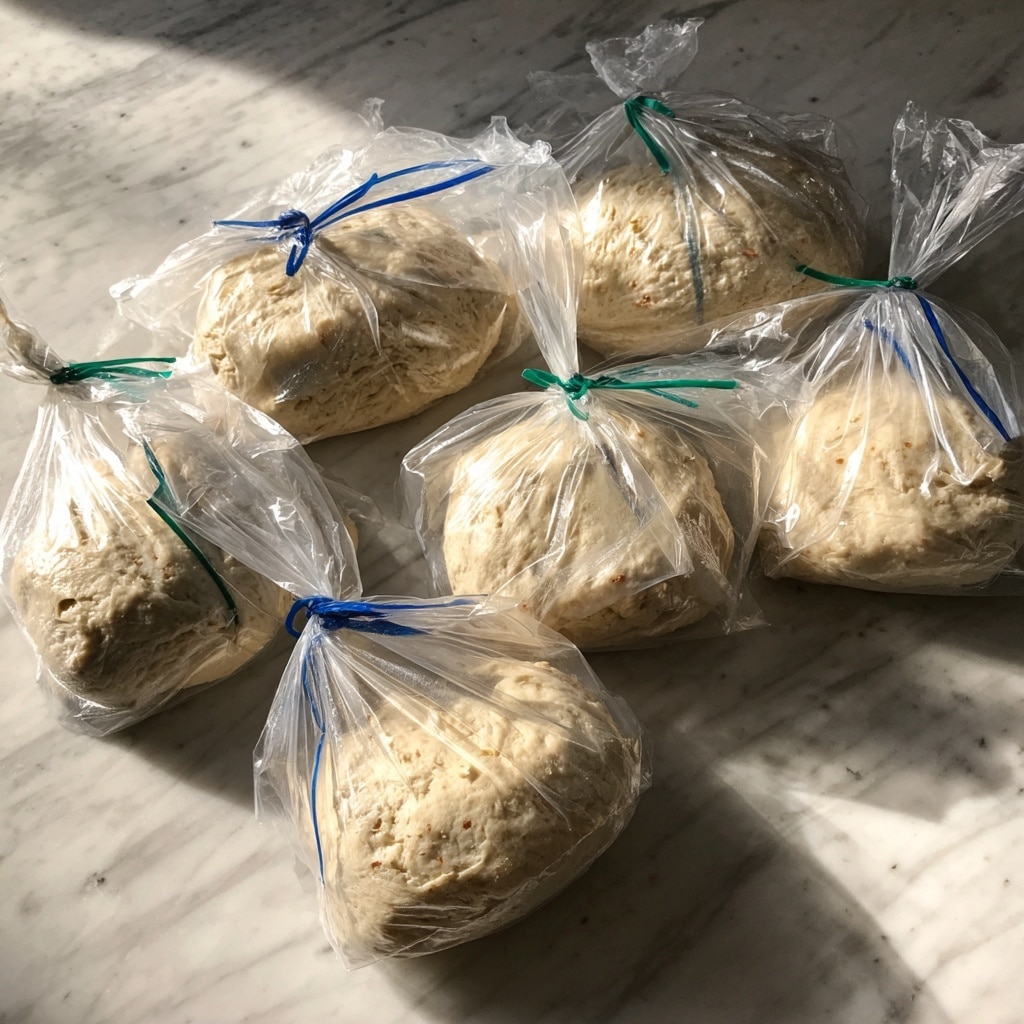
- Step 8: Use a bench scraper to lift each dough ball and place into a small resealable plastic bag. Remove as much air as possible before sealing. Use one dough ball per bag.
- Step 9: Label and date a large freezer-safe ziplock bag, then place all individual bags inside. Remove excess air and seal tightly.
- Step 10: Freeze for future use.
- Step 11: To thaw, remove dough from the freezer 10-12 hours before use and place it in the fridge.
- Step 12: When ready, preheat a stone baking sheet or cast iron skillet in the oven at 500°F.
- Step 13: Shape thawed dough on a floured countertop into your preferred rustic or thin crust shape.
- Step 14: Remove the hot baking stone or skillet from the oven and transfer the shaped dough onto it.
- Step 15: Add your favorite sauce, cheese, and toppings.
- Step 16: Bake for 10-15 minutes until the cheese bubbles and the crust turns golden.
Tips & Variations
- For extra flavor, experiment with adding herbs like oregano or rosemary to the dough before kneading.
- If you don’t have a stand mixer, knead the dough by hand for about 10 minutes until smooth and elastic.
- Try substituting up to half the all-purpose flour with bread flour for a chewier crust.
- Let the dough rest at room temperature for 30 minutes after shaping to relax gluten for easier stretching.
Storage
Store dough balls individually sealed in the freezer for up to 3 months. Thaw in the fridge 10-12 hours before use to allow gradual defrosting. Once thawed, use immediately for best texture and rise. Reheating is best done by baking as directed.
How to Serve
Serve this delicious recipe with your favorite sides.
FAQs
Can I freeze the dough after shaping into pizza bases?
It’s best to freeze the dough balls rather than shaped bases. Shaping just before baking ensures better texture and rise.
How do I know if my sourdough starter is active enough?
Your starter should be bubbly and doubled in size within 4-6 hours after feeding, indicating it’s active and ready to leaven the dough.
PrintFreezer-Friendly Sourdough Pizza Dough Recipe

This Freezer-Friendly Sourdough Pizza Dough recipe offers a convenient way to enjoy authentic sourdough pizza anytime. With a mix of all-purpose and whole wheat flour, plus a long fermentation for flavor development, this dough can be portioned, frozen, and thawed as needed, making it ideal for meal prepping and spontaneous pizza nights. It yields a chewy, flavorful crust that can be baked on a preheated stone or cast iron skillet for a crispy, golden finish.
- Prep Time: 20 minutes
- Cook Time: 15 minutes
- Total Time: 8 hours 35 minutes (including fermentation)
- Yield: 4 individual pizza dough balls 1x
- Category: Bread/Dough
- Method: Baking
- Cuisine: Italian
- Diet: Vegetarian
Ingredients
Dough Ingredients
- 100 g sourdough starter, active and bubbly
- 500 g all-purpose flour
- 100 g whole wheat flour
- 350 g water
- 10 g salt
- 30 g olive oil
Instructions
- Make the Dough: In the bowl of a stand mixer, combine all of the ingredients thoroughly to form a cohesive mixture.
- Mix and Knead: Using a dough hook, mix on low speed until ingredients are combined. Scrape down the bowl’s sides as needed. Increase speed to medium and knead until the dough becomes smooth, elastic, and passes the windowpane test. If too sticky, gradually add flour one tablespoon at a time until manageable without sticking.
- Bulk Fermentation: Place the dough in an oiled bowl and cover. Allow it to ferment for about 8 hours or until it has doubled in size and developed a domed top.
- Divide and Shape: Turn the risen dough out onto a clean work surface. Using a bench scraper, divide the dough into 4 equal portions. Shape each piece into a tight ball by rotating it clockwise while pulling it towards yourself on the counter.
- Prepare for Freezing: Lightly flour the tops of the dough balls to prevent sticking inside bags.
- Bag and Freeze: Lift each dough ball with a bench scraper and place it into individual small resealable plastic bags, removing as much air as possible before sealing. Label and date a large freezer-safe ziplock bag, place all individual bags inside, remove the air again, then seal and place in the freezer for storage.
- Thaw: About 10-12 hours before making pizza, transfer the dough balls from the freezer to the refrigerator to thaw slowly.
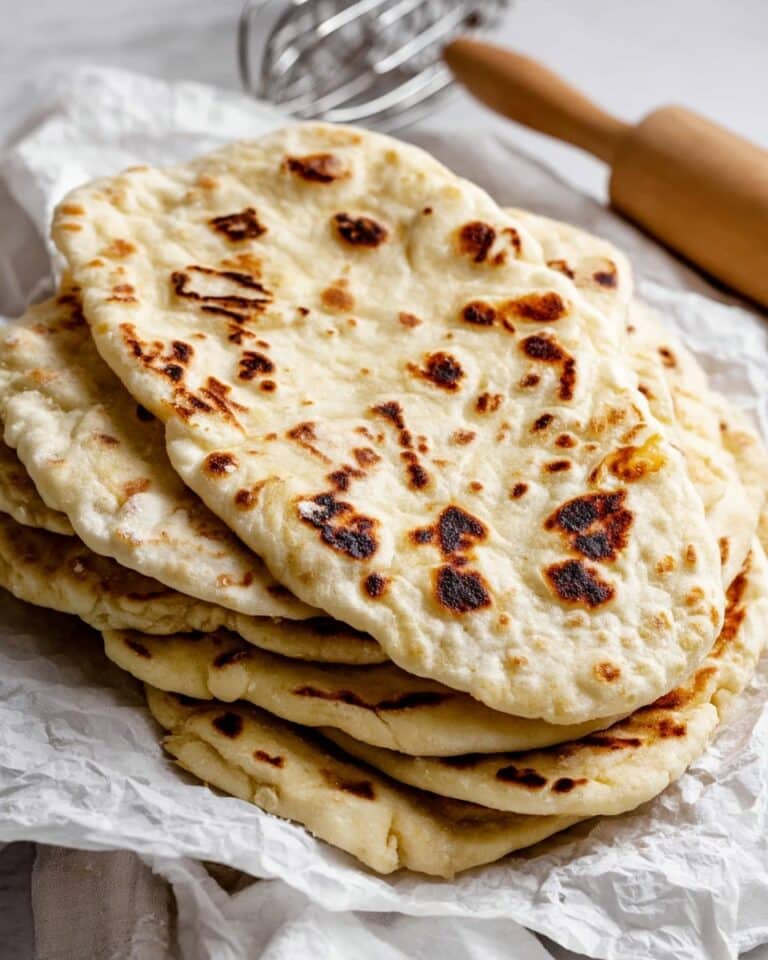
- Shape and Bake: Preheat a stone baking sheet or cast iron skillet in the oven at 500°F. Shape the dough on a floured surface into a rustic flatbread shape, adjusting thickness to preference. Remove the hot stone or skillet from the oven, transfer the shaped dough onto it, then add sauce, cheese, and toppings. Bake for 10-15 minutes or until cheese is bubbly and crust is golden brown.
Notes
- Ensure your sourdough starter is active and bubbly before using for the best rise and flavor.
- Adjust flour quantity slightly if the dough feels too sticky; consistency is key for handling and shaping.
- Only freeze the dough balls once shaped and lightly floured to prevent sticking in the bags.
- Remove as much air as possible from bags to avoid freezer burn and maintain dough quality.
- Thawing in the refrigerator for 10-12 hours prevents over-proofing and maintains dough texture.
- Preheating your baking surface ensures a crispy crust by creating an instant sizzle when the dough is placed.
- You can customize the thickness of your pizza crust according to personal preference during shaping.
Keywords: sourdough pizza dough, freezer-friendly pizza dough, easy pizza dough, make-ahead pizza dough, homemade sourdough pizza crust, rustic pizza dough


