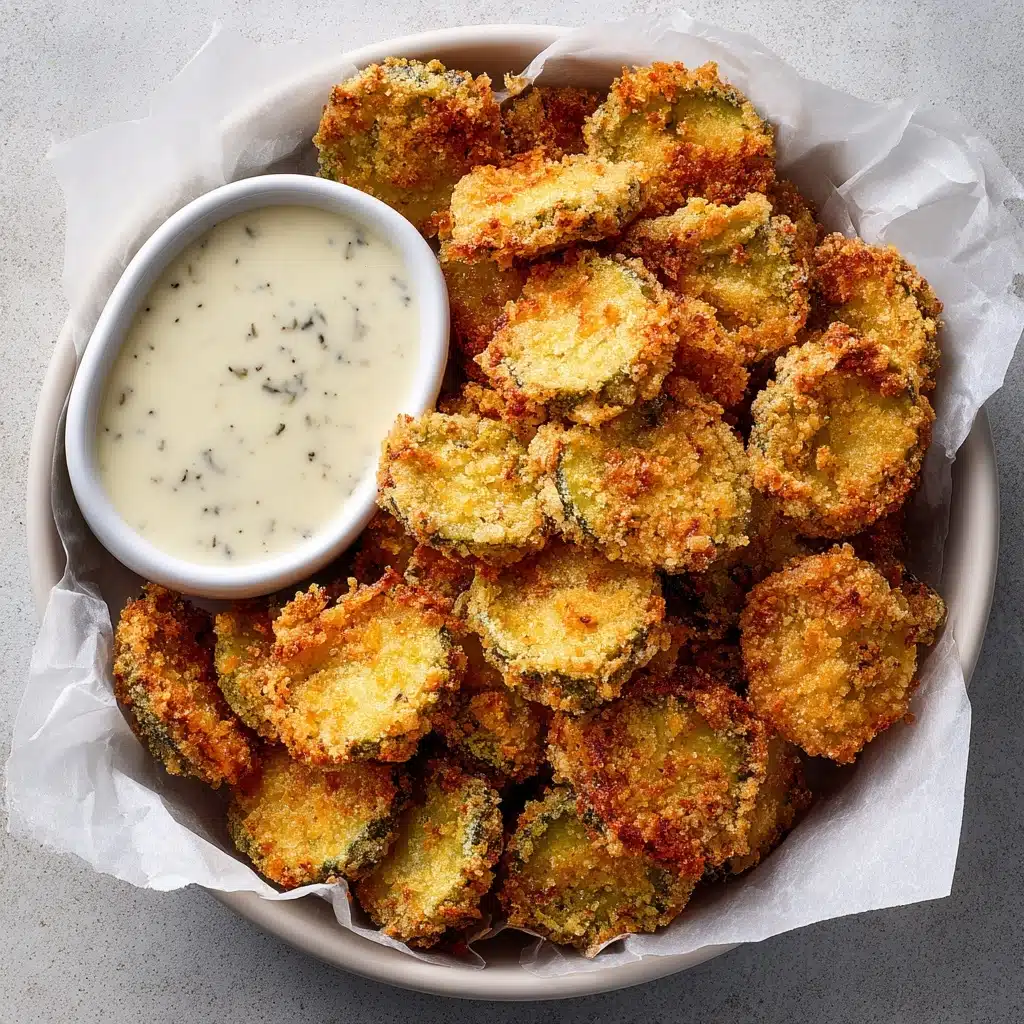
Fried Pickles Recipe
If you’re ready to dive into a snack that’s equal parts crispy, tangy, and just plain irresistible, you’re in for a treat with these Fried Pickles. Picture juicy dill pickle slices wrapped in a golden crust, seasoned just right, and ready for swirling through your favorite dipping sauce. Whether you’re whipping these up for a cozy night in, a crowd-pleasing appetizer, or just to satisfy a serious craving, Fried Pickles will quickly become your go-to, guaranteed to delight anyone lucky enough to snag a plate.
Ingredients You’ll Need
Let’s gather our essentials! Each ingredient here brings something special to the table: flavor, crunch, or foolproof frying results. Keep these on hand, and you’ll always be just a few quick steps from freshly made Fried Pickles.
- Vegetable oil: The key to crisping — choose a neutral oil with a high smoke point for perfect frying.
- 1 (16-ounce) jar dill pickle slices: Pickle chips are the star, offering that signature tang and irresistible bite.
- ½ cup all-purpose flour: This creates the base for a light yet sturdy batter to hug each pickle slice.
- 2 teaspoons garlic salt: Infuses a savory zing into every crispy bite.
- 1 teaspoon Italian seasoning: Adds a clever hint of herbs, giving the crust extra depth.
- ¼ teaspoon pepper: A little kick to balance out the brine and seasoning.
- ¾ cup water: Just enough to form a smooth, dippable batter that sticks to every edge.
- 1½ cups panko breadcrumbs: The not-so-secret weapon for that shatteringly crisp coating.
How to Make Fried Pickles
Step 1: Heat the Oil
Pour vegetable oil into a frying pan until it’s about half an inch deep, and set it over medium-high heat. You’re aiming for a temperature between 350 and 375°F — this is your crispy sweet spot. A quick tip: use a kitchen thermometer for accuracy, or drop in a pinch of breadcrumbs; they should sizzle right away but not burn instantaneously.
Step 2: Prep the Pickles
While your oil heats, drain your jar of pickles and spread them onto a plate lined with paper towels. Pat them dry thoroughly — damp pickles can cause the coating to slide right off and might even make your hot oil sputter. This little step makes all the difference in ensuring your Fried Pickles get extra crunchy and not soggy.
Step 3: Make the Batter
In a shallow bowl, whisk together the all-purpose flour, garlic salt, Italian seasoning, and pepper. Gently pour in the water, stirring until you have a smooth, lump-free batter. The consistency should be similar to pancake batter: thick enough to coat, but not so heavy that it slides right off.
Step 4: Bread the Pickles
Set up a quick assembly line! Place your panko breadcrumbs in a second shallow dish. Dip each pickle slice first into the batter, making sure it’s well coated, then dredge it in the panko. Gently press to ensure a full coating. The double layer keeps each Fried Pickle fabulously crunchy on the outside, tender inside.
Step 5: Fry to Golden Perfection
Time for the magic! Working in batches, carefully lower your coated pickles into the hot oil. Fry for 1 to 2 minutes per side, or until they’re beautifully golden and crisp. Don’t overcrowd the pan — this helps each batch fry up evenly and stay crunchy. Remove the fried pickles using a slotted spoon and let them drain on a plate lined with paper towels. Repeat with the rest until your batch is done.
Step 6: Serve Right Away
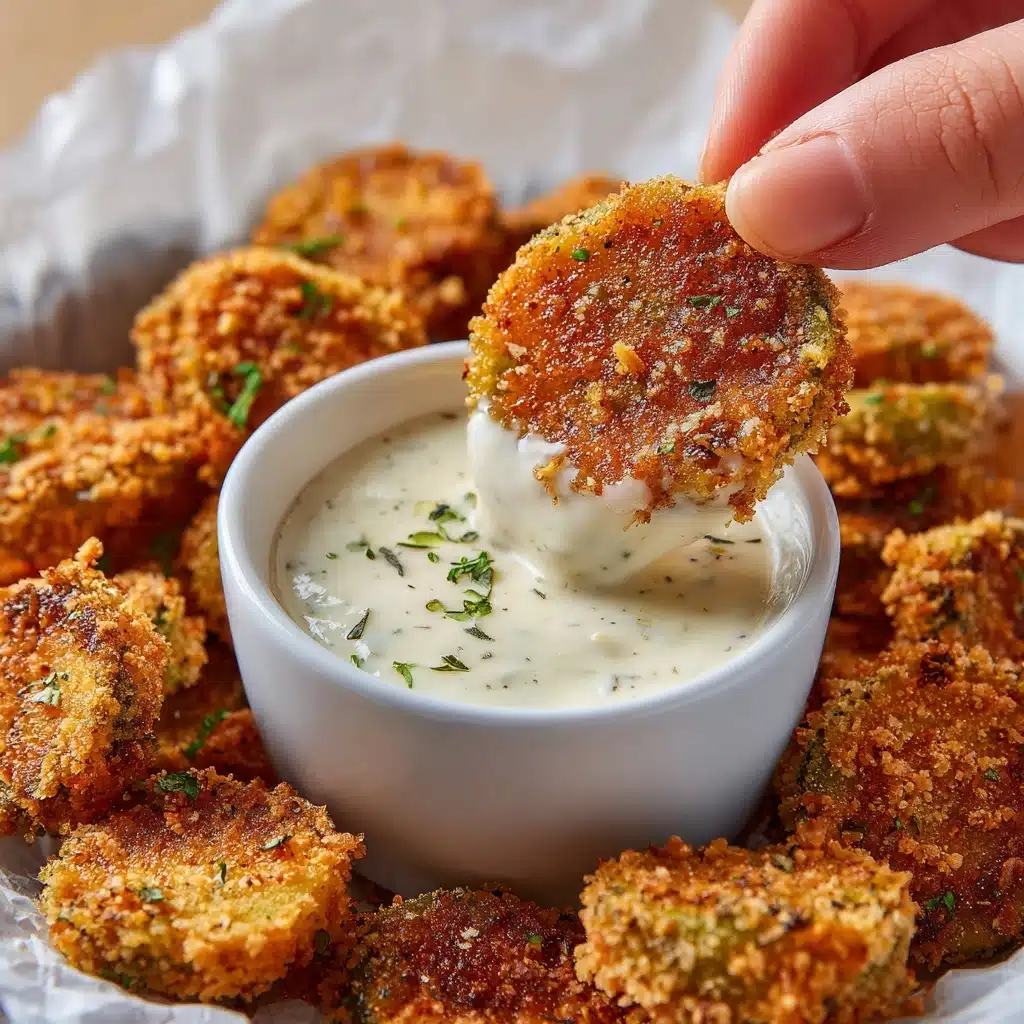
There’s nothing better than Fried Pickles straight from the fryer! Dish them up immediately with a side of creamy Ranch or zesty Marinara for dipping. This is snacking at its absolute best.
How to Serve Fried Pickles
Garnishes
Sprinkle your Fried Pickles with a light dusting of extra Italian seasoning or freshly chopped parsley for a pop of color. A little grated Parmesan adds instant gourmet flair, while a squeeze of lemon can brighten everything up for a tangy twist.
Side Dishes
Fried Pickles play beautifully alongside all kinds of party snacks and comfort foods. They pair especially well with sliders, chicken wings, or a fresh crisp coleslaw. For game day or gatherings, don’t forget some crunchy veggie sticks and lots of dipping sauces on the side!
Creative Ways to Present
If you’re aiming for wow-factor, stack your Fried Pickles in a paper-lined basket or arrange them on a rustic wooden board with a trio of dips. For a playful touch, skewer them onto toothpicks and serve as bite-sized appetizers at your next party — bonus points for presentation and easy grabbing!
Make Ahead and Storage
Storing Leftovers
If you somehow have leftovers, let your Fried Pickles cool completely first, then store them in an airtight container in the refrigerator. They’ll keep for up to 3 days, though the crunch factor is at its peak on day one.
Freezing
Yes, you can freeze Fried Pickles! Spread them in a single layer on a baking sheet, freeze until solid, then transfer them to a zip-top freezer bag. They’ll stay good for up to 1 month. This trick is especially handy for making a big batch ahead of time.
Reheating
To bring back that fresh-from-the-fryer crispness, reheat your Fried Pickles in a 400°F oven or air fryer for 5 to 7 minutes, flipping halfway through. Avoid the microwave for this one — it tends to make the crust soggy rather than crunchy.
FAQs
Can I use different kinds of pickles?
Absolutely! While dill pickle chips are classic, you can experiment with spicy pickles, bread and butter chips, or even pickle spears for a bolder bite. Just be sure to pat them dry thoroughly before battering.
Can I bake or air fry instead of deep frying?
Yes, you can! For a lighter version, arrange battered and breaded pickles on a baking sheet and bake at 425°F until crisp, or use your air fryer at 400°F until golden. They won’t be quite as decadent, but they’re still satisfyingly crunchy.
Why is my coating falling off?
If your Fried Pickles lose their coating, make sure your pickles are completely dry before breading, and press the panko gently so it adheres. Also, avoid crowding the pan when frying — this helps the crust stay intact.
What are the best dips for Fried Pickles?
Creamy Ranch is a timeless favorite, but you can also try blue cheese dressing, chipotle mayo, Sriracha aioli, or a side of marinara for an Italian-inspired twist.
Can I make Fried Pickles gluten-free?
Definitely! Substitute a gluten-free flour blend for the all-purpose flour, and use gluten-free panko breadcrumbs. Make sure your pickles and seasonings are gluten-free too, and you’re all set.
Final Thoughts
If you’ve never made Fried Pickles at home, get ready for a new addiction! With simple steps and ingredients, you can whip up a batch that rivals your favorite restaurant — only fresher, crispier, and totally made with love. Give them a try, share with friends, and don’t be surprised when people start requesting this snack again and again!
PrintFried Pickles Recipe
These crispy Fried Pickles are a delightful snack or appetizer with a satisfying crunch and tangy flavor. Perfect for sharing or enjoying as a tasty treat!
- Prep Time: 15 minutes
- Cook Time: 10 minutes
- Total Time: 25 minutes
- Yield: 4 servings 1x
- Category: Appetizer
- Method: Frying
- Cuisine: American
- Diet: Vegetarian
Ingredients
For Frying:
- Vegetable oil, for frying
For Pickles:
- 1 (16-ounce) jar dill pickle slices
For Batter:
- ½ cup all-purpose flour
- 2 teaspoons garlic salt
- 1 teaspoon Italian seasoning
- ¼ teaspoon pepper
- ¾ cup water
For Coating:
- 1½ cups panko breadcrumbs
Instructions
- Prepare the Oil: Fill a frying pan with ½ inch oil and heat over medium-high heat to 350–375°F.
- Drain and Dry Pickles: While the oil is heating, drain pickles and place them on paper towels. Pat dry to remove excess juice.
- Make Batter: Whisk flour, garlic salt, Italian seasoning, and pepper in a shallow bowl. Add water and mix until smooth.
- Prepare Coating: Place breadcrumbs in a separate shallow dish.
- Coat Pickles: Working in batches, add pickles to the batter and toss to coat. Then dip pickles in breadcrumbs, making sure to coat all sides.
- Fry Pickles: Fry pickles in batches in the oil for 1–2 minutes on each side or until golden brown. Remove with a slotted spoon and place on a paper towel lined plate.
- Serve: Serve immediately with Ranch dressing or Marinara.
Nutrition
- Serving Size: 1 serving
- Calories: 215 kcal
- Sugar: 3g
- Sodium: 1252mg
- Fat: 10g
- Saturated Fat: 2g
- Unsaturated Fat: 7g
- Trans Fat: 0g
- Carbohydrates: 27g
- Fiber: 2g
- Protein: 4g
- Cholesterol: 0mg
Keywords: Fried Pickles, Appetizer, Snack, Fried Food, Pickle Recipe

