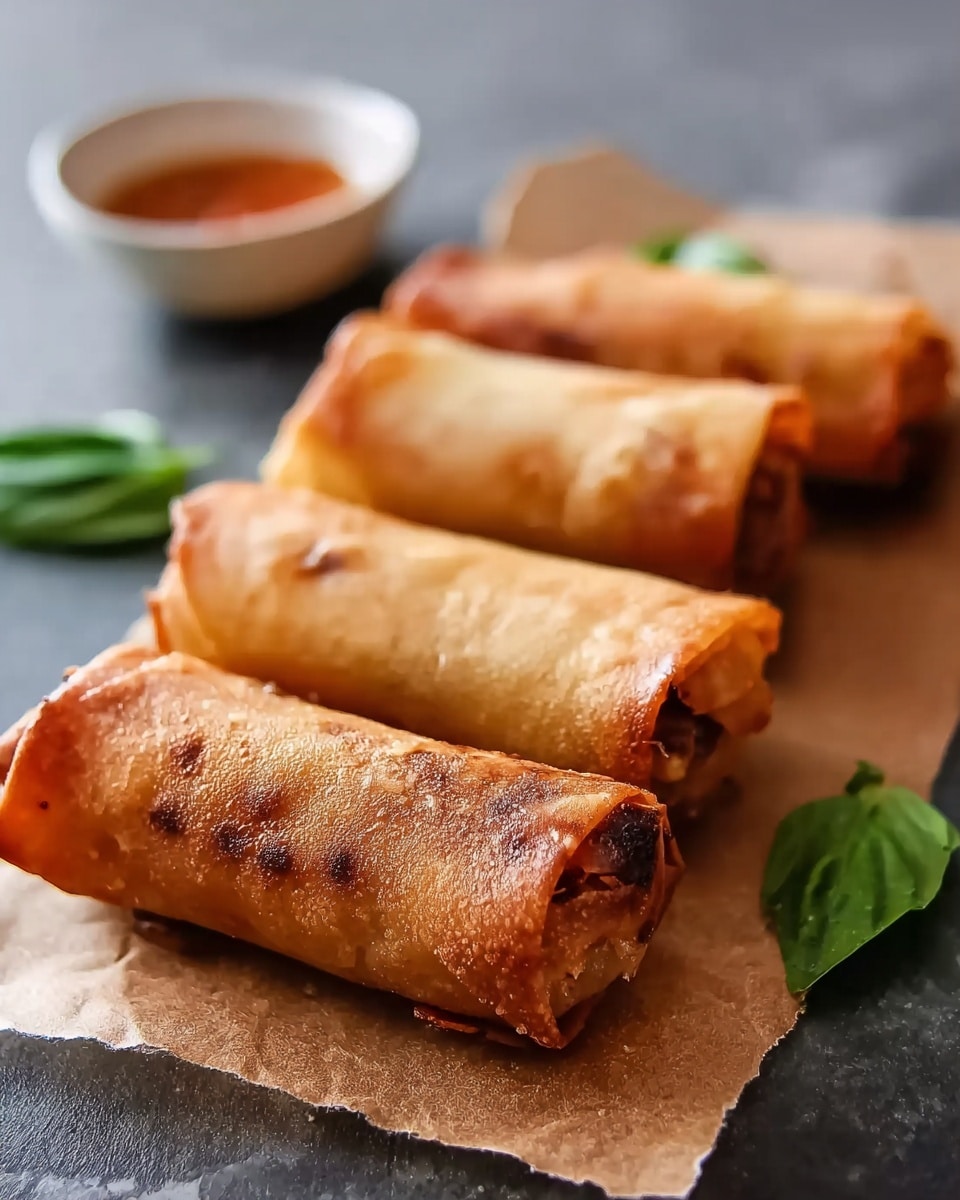
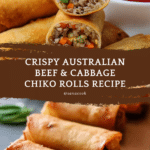
Golden Crispy Australian-Style Beef and Cabbage Chiko Rolls Recipe
Introduction
Discover the delicious crunch of Golden Crispy Australian-Style Beef and Cabbage Chiko Rolls. These savory rolls are packed with a flavorful beef and vegetable filling, wrapped in crisp spring roll pastry and fried to golden perfection. Perfect as a snack or a tasty meal accompaniment.

Ingredients
- 300 g (10 oz) beef mince
- 2 cups cabbage, finely shredded
- 1 carrot, grated
- 1 small brown onion, finely chopped
- 1/2 cup celery, finely sliced
- 1 tablespoon soy sauce
- 1 tablespoon Worcestershire sauce
- 1 teaspoon curry powder
- 1/2 teaspoon salt
- 1/2 teaspoon black pepper
- 1 tablespoon plain flour
- 2 tablespoons water
- 8 large spring roll wrappers
- 1 egg, lightly beaten (for sealing)
- Vegetable oil, for deep frying
Instructions
- Step 1: Heat a large frying pan over medium heat. Add the beef mince and cook until browned, breaking it up well as it cooks.
- Step 2: Stir in onion, cabbage, carrot, and celery. Cook for 5–6 minutes until the vegetables soften and excess moisture evaporates.
- Step 3: Add soy sauce, Worcestershire sauce, curry powder, salt, and pepper. Stir well to combine all the flavors.
- Step 4: Mix the plain flour with water to create a slurry. Stir this into the filling to lightly bind everything together. Cook for another 2 minutes, then remove from heat and let cool slightly.
- Step 5: Lay a spring roll wrapper on a clean surface in a diamond shape. Spoon the filling across the center.
- Step 6: Fold the bottom corner over the filling, fold in the sides tightly, then roll upward to form a firm log. Brush the top edge with beaten egg to seal. Repeat with the remaining wrappers.
- Step 7: Heat vegetable oil in a deep saucepan or fryer to 350°F (180°C). Fry the rolls in batches for 4–5 minutes or until golden brown and crisp.
- Step 8: Remove rolls and drain on paper towels. Serve hot with tomato sauce or sweet chili sauce.
Tips & Variations
- For a lighter version, brush the rolls lightly with oil and bake at 400°F (200°C) for 20–25 minutes, turning once, until golden and crisp.
- You can add finely chopped mushrooms or bean sprouts for extra texture and flavor.
- If you prefer a spicier kick, add a pinch of chili flakes or a dash of hot sauce to the filling.
Storage
Store leftover cooked chiko rolls in an airtight container in the refrigerator for up to 2 days. To reheat, bake in a preheated oven at 350°F (175°C) for 10-12 minutes to restore the crispiness. Avoid microwaving as it can make the wrapper soggy.
How to Serve
Serve this delicious recipe with your favorite sides.
FAQs
Can I prepare the filling in advance?
Yes, you can make the filling a day ahead and keep it refrigerated. Allow it to come to room temperature before assembling the rolls for easier handling.
What can I use if I don’t have spring roll wrappers?
Phyllo pastry or filo sheets can be used as an alternative, but they require careful handling and typically need to be brushed with oil or butter before baking or frying.
PrintGolden Crispy Australian-Style Beef and Cabbage Chiko Rolls Recipe

Golden Crispy Australian-Style Beef and Cabbage Chiko Rolls are savory deep-fried rolls filled with a flavorful mixture of beef mince, cabbage, carrot, celery, and aromatic spices. These rolls feature a crisp spring roll wrapper and deliver a perfect balance of textures and tastes, inspired by classic Australian snack foods.
- Prep Time: 20 minutes
- Cook Time: 15 minutes
- Total Time: 35 minutes
- Yield: 8 chiko rolls 1x
- Category: Snack
- Method: Frying
- Cuisine: Australian
Ingredients
Filling
- 300 g (10 oz) beef mince
- 2 cups cabbage, finely shredded
- 1 carrot, grated
- 1 small brown onion, finely chopped
- 1/2 cup celery, finely sliced
- 1 tablespoon soy sauce
- 1 tablespoon Worcestershire sauce
- 1 teaspoon curry powder
- 1/2 teaspoon salt
- 1/2 teaspoon black pepper
- 1 tablespoon plain flour
- 2 tablespoons water
Wrapper
- 8 large spring roll wrappers
- 1 egg, lightly beaten (for sealing)
Cooking
- Vegetable oil, for deep frying
Instructions
- Cook the beef mince: Heat a large frying pan over medium heat. Add the beef mince and cook until browned, breaking it up into small pieces as it cooks to ensure even browning.
- Add vegetables: Stir in the finely chopped onion, shredded cabbage, grated carrot, and sliced celery. Cook the mixture for 5–6 minutes until the vegetables soften and the excess moisture evaporates, concentrating the flavors.
- Season the filling: Add soy sauce, Worcestershire sauce, curry powder, salt, and black pepper to the pan. Stir thoroughly to combine all ingredients evenly.
- Bind the filling: Mix plain flour with water to form a slurry, then stir this into the filling to lightly bind the mixture together. Cook for an additional 2 minutes, then remove from heat and allow the filling to cool slightly, making it easier to handle.
- Prepare the wrappers: Lay a spring roll wrapper flat on a clean surface in a diamond shape. Spoon a generous amount of the cooled filling across the center of each wrapper.
- Roll the chiko rolls: Fold the bottom corner of the wrapper over the filling, then fold in the sides tightly. Roll upwards to form a firm log shape. Brush the top edge with the beaten egg to seal the roll securely. Repeat this process with the remaining wrappers and filling.
- Heat oil for frying: In a deep saucepan or fryer, heat vegetable oil to 350°F (180°C), ensuring there is enough oil to fully submerge the rolls for even cooking.
- Deep fry the rolls: Fry the chiko rolls in batches for 4–5 minutes each until they turn golden brown and crispy. Avoid overcrowding to maintain temperature and crispness.
- Drain excess oil: Remove the fried rolls with a slotted spoon and drain on paper towels to remove excess oil.
- Optional oven method: Alternatively, brush the rolls lightly with oil and bake them in a preheated oven at 400°F (200°C) for 20–25 minutes, turning once halfway, until golden and crisp.
- Serve: Enjoy the chiko rolls hot, served with tomato sauce or sweet chili sauce for dipping.
Notes
- For best results, ensure the filling is cool before wrapping to prevent the wrappers from tearing.
- If preferred, you can substitute beef mince with ground chicken or turkey for a leaner version.
- Spring roll wrappers must be kept covered under a damp cloth to prevent drying out while assembling.
- Deep frying yields the crispiest texture, but baking is a healthier alternative that still produces a crunchy finish.
- Adjust seasoning quantities to taste, especially if using low-sodium soy sauce.
- Serve immediately after cooking for optimal crispiness.
Keywords: chiko rolls, beef chiko rolls, Australian snack, crispy spring rolls, deep fried snacks, beef and cabbage rolls
