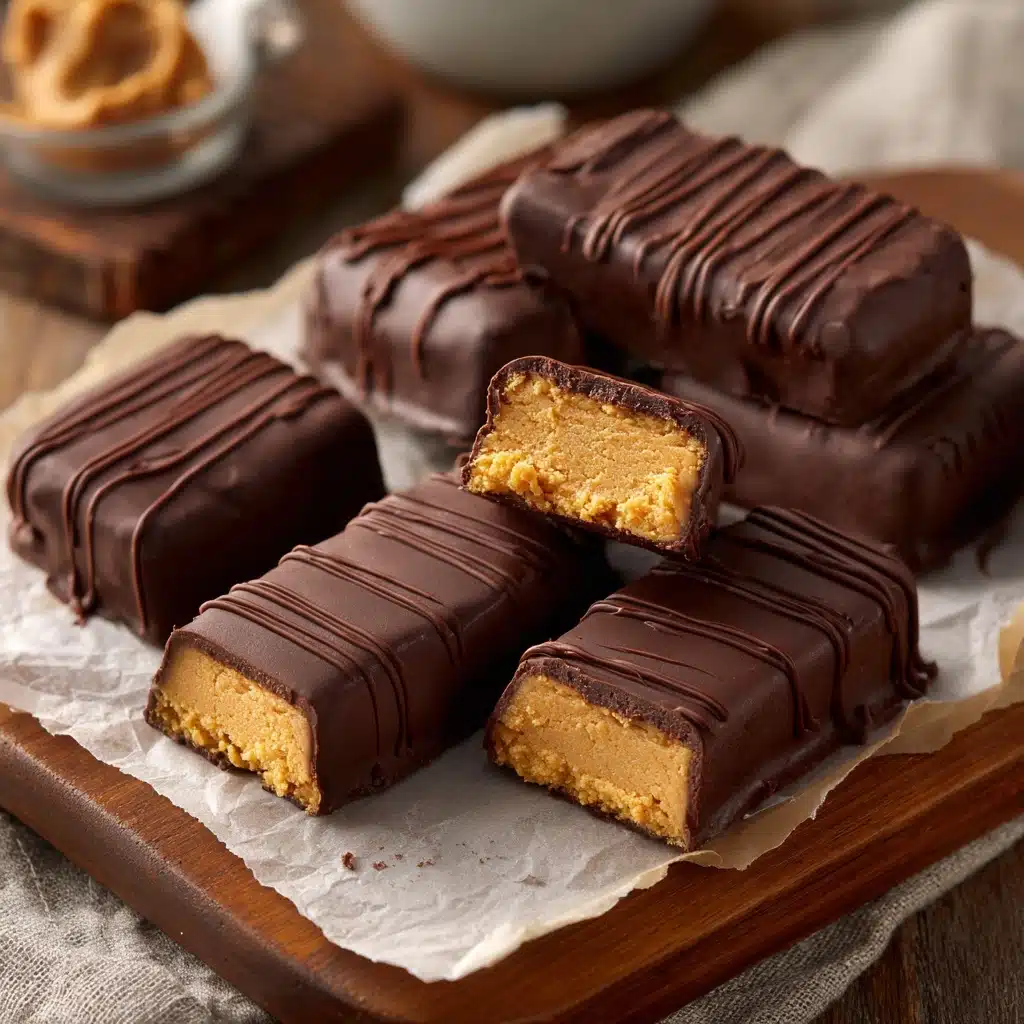
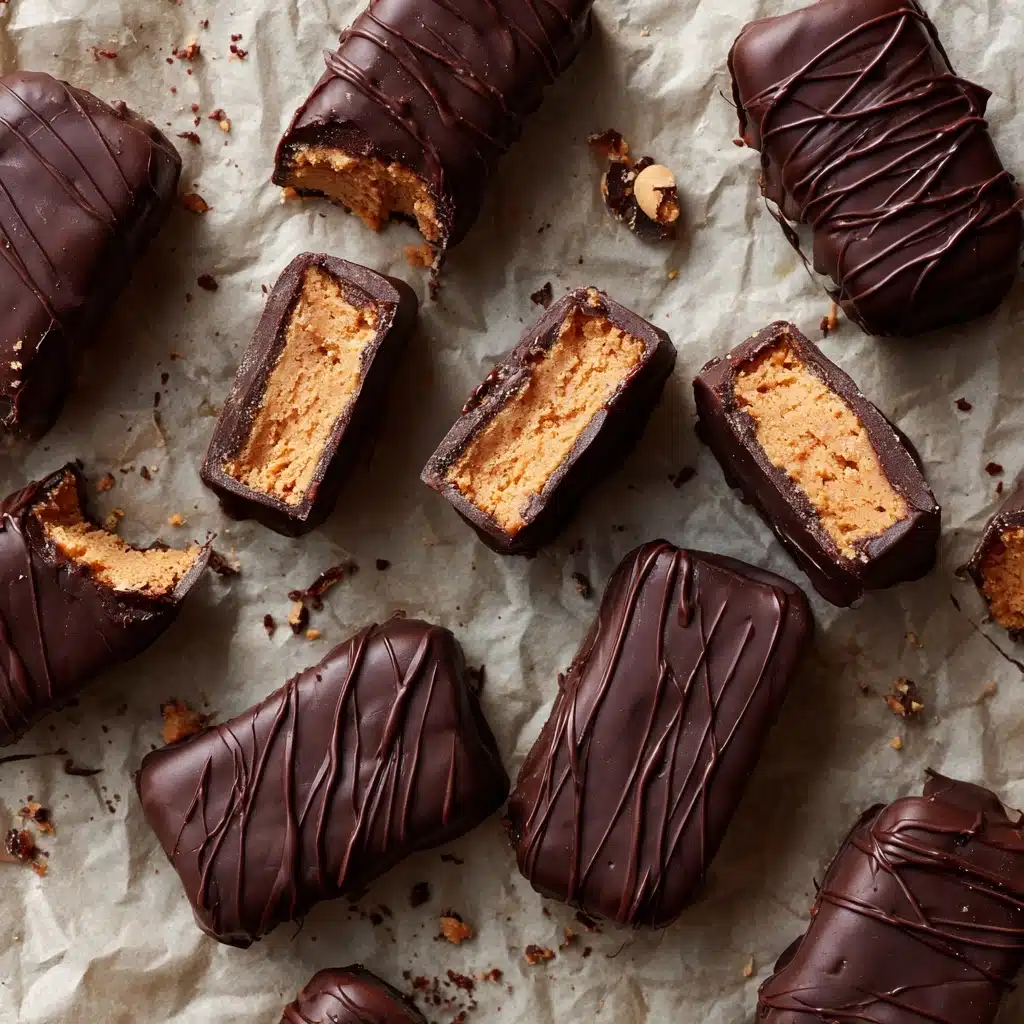
Healthy Homemade Butterfingers Recipe
If you’ve ever found yourself daydreaming about the crunchy, peanut-buttery magic of classic candy bars but wanted something wholesome enough to enjoy without guilt, you’re in for a treat with these Healthy Homemade Butterfingers. They deliver all the crave-worthy texture and flavor you remember, but made with simple, nourishing ingredients you likely already have in your pantry. With just the right balance of salty-sweet, a hint of vanilla, and a decadent chocolate shell, these bars are a pure delight to make and eat—plus they’re shockingly easy to pull off at home!
Ingredients You’ll Need
Gathering your ingredients for Healthy Homemade Butterfingers truly couldn’t be more straightforward. Each element brings something essential to the table, from rich peanut butter to that irresistible chocolatey finish—let’s walk through what makes each one tick.
- Peanut butter: Opt for creamy, natural peanut butter for the best nutty flavor and gooey texture.
- Honey: Adds natural sweetness and helps bind the filling; maple syrup works if you’d like a vegan twist.
- Vanilla extract: Boosts the overall flavor and brings out the candy bar’s nostalgic notes.
- Sea salt: Balances the sweetness and makes the peanut flavor pop—don’t skip it!
- Cornflake cereal: The secret to that snappy, crispy bite; crush them slightly for the perfect texture.
- Chocolate chips: Choose dairy-free if needed—their rich coating is essential for that classic finish.
- Coconut oil: Helps the chocolate melt smoothly and sets up beautifully when chilled.
How to Make Healthy Homemade Butterfingers
Step 1: Warm the Peanut Butter Base
Start by combining your peanut butter, honey, vanilla, and salt in a saucepan over medium-low heat. Warm this mixture for about 2-4 minutes. Stir gently until it’s silky and smooth—don’t let it simmer or boil, just encourage everything to come together. This step ensures your base will hold its shape while making it easy to mix with the crispy cereal.
Step 2: Mix With Cornflakes
Transfer the warm peanut butter mixture into a large mixing bowl with your cornflake cereal. Now comes a fun part—stir everything together, crushing the cereal just a bit as you mix. You want to break up the flakes enough to coat them with the luscious peanut butter, but not so finely that you lose that signature crunch in your Healthy Homemade Butterfingers.
Step 3: Shape and Freeze
Working quickly (while the mixture is still pliable), scoop out portions and form them into log shapes with your hands. Aim for 12-14 bars—don’t worry if they’re not perfectly uniform. Place each log onto a parchment-lined baking sheet or plate. Pop them in the freezer for one hour to firm up, making them ready for a chocolatey dip!
Step 4: Melt the Chocolate
While the bars chill, melt the chocolate chips with coconut oil in the microwave or gently on the stove. Stir frequently so it melts evenly and stays satiny—you want to avoid scorching. The coconut oil gives the chocolate a lovely glossy texture, making your Healthy Homemade Butterfingers luscious and irresistible.
Step 5: Dip and Set
Once the logs are fully chilled, dip each one into the melted chocolate, turning to coat all sides evenly. Let any excess chocolate drip off (a fork works perfectly for this), then return each bar to your parchment-lined tray. Freeze or refrigerate the bars for about 10 minutes more, just until the chocolate shell is snappy and set. That’s it—time to snack, share, and swoon!
How to Serve Healthy Homemade Butterfingers
Garnishes
For a final flourish, sprinkle a tiny pinch of flaky sea salt or crushed cornflakes on top just before the chocolate sets. This adds visual appeal and that little extra something to set your Healthy Homemade Butterfingers apart from the store-bought candy aisle.
Side Dishes
Pair these treats with a cool glass of almond or oat milk, or serve alongside a fresh fruit plate for a bright, refreshing contrast. They also make a fun addition to snack boards or dessert platters for gatherings with friends.
Creative Ways to Present
Try wrapping each bar in wax paper and tying with twine for a retro candy shop vibe, or chop the bars and sprinkle over your favorite vanilla or chocolate nice cream. For parties, arrange them in mini muffin liners on a colorful tray for easy grabbing!
Make Ahead and Storage
Storing Leftovers
Leftover Healthy Homemade Butterfingers store beautifully! Keep them in an airtight container in the refrigerator for up to one week. The chocolate stays glossy and the insides keep that amazing crispness, making them perfect for daily treats or to pop into lunchboxes.
Freezing
If you want to extend their life, these bars freeze like a dream. Make sure they’re layered with parchment to keep them from sticking, seal tightly, and tuck in the freezer for up to three months. A quick five-minute rest at room temp is all it takes for that perfect, just-made bite.
Reheating
No need to reheat Healthy Homemade Butterfingers, but if you prefer a gooey center, let them sit at room temperature for 10-15 minutes before eating. This softens the filling while the chocolate stays snappy—just the way homemade candy should be.
FAQs
Can I use a different kind of nut butter?
Absolutely! Almond butter or sunflower seed butter are great swaps, though the flavor profile will change a bit. Stick to creamy options for the best texture in your Healthy Homemade Butterfingers.
Are these gluten-free?
As long as you use certified gluten-free cornflakes and chocolate chips, you’re all set! Always double-check your labels if you’re making them gluten-free for someone sensitive.
Could I make these vegan?
Yes! Just substitute maple syrup or brown rice syrup for the honey, and use dairy-free chocolate chips. Everything else stays the same for wonderful vegan Healthy Homemade Butterfingers.
Why freeze the bars before dipping in chocolate?
Freezing firms up the filling so your logs hold together beautifully when coated in warm chocolate. This makes dipping much neater and helps the chocolate set quickly and attractively.
How do I keep the chocolate shell from cracking?
Allow the chocolate-dipped bars to set in the fridge or freezer, but don’t handle them too much right after dipping. A little patience ensures the chocolate firms up nicely and stays intact when you bite in.
Final Thoughts
Homemade candy never fails to make a day brighter, and these Healthy Homemade Butterfingers are pure happiness in every bite. It’s hard to believe something this satisfying can be so easy to whip up at home. I hope you’ll treat yourself and your loved ones—you won’t want to go back to the store-bought kind again!
PrintHealthy Homemade Butterfingers Recipe
Learn how to make a healthier version of the classic Butterfingers candy bars at home with this easy recipe. These homemade Butterfingers are made with simple ingredients and are perfect for a sweet treat.
- Prep Time: 15 minutes
- Cook Time: 5 minutes
- Total Time: 1 hour 20 minutes
- Yield: 12–14 Butterfingers 1x
- Category: Dessert
- Method: Mixing, Freezing, Melting
- Cuisine: American
- Diet: Vegetarian
Ingredients
For the Butterfinger mixture:
- 1 cup peanut butter
- 1/3 cup honey
- 1/2 tsp vanilla extract
- 1/2 tsp sea salt
- 1 + 3/4 cup cornflake cereal
For the chocolate coating:
- 1 cup chocolate chips (dairy free, if needed)
- 1 tsp coconut oil
Instructions
- Heat the peanut butter mixture: In a saucepan over medium-low heat, combine peanut butter, honey, vanilla, and salt. Heat for 2-4 minutes until smooth.
- Mix the Butterfinger mixture: Combine the peanut butter mixture with the cornflake cereal in a large mixing bowl. Stir until well-combined, ensuring the cereal is coated.
- Form the Butterfingers: Shape the mixture into 12-14 logs and place them on a parchment-lined plate. Freeze for 1 hour.
- Coat with chocolate: Melt chocolate and coconut oil, then dip each Butterfinger in the chocolate. Let excess drip off, then freeze until set, around 10 minutes.
Notes
- You can store these homemade Butterfingers in the refrigerator or freezer for a delicious, cool treat.
- Feel free to customize this recipe by using different types of nut butter or cereal.
Nutrition
- Serving Size: 1 Butterfinger
- Calories: 160
- Sugar: 10g
- Sodium: 125mg
- Fat: 10g
- Saturated Fat: 4g
- Unsaturated Fat: 5g
- Trans Fat: 0g
- Carbohydrates: 16g
- Fiber: 1g
- Protein: 3g
- Cholesterol: 0mg
Keywords: Homemade Butterfingers, Healthy Candy Recipe, DIY Butterfingers, Peanut Butter Treats
