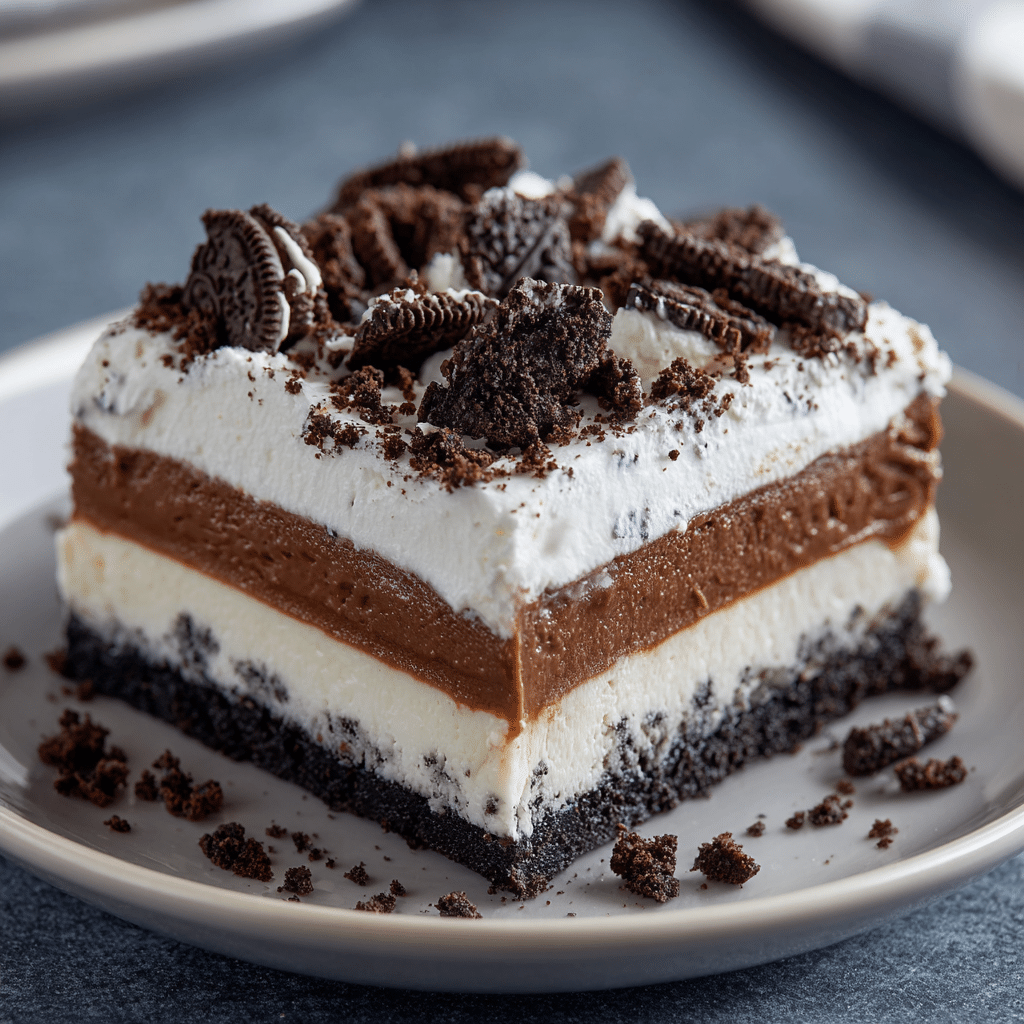
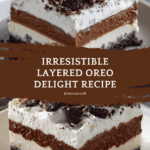
Heavenly Oreo Dessert Recipe
If you’re on the hunt for a show-stopping, no-bake dessert that combines a creamy filling, chocolatey richness, and a playful crunch, look no further than this Heavenly Oreo Dessert. Each bite tastes like a nostalgic trip down Oreo memory lane, but with a grown-up twist thanks to luscious layers of cream cheese, chocolate pudding, and that signature Oreo cookie crust. Whether you’re prepping for a potluck or just craving something ultra-indulgent, this is the treat you’ll want to share again and again.
Ingredients You’ll Need
This Heavenly Oreo Dessert requires just a handful of pantry staples — every one of them a hero in its own right. From the classic cookies you know and love, to the irresistible creamy layers, these ingredients work together for the perfect balance of crunch, sweetness, and smoothness.
- 50 Oreo cookies: The foundation and star of the show, these get crushed into chocolatey crumbs that give both body and flavor — don’t skip the cream inside!
- ½ cup unsalted butter (melted): Brings richness and helps the cookie crust hold together so you get neat layers with every slice.
- 8 ounces cream cheese (softened to room temperature): Adds tangy depth and a smooth, creamy layer that complements the Oreo base perfectly.
- 1 cup confectioners’ sugar: Blends smoothly into the cream cheese for gentle sweetness without any gritty texture.
- 16 ounces Cool Whip (two 8-ounce tubs): Light and fluffy, this helps build a cloud-like filling and a soft, creamy top layer.
- 6.8 ounces instant chocolate pudding (two 3.4-ounce packages): Provides instant decadence with its rich chocolate flavor and quick-set texture.
- 2½ cups 2% milk: Just the right amount to mix with your pudding — use cold milk for the fastest, smoothest results.
How to Make Heavenly Oreo Dessert
Step 1: Prep the Baking Dish
Give your trusty 9×13-inch baking dish a quick spritz of nonstick spray. This will make serving the Heavenly Oreo Dessert a breeze and keep every delectable layer intact.
Step 2: Crush Those Oreos
Using a food processor, pulse the Oreo cookies (cream and all!) into fine crumbs. Be sure to scoop out ¾ cup of these crumbs and set them aside — you’ll later use them for that can’t-miss Oreo topping.
Step 3: Make the Crust
Pour the melted butter over the remaining crushed Oreos and stir until everything is nicely moistened. Transfer this mixture into your prepared baking dish and press it firmly for a solid, even crust. Slip the dish into the freezer to help the crust set up while you prep your next layer.
Step 4: Mix the Cream Cheese Layer
In a large bowl, blend the softened cream cheese with the confectioners’ sugar until it’s perfectly smooth and creamy. Fold in one tub of Cool Whip and mix until just combined — don’t overdo it, as you want this layer to stay light and airy.
Step 5: Assemble the Creamy Layer
Drop spoonfuls of the cream cheese mixture evenly over your Oreo crust. Then, carefully spread the mixture into an even layer. Work gently so you don’t disturb your crumbly crust underneath — patience is key for those beautiful, clean layers.
Step 6: Whip Up the Pudding
In a separate mixing bowl, whisk the pudding mix with cold milk for 2 minutes, until thick and luscious. This quick layer adds a fudgy, chocolatey punch that really sets the Heavenly Oreo Dessert apart from the crowd.
Step 7: Create the Chocolatey Middle
Spread your pudding in an even layer right on top of the cream cheese mixture. Smooth it out with a spatula, making sure every corner is covered for chocolate goodness in every bite.
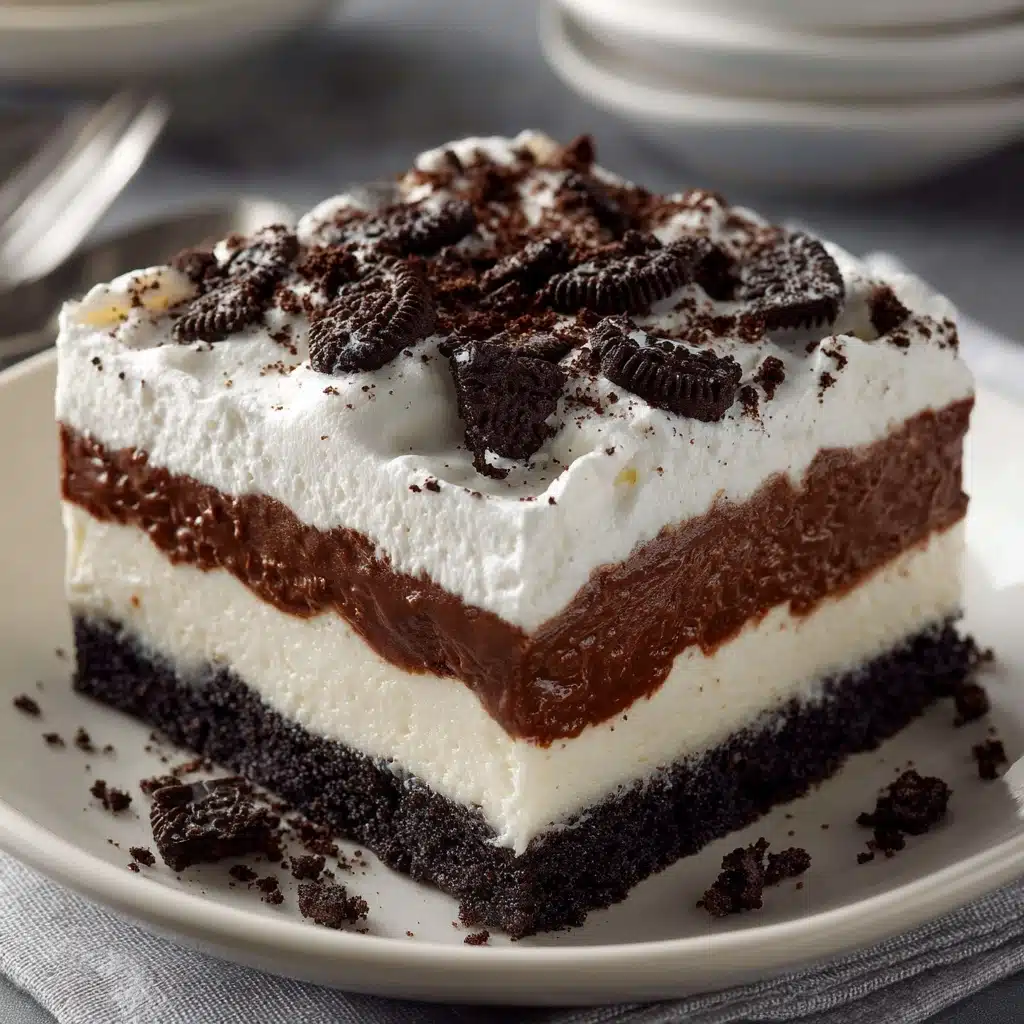
Step 8: Top with Cool Whip and Oreo Crumbs
Finish things off by spreading the remaining tub of Cool Whip gently over the pudding. Sprinkle the reserved Oreo crumbs over the top for the ultimate chocolate crunch — it’s like confetti, but better!
Step 9: Chill and Serve
Patience time! Cover your dish and refrigerate for at least 6 hours, or overnight. This is what allows all those layers to set up perfectly and ensures neat slices when serving your Heavenly Oreo Dessert.
How to Serve Heavenly Oreo Dessert
Garnishes
The crowning glory of this dessert is already those crunchy Oreo crumbs, but you can always level things up. Consider adding a drizzle of chocolate sauce, a swirl of whipped cream, or even a few whole mini Oreos for an extra-festive touch.
Side Dishes
Because this dessert is so rich and creamy, it pairs beautifully with fresh seasonal berries. A handful of raspberries or sliced strawberries on the side brings just the right pop of tartness. For parties, a bright fruit salad or simple scoop of vanilla ice cream on the side really balances the chocolatey goodness of your Heavenly Oreo Dessert.
Creative Ways to Present
Take your presentation up a notch by serving the Heavenly Oreo Dessert in individual mason jars or clear parfait glasses. This lets your guests admire those dreamy layers before diving in! You can also use cookie cutters to make fun shapes, or add edible glitter for a playful party vibe. The dessert is as adaptable as your imagination!
Make Ahead and Storage
Storing Leftovers
Got leftovers (lucky you!)? Cover your baking dish tightly with plastic wrap or transfer individual pieces to airtight containers. Refrigerate for up to four days for maximum freshness. It actually tastes even better after sitting overnight as the flavors mingle.
Freezing
Yes, you can freeze Heavenly Oreo Dessert! Simply wrap it well so it’s airtight and freeze for up to two months. When ready to enjoy, let it thaw in the fridge overnight. Keep in mind the texture of the Cool Whip may soften slightly, but all the flavors will still shine through.
Reheating
This dessert is best enjoyed cold, straight from the fridge — no reheating necessary! In fact, chilling helps the layers hold together beautifully. If you’re serving from the freezer, just plan ahead to allow proper time to thaw in the fridge.
FAQs
Can I use homemade whipped cream instead of Cool Whip?
Absolutely! Freshly whipped cream brings a homemade charm and flavor to your Heavenly Oreo Dessert. Just be sure to whip the cream to firm peaks for best results, and use the same volume as the Cool Whip called for in the recipe.
Can I make this with gluten-free Oreos?
Yes, gluten-free Oreos work wonderfully and taste just as fabulous in this dessert, making it a hit for friends or family who are sensitive to gluten.
Do I need to use a food processor to crush the cookies?
No food processor? No problem. You can easily place your Oreos in a sturdy zip-top bag and crush them with a rolling pin. Just keep at it until you’ve got a fine crumb, which helps the crust stick together.
Is there a substitute for cream cheese?
If you’re looking to switch it up, mascarpone or Neufchâtel cheese are both tasty alternatives. They’ll give a similar creamy richness, though mascarpone is a bit sweeter and less tangy than cream cheese.
How far ahead can I make the Heavenly Oreo Dessert?
You can prepare the dessert up to 24 hours in advance, or even make it the night before your gathering. Just cover and chill in the refrigerator until ready to serve. Longer chilling actually enhances the flavor and texture!
Final Thoughts
I can’t wait for you to experience the joy of sharing (and savoring!) this Heavenly Oreo Dessert with your favorite people. It’s an instant crowd-pleaser that turns a simple handful of ingredients into layers of bliss. Dive in, have fun, and don’t be surprised when requests for the recipe start coming your way!
PrintHeavenly Oreo Dessert Recipe

Indulge in the heavenly goodness of this Oreo dessert that combines the richness of cream cheese, the crunch of Oreo cookies, and the lightness of whipped topping. A perfect treat for any occasion!
- Prep Time: 20 minutes
- Cook Time: 0 minutes
- Total Time: 6 hours 20 minutes
- Yield: 12 servings 1x
- Category: Dessert
- Method: Baking
- Cuisine: American
- Diet: Vegetarian
Ingredients
Oreo Crust:
- 50 Oreo cookies
- ½ cup unsalted butter, melted
Cream Cheese Layer:
- 8 ounces cream cheese, softened
- 1 cup confectioners’ sugar
- 8 ounces Cool Whip, softened
Chocolate Pudding Layer:
- 6.8 ounces instant chocolate pudding mix (two 3.4-ounce packages)
- 2½ cups 2% milk
Instructions
- Spray the Baking Dish: Spray a 9×13-inch baking dish with nonstick spray.
- Crush Oreos: Use a food processor to crush the Oreos until fine crumbs. Reserve ¾ cup for topping.
- Prepare Oreo Crust: Mix remaining crushed Oreos with melted butter and press into the dish.
- Make Cream Cheese Layer: Beat cream cheese and confectioners’ sugar until smooth. Gently fold in 1 tub of Cool Whip.
- Layer Cream Cheese: Spread cream cheese mixture over Oreo crust.
- Prepare Pudding Layer: Beat milk and pudding mix for 2 minutes. Spread over cream cheese layer.
- Add Topping: Spread remaining Cool Whip over pudding layer and top with reserved Oreo crumbs.
- Chill: Refrigerate for at least 6 hours before serving.
Notes
- For a twist, try using different flavors of pudding mix for variety.
- Feel free to garnish with additional crushed Oreos or chocolate shavings for extra flair.
Nutrition
- Serving Size: 1 slice
- Calories: 380
- Sugar: 28g
- Sodium: 370mg
- Fat: 22g
- Saturated Fat: 12g
- Unsaturated Fat: 8g
- Trans Fat: 0g
- Carbohydrates: 41g
- Fiber: 1g
- Protein: 5g
- Cholesterol: 35mg
Keywords: Oreo dessert, no-bake dessert, cream cheese dessert, chocolate pudding dessert


