Homemade Gummy Peach Rings Recipe
Introduction
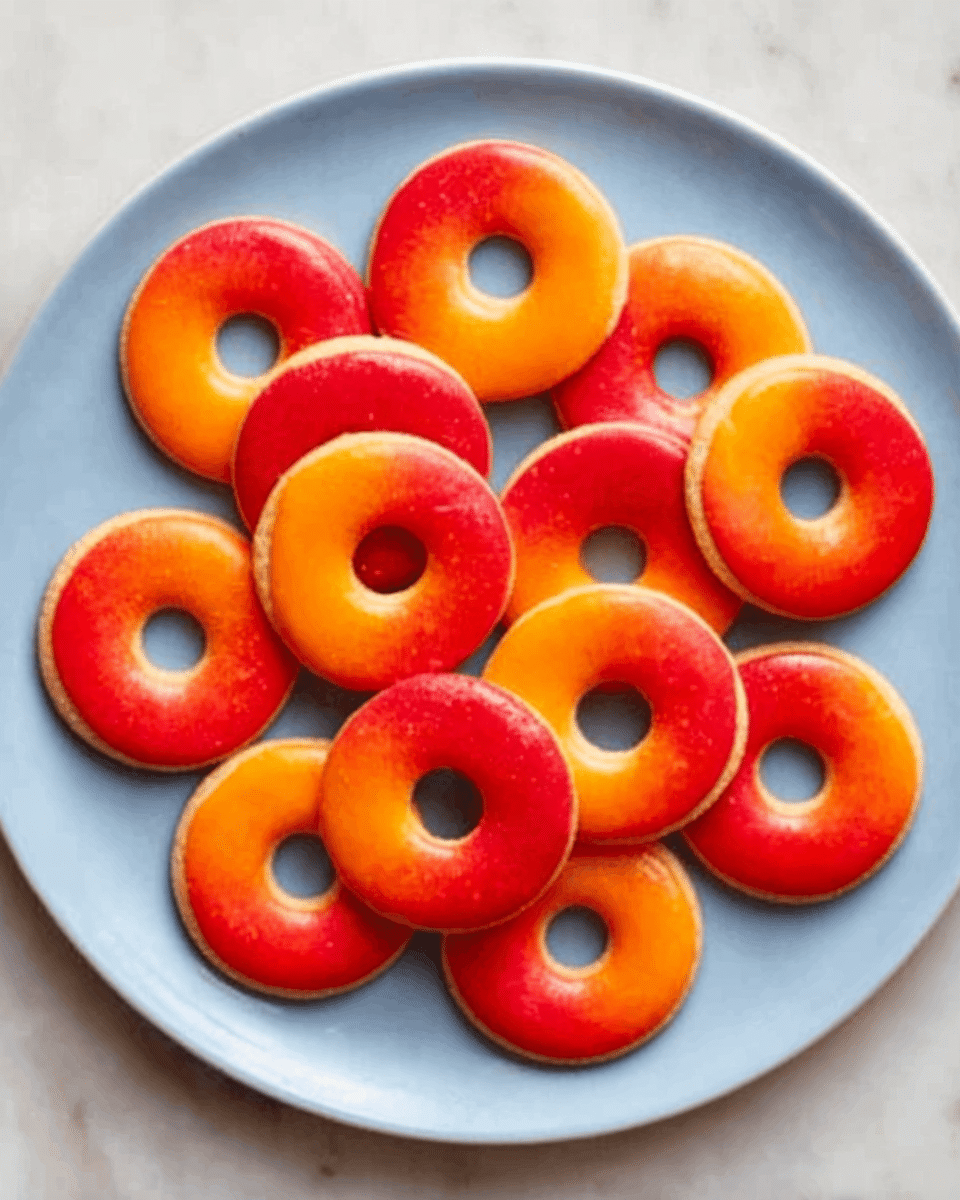
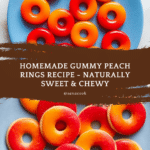
Homemade gummy peach rings are a delightful treat that combines fresh, fruity flavor with a chewy, satisfying texture. These gummies are made from real peaches and can be customized with natural coloring and flavors for a fun twist. Perfect for a snack or a homemade candy gift, they’re surprisingly easy to make at home.

Ingredients
- 180g fresh or frozen yellow peaches (about 2/3 cup blended)
- 2 envelopes (~7g each, ~14g total) unflavored powdered gelatin
- 2 tablespoons freshly squeezed lemon juice
- 2 tablespoons honey or agave
- Optional: 1 1/2 teaspoons tart cherry concentrate (or natural red food coloring)
- Optional: 1/4 cup sugar + 1 tablespoon (or less) citric acid for coating
Instructions
- Step 1: Blend the fruit until completely smooth. You may pass the purée through a fine mesh strainer to remove some of the peach skin, but this step is optional.
- Step 2: Bloom the gelatin by sprinkling it evenly over the lemon juice in a small container. Stir thoroughly until no dry grains remain and let it sit for 5 minutes.
- Step 3: In a small saucepan over low heat, combine the peach purée and honey or agave. Stir gently and warm the mixture until it reaches about 120˚F, just enough to melt the gelatin. Avoid boiling.
- Step 4: Add the bloomed gelatin and lemon juice mixture to the warmed purée. Stir until the gelatin is completely dissolved. Remove from heat and let cool for about 5 minutes.
- Step 5: Divide the mixture evenly into two bowls. Add tart cherry concentrate to one bowl for a red color and mix well. Lightly spray silicone molds with avocado oil or cooking spray. Using two spoons or droppers, fill each mold ring with the two different colored mixtures. Refrigerate for 1½ hours to set.
- Step 6: Remove the gummies from the molds and place them on a wire rack. Let them air dry for 8 hours or overnight until they shrink and develop a chewy texture.
- Step 7: Optional: Just before eating, toss the gummies in a mixture of sugar and citric acid for a tangy coating. Do not coat them before storing as the mixture draws out moisture and causes the gummies to dissolve.
Tips & Variations
- For a smoother texture, straining the peach purée before using can remove skins and pulp.
- Substitute honey with agave or maple syrup for a different sweetness profile.
- Add natural food coloring or other fruit concentrates to create a variety of gummy colors.
- Use silicone molds shaped like rings or any fun shapes for a personalized touch.
Storage
Store peeled gummies in an airtight container at room temperature for up to one week. Avoid refrigerating once air-dried, as moisture can affect their texture. If coated with sugar and citric acid, apply just before serving to prevent them from melting or becoming sticky.
How to Serve
Serve this delicious recipe with your favorite sides.
FAQs
Can I use other fruits instead of peaches?
Yes, you can substitute peaches with other soft fruits like mango, strawberries, or raspberries. Keep the quantity similar and adjust sweetness as needed.
Why do I need to avoid boiling the gelatin mixture?
Boiling gelatin can break down its setting properties, preventing the gummies from firming up properly. Heating just enough to dissolve the gelatin ensures the right texture.
PrintHomemade Gummy Peach Rings Recipe
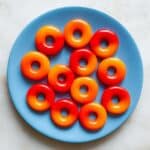
These Homemade Gummy Peach Rings are a delightful, chewy treat made from fresh or frozen peaches, lightly sweetened with honey or agave, and set perfectly with gelatin. They feature vibrant colors, including an optional tart cherry concentrate for a burst of red, and can be coated with a tangy sugar-citric acid mix for extra flavor and texture. Perfect for a healthier gummy candy alternative, these gummies are naturally gluten-free and can be customized to suit your taste.
- Prep Time: 15 minutes
- Cook Time: 10 minutes
- Total Time: 10 hours (including air drying)
- Yield: Approximately 30 gummy peach rings 1x
- Category: Dessert
- Method: Stovetop
- Cuisine: American
- Diet: Gluten Free
Ingredients
Fruit Base
- 180g fresh or frozen yellow peaches (about 2/3 cup blended)
Gelatin Mixture
- 2 envelopes (~7g each, ~14g total) unflavored powdered gelatin
- 2 tablespoons freshly squeezed lemon juice
Sweetener
- 2 tablespoons honey or agave
Optional Color and Coating
- 1 1/2 teaspoons tart cherry concentrate (or natural red food coloring)
- 1/4 cup sugar + 1 tablespoon (or less) citric acid for coating
Instructions
- Blend the Fruit: Add the fresh or frozen peaches to a blender and blend until completely smooth. For a smoother texture, optionally pass the blended fruit through a fine mesh strainer to remove some of the skin.
- Bloom the Gelatin: In a small container, evenly sprinkle the unflavored powdered gelatin over the freshly squeezed lemon juice. Stir thoroughly until no dry grains remain, then let it sit for 5 minutes to bloom.
- Heat the Fruit Purée: While the gelatin blooms, combine the fruit purée and honey or agave in a small saucepan over low heat. Stir continuously to combine. Heat until the mixture reaches just above 120°F to melt the gelatin without boiling, as boiling will denature the gelatin.
- Combine Purée and Gelatin: Add the bloomed gelatin and lemon juice mixture to the warmed fruit purée. Stir until the gelatin is fully dissolved. Remove the saucepan from heat and let it cool for about 5 minutes.
- Fill Your Molds: Divide the mixture equally into two small bowls. Stir the tart cherry concentrate into one bowl to create two different colored mixtures. Lightly spray your silicone molds with avocado oil or cooking spray. Using two spoons or droppers simultaneously, fill each ring mold with the two different colors to create distinct layers or halves. Transfer the filled molds into the refrigerator and chill for 1.5 hours to set.
- Air Dry the Gummies: Once set, carefully remove the gummy rings from the molds and place them on a wire rack. Let them air dry for 8 hours or overnight. This drying process allows the gummies to shrink, intensify in flavor, and develop the perfect chewy, gummy texture.
- Optional Coating: Just before serving, optionally coat the gummies in a mixture of sugar and citric acid to add a tangy, sweet crust. Note that coating too early can draw moisture from the gummies and cause them to dissolve, so it’s best to coat only the portions you plan to eat immediately.
Notes
- Passing blended fruit through a fine mesh strainer is optional but results in a smoother gummy.
- Do not boil the fruit purée after adding gelatin to prevent gelatin from losing its gelling properties.
- Use silicone molds for easy removal of gummies.
- Air drying is crucial for achieving the characteristic gummy texture and flavor concentration.
- Coat gummies with sugar and citric acid mixture only right before eating to avoid moisture-related disintegration.
- This recipe yields two colors of gummies if you use the tart cherry concentrate; otherwise, the gummies will be a single peach color.
Keywords: homemade gummy rings, peach gummies, gelatin candy, fruit gummies, healthy gummies, gluten free candy, natural gummies, peach candy