How to Make Dried Orange Slices Recipe
Introduction
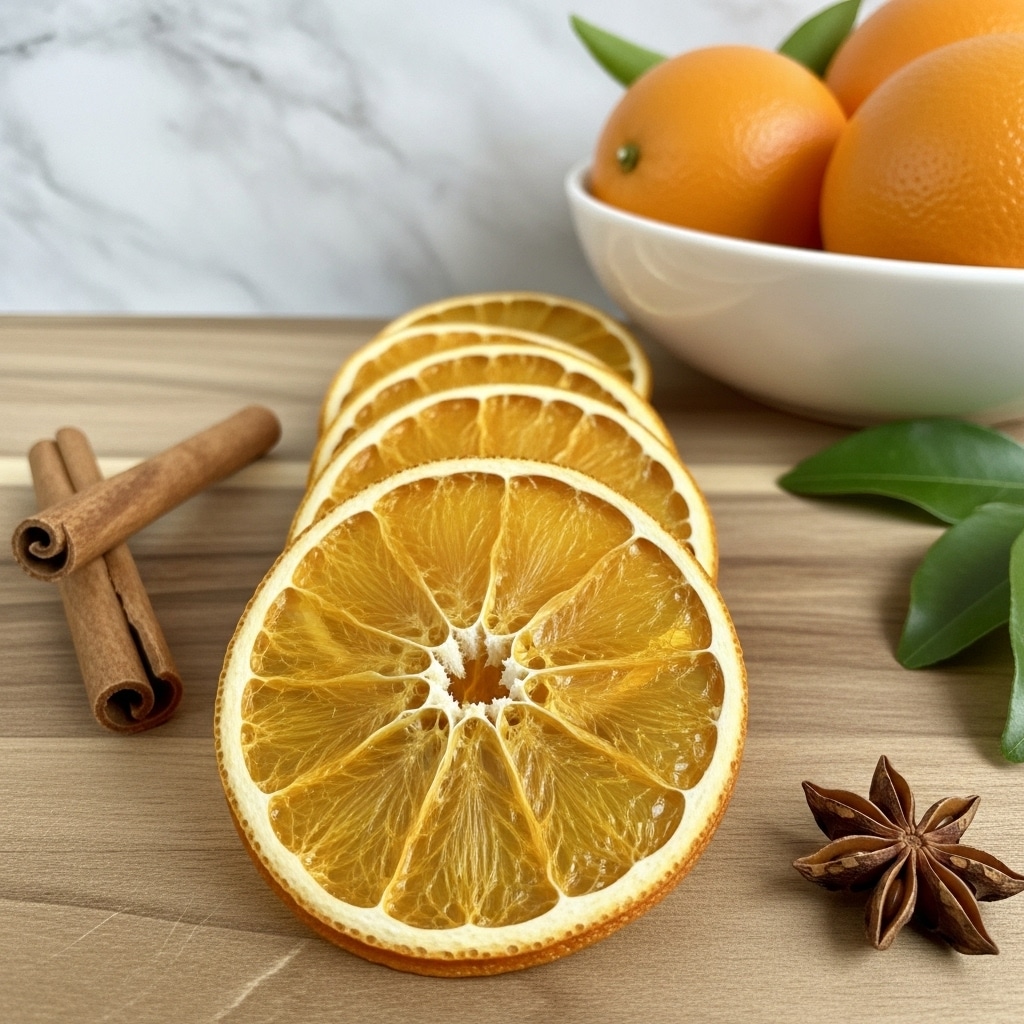
Dried orange slices are a delightful way to add bright citrus flavor and natural sweetness to your snacks, decorations, or recipes. Making them at home is simple and rewarding, allowing you to enjoy their aroma and taste any time of year.

Ingredients
- 2-3 fresh oranges
Instructions
- Step 1: Preheat your oven to 170-175°F (80°C).
- Step 2: Wash and dry the oranges thoroughly.
- Step 3: Slice the oranges into 1/4-inch to 3/8-inch thick rounds using a sharp knife or a mandolin for even slices.
- Step 4: Pat each orange slice dry with a paper towel to remove excess moisture.
- Step 5: Line a cookie sheet with parchment paper, then place a baking rack on top. Arrange the orange slices in a single layer on the rack, spacing them evenly to avoid sticking.
- Step 6: Place the tray in the oven and dehydrate the slices for about 6 hours, flipping them every hour to ensure even drying.
- Step 7: Remove the slices when the centers appear dry and no longer glossy. If needed, allow them to air-dry further to avoid overbaking.
Tips & Variations
- For added flavor, sprinkle a little cinnamon or cloves on the orange slices before drying.
- If your oven doesn’t go as low as 170°F, set it to the lowest temperature and leave the door slightly ajar to reduce heat.
- Dried orange slices make lovely garnishes for cocktails, holiday decorations, or flavorful tea infusions.
Storage
Store dried orange slices in an airtight container at room temperature for up to 2 weeks. For longer storage, keep them in the refrigerator or freezer to maintain freshness. When reheating for recipes, a quick toast in a dry skillet or oven can revive their aroma.
How to Serve
Serve this delicious recipe with your favorite sides.
FAQs
Can I use other citrus fruits for drying?
Yes, lemons, limes, and grapefruits can be dried using the same method, offering delightful variations in flavor and color.
How do I prevent orange slices from sticking during drying?
Using a baking rack to elevate the slices and spacing them evenly helps air circulate around each piece, reducing sticking and promoting even drying.
PrintHow to Make Dried Orange Slices Recipe

Learn how to make delicious dried orange slices at home with this simple oven dehydration method. Perfect for garnishes, snacks, or festive decorations, these dried slices retain their vibrant color and citrusy aroma with a slow and low-temperature drying process.
- Prep Time: 15 minutes
- Cook Time: 6 hours
- Total Time: 6 hours 15 minutes
- Yield: About 20-30 dried orange slices
- Category: Snack
- Method: Baking
- Cuisine: American
Ingredients
Ingredients
- Oranges – 2 to 3 medium-sized, washed and dried
Instructions
- Preheat the Oven: Set your oven to a low temperature between 170-175°F (80°C) to prepare for dehydrating the orange slices slowly and evenly.
- Prepare the Oranges: Thoroughly wash and dry the oranges to remove any dirt or residues. Slice them into 1/4-inch to 3/8-inch thick rounds, ideally using a mandolin for uniform thickness.
- Dry the Slices: Pat each slice with a paper towel to remove surface moisture. This helps to speed up the dehydration process and improve texture.
- Arrange on Baking Rack: Line a cookie sheet with parchment paper and place a baking rack on top. Lay out the orange slices in a single layer, spaced evenly to avoid sticking and ensure air circulation.
- Dehydrate in Oven: Place the rack with orange slices in the oven and bake for approximately 6 hours, flipping the slices every hour. This flipping ensures even drying and prevents sticking or burning.
- Check for Doneness: Orange slices are done when their centers look dry and matte rather than glossy. If needed, allow the slices to air dry further outside the oven rather than overbaking to preserve flavor and avoid bitterness.
Notes
- Use a mandolin slicer to get consistent slice thickness for even drying.
- Flipping slices hourly prevents burning and promotes uniform dehydration.
- Air drying after oven dehydration helps maintain flavor without overbaking.
- Store dried orange slices in an airtight container to preserve freshness.
- Dried orange slices make excellent garnishes for drinks, desserts, or holiday decorations.
Keywords: dried orange slices, oven dried oranges, citrus garnish, dried fruit snack, homemade dried oranges


