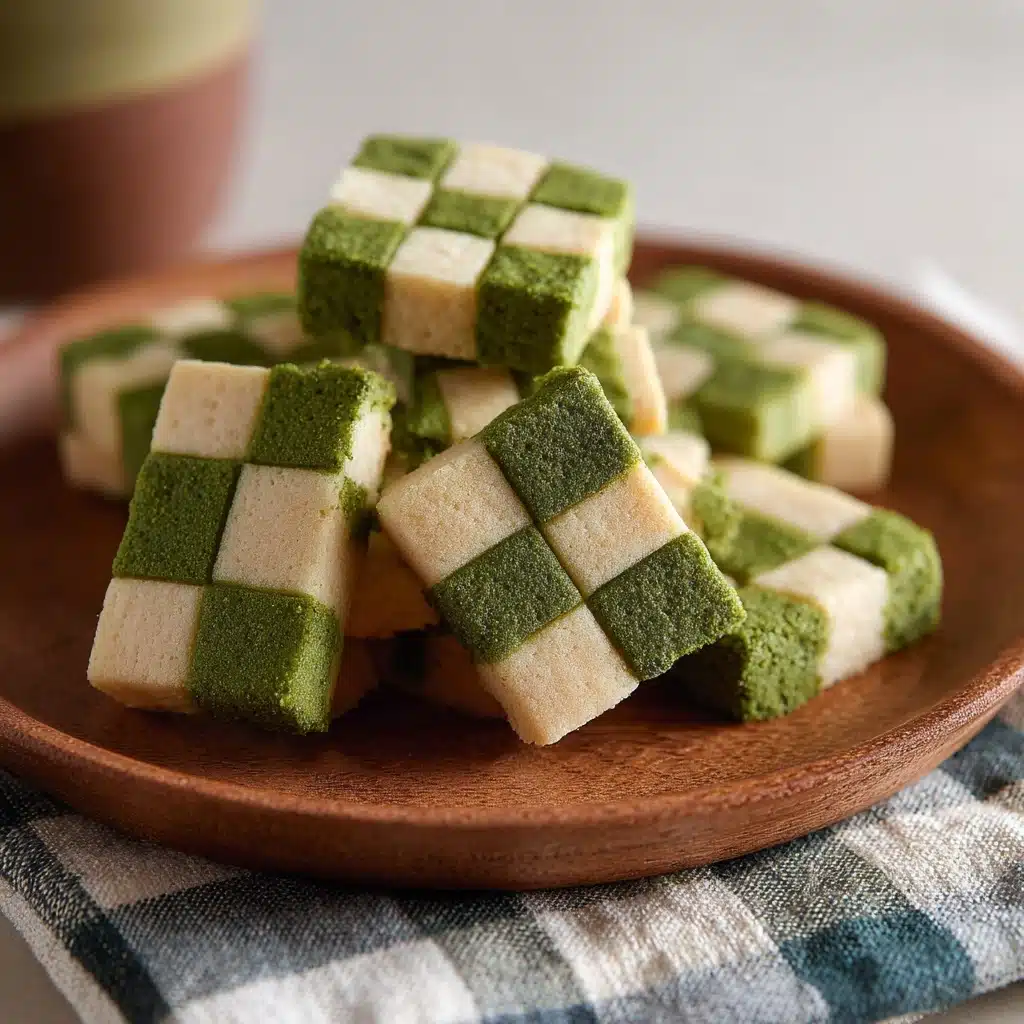
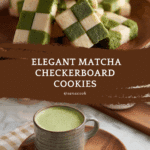
Matcha Checkerboard Cookies Recipe
If you’ve ever admired pretty bakery treats and wished you could re-create that magic at home, these Matcha Checkerboard Cookies are your invitation to do exactly that. But don’t let their eye-catching design fool you — these cookies are as fun to make as they are to eat! Marrying aromatic vanilla with earthy, vibrant matcha, each bite brings the best of both worlds in a tender, buttery shortbread. Whether you’re looking to impress friends, up your cookie game, or simply treat yourself, these cookies are both a recipe and an experience you’ll absolutely love.
Ingredients You’ll Need
Ingredients You’ll Need
The beauty of Matcha Checkerboard Cookies is in the way a few simple staples transform into something spectacular. Each ingredient plays a unique role: from rich butter that creates melt-in-your-mouth texture to ceremonial-grade matcha that infuses a stunning color and subtle complexity.
- All-purpose flour: Gives structure to the cookies and keeps them tender.
- Salt: Enhances sweetness and balances the flavors.
- Unsalted butter (softened): The foundation of that buttery, melt-away texture — be sure it’s at room temperature for easy mixing.
- Granulated sugar: Sweetens and helps develop those gently crisp edges.
- Large egg yolk: Adds richness and binds the dough for a delicate crumb.
- Vanilla extract: Elevates the vanilla half with warm, fragrant notes.
- Matcha powder (ceremonial-grade): Lends earthy flavor and captivating green color — choose ceremonial grade for the brightest, purest taste.
- Large egg white: Acts as the glue when assembling the checkerboard layers.
How to Make Matcha Checkerboard Cookies
Step 1: Prepare the Flour Mixture
Start by combining the flour and salt in a medium bowl. Give it a good stir to evenly distribute the salt — this helps season the cookies thoroughly. Set the mixture aside; you’ll come back to it soon.
Step 2: Cream the Butter and Sugar
In a large mixing bowl, beat your softened butter until it’s luxuriously creamy, using an electric hand mixer. Gradually add the granulated sugar and mix until fluffy and pale. Then, beat in the egg yolk and vanilla extract, creating a smooth, fragrant base for your dough.
Step 3: Combine the Wet and Dry Ingredients
With your mixer on low speed, add the flour and salt mixture to the butter mixture. Only mix until just combined — you might still see a few pockets of flour here and there. This ensures your cookies stay soft and tender instead of tough.
Step 4: Divide and Finish Each Dough
Split the dough evenly in half, putting one portion in a separate bowl. Finish mixing the plain dough just enough to eliminate any remaining flour streaks; this becomes your vanilla layer. Set this bowl aside while you prepare the matcha dough.
Step 5: Make the Matcha Dough
Sift the ceremonial-grade matcha powder into the second half of the dough. Mix gently with the hand mixer on low speed, just until the green is uniformly blended throughout. Your kitchen will smell amazing already!
Step 6: Shape and Roll Out Each Layer
Lay down a sheet of parchment on your counter and pat the matcha dough into a rough rectangle with your hands. A bench scraper or straight edge helps neaten the sides as you go. Cover with another sheet of parchment and roll it out evenly to about 1/4 inch thick — keeping those sides square will pay off later.
Step 7: Repeat with Vanilla Dough and Chill
Do the same with your vanilla dough on a separate piece of parchment so both layers are the same size and thickness. Layer each flat rectangle (still on parchment) onto a baking sheet and refrigerate for at least 1 hour, until firm enough to handle.
Step 8: Stack and Laminate the Dough
Take the chilled doughs from the fridge. Gently peel one rectangle off its parchment and lay it atop the other, keeping everything even. Cut the stack in half widthwise for even handling. Brush the top of one with egg white, stack the second half on top so colors alternate, and chill for 15 minutes for easier slicing.
Step 9: Cut and Build the Checkerboard Pattern
Slice the double-layered dough into 1/4-inch thick strips. You should get twelve strips, each with striking stripes of green and cream. Grab one strip, brush it lightly with egg white, then flip another strip so the colors are offset and stack it on top. Repeat until you have three blocks of four strips each, with colors alternating to create that fabulous checkerboard look. Chill again to firm up for neat slicing.
Step 10: Preheat and Prepare
Heat your oven to 350°F (180°C) and line a baking sheet with fresh parchment paper. Arrange your chilled dough blocks for easy slicing.
Step 11: Slice and Bake
Cut each block into 1/4-inch thick square cookies. Place them on the prepared baking sheet with about 1/2 inch space in between. They won’t spread much, so almost all can fit on one large baking sheet. Bake for 12-15 minutes, keeping an eye out for the bottoms to just barely turn golden brown.
Step 12: Cool and Enjoy
Let the cookies cool on the baking sheet for 5 minutes after baking (they’ll set up but remain tender), then transfer to a wire rack to cool completely. Now you’re ready to dazzle with your homemade Matcha Checkerboard Cookies!
How to Serve Matcha Checkerboard Cookies
Garnishes
Matcha Checkerboard Cookies already look like tiny works of art, but a scattering of edible flower petals, a dusting of powdered sugar, or even a light drizzle of white chocolate takes them over the top. For a little extra color, sprinkle sparingly with matcha powder right before serving for a truly “wow” finish.
Side Dishes
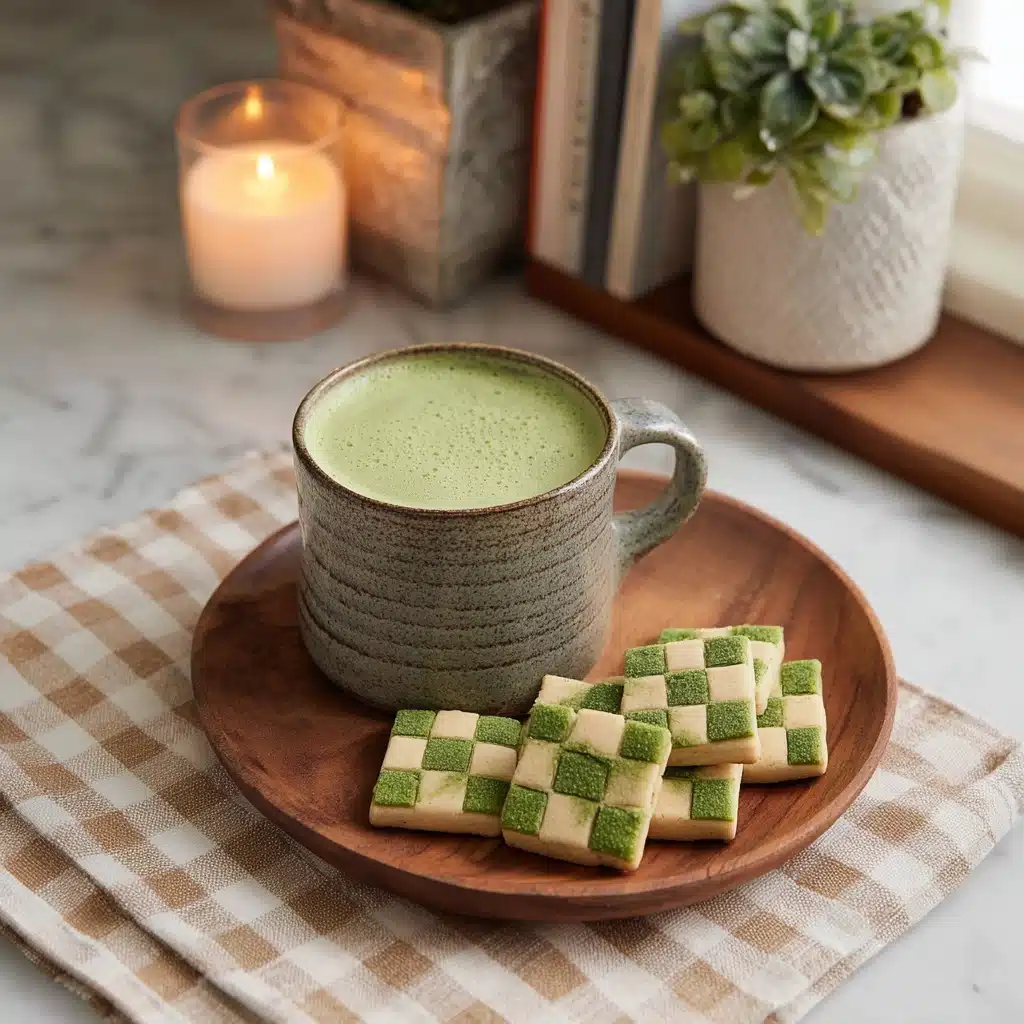
Balance the sweet, earthy flavors by serving your cookies with delicate accompaniments. A pot of jasmine or sencha green tea, a small bowl of bright berries, or even a scoop of vanilla ice cream makes for a delightful pairing, highlighting the Matcha Checkerboard Cookies without overwhelming their flavor.
Creative Ways to Present
Presentation is half the magic! Arrange your cookies in tight rows on a slender wooden cheeseboard for a minimalist vibe or stack them in clear cellophane bags and tie with a green ribbon for an irresistibly giftable homemade treat. For tea parties, try fanning them out on fine china with a few glossy matcha truffles alongside.
Make Ahead and Storage
Storing Leftovers
Store extra Matcha Checkerboard Cookies in an airtight container at room temperature. They’ll stay fresh for up to a week, retaining their beautiful shape and buttery texture (if they last that long!).
Freezing
You can freeze the cookies after baking, or even freeze the dough blocks before slicing and baking. For best flavor and color, wrap tightly in plastic wrap and keep in a freezer-safe bag or box. They thaw quickly at room temperature, making them perfect for make-ahead entertaining.
Reheating
If your cookies have lost that just-baked crispness, refresh them in a 300°F oven for four or five minutes. Let them cool briefly — they’ll be as delicious as if they just left the oven!
FAQs
Can I use culinary-grade matcha instead of ceremonial-grade matcha?
While ceremonial-grade matcha gives the brightest color and purest flavor, you can use high-quality culinary-grade matcha in a pinch. Just know the flavor may be a bit bolder and the green slightly less vibrant.
How do I get perfectly straight checkerboard layers?
Chilling the dough thoroughly at each step is key! Use a bench scraper or ruler to keep edges square as you roll and assemble. Take your time — patience pays off in beautiful, tidy Matcha Checkerboard Cookies.
Can I make the dough in advance?
Absolutely! Both the matcha and vanilla doughs can be made and refrigerated (well-wrapped) for up to 48 hours before assembling and baking. Let the dough sit at room temperature for about 10 minutes to soften slightly before rolling out.
What’s the best way to slice the cookies without them crumbling?
Always use a sharp knife and cut the dough when it’s cold and firm from the fridge. If it becomes too soft, just chill it again for a few minutes to make slicing clean and easy.
How thick should I slice the cookies?
Slicing to 1/4-inch thickness strikes the perfect balance between crisp edges and a melt-in-your-mouth center. Try to keep your slices uniform for even baking and that picture-perfect checkerboard effect.
Final Thoughts
Whether you’re a longtime matcha lover or a curious baker ready for a new adventure, Matcha Checkerboard Cookies deliver on beauty, flavor, and pure fun. They’re a little bit magic and a whole lot of delicious, so don’t hesitate — gather your ingredients, invite a friend, and let your kitchen fill with the joy of baking something special.
PrintMatcha Checkerboard Cookies Recipe
These Matcha Checkerboard Cookies are a delightful treat with a visually appealing checkerboard pattern. The combination of plain and matcha-flavored dough creates a unique and delicious flavor profile that is sure to impress your friends and family.
- Prep Time: 30 minutes
- Cook Time: 15 minutes
- Total Time: 2 hours
- Yield: 24 cookies 1x
- Category: Dessert
- Method: Baking
- Cuisine: Japanese
- Diet: Vegetarian
Ingredients
For the plain dough:
- 300 g all-purpose flour
- 1/2 teaspoon salt
- 230 g unsalted butter (softened to room temperature)
- 100 g granulated sugar
- 1 large egg yolk
- 1 tablespoon vanilla extract
For the matcha dough:
- 1 tablespoon matcha powder (ceremonial-grade)
- 1 large egg white
Instructions
- Flour mixture: In a medium bowl, stir together the flour and salt. Set aside.
- Butter mixture: In a large mixing bowl, use an electric hand mixer to beat the softened butter until very creamy. Add the granulated sugar and beat until creamy and fluffy. Add the egg yolk and vanilla extract and beat again on low speed until combined.
- Combine flour and butter mixtures: Add the flour mixture to the butter mixture and beat on low speed until just barely combined with some flour patches still remaining.
- Divide dough: Divide the dough in half and transfer one half to a separate mixing bowl. Finish mixing the dough in one of the bowls just until there are no more flour patches. This will be your plain/vanilla dough. Set aside.
- Matcha dough: To the other dough, sift in matcha powder. Use the hand mixer to mix on low speed until the matcha is evenly distributed throughout the dough.
- Shape dough: On your kitchen counter, lay down a sheet of parchment paper. Turn out the matcha dough onto the parchment paper. Use your hands to press it into a rectangular shape. Use a bench scraper or something with a straight edge to square off the sides of the rectangle as best you can.
- Roll out dough: Lay another sheet of parchment paper on top. Use a rolling pin to roll the dough out to about 1/4′ thick, keeping it in a rectangle shape as best you can. Occasionally, use a bench scraper to straighten the sides.
- Chill dough: On a separate sheet of parchment paper, repeat the previous two steps with the plain dough, making both sheets of dough roughly the same size and shape. Transfer both sheets of dough to the fridge to chill for at least 1 hour or until firm.
- Stack dough: Once chilled, peel one sheet of dough off the parchment paper and lay it directly on top of the other sheet of dough.
- Stack dough again: Use a knife to cut the stack of dough in half widthwise. Use a pastry brush to brush the top of one half with a thin layer of egg white. Pick up the other half of dough and lay it on top of the egg white layer so that the colors of dough are alternating. Pop this back in the fridge for 15 minutes to firm up again.
- Cut strips: Use a sharp knife to cut strips of dough that are about 1/4′ thick. Each long strip should have 4 stripes of alternating colors and you should end up with 12 strips.
- Create checkerboard pattern: Place one strip flat on your surface. Brush the top with a thin layer of egg white. Take another strip and flip it over so that the colors are the opposite of the ones below it. Place the strip down on top of the first strip, lining it up down the length of the strip, and gently press it down to seal together. Repeat until you have a stack of 4 strips. Repeat with the remaining strips. You should end up with 3 ‘blocks’ with 4 strips each. Chill the blocks in the fridge for another 15 minutes to firm up again.
- Prep: Preheat the oven to 350°F. Line a baking sheet with parchment paper. Set aside.
- Slice cookies: Use a sharp knife to slice each block into 1/4′ thick cookies. Place the cookies on your lined baking sheet, leaving about 1/2′ in between each cookie. They won’t spread much so they can be fairly close together.
- Bake: Bake cookies for 12-15 minutes or until the bottom edges of the cookies start to lightly brown.
- Cool: Let the cookies cool on the baking sheet for about 5 minutes before transferring them to a wire rack to cool completely.
Notes
- For a more intense matcha flavor, you can adjust the amount of matcha powder used in the recipe.
- Make sure to chill the dough adequately to make it easier to handle and cut into shapes.
- These cookies can be stored in an airtight container for up to a week.
Nutrition
- Serving Size: 1 cookie
- Calories: 120
- Sugar: 5g
- Sodium: 50mg
- Fat: 7g
- Saturated Fat: 4g
- Unsaturated Fat: 2g
- Trans Fat: 0g
- Carbohydrates: 13g
- Fiber: 0.5g
- Protein: 1g
- Cholesterol: 25mg
Keywords: Matcha, Checkerboard, Cookies, Dessert, Baking, Japanese, Homemade