Milk mochi Recipe
If you’re on the hunt for a treat that’s delicately chewy, softly sweet, and guaranteed to delight both the young and the young at heart, Milk mochi is your new go-to recipe. This Japanese-inspired delight boasts a pillowy texture thanks to glutinous rice flour and the creamy embrace of whole milk. Perfect for snacking, gifting, or even dressing up for a special dessert moment, Milk mochi is easy enough for beginners yet impressive every time. There’s something genuinely magical about the transformation of just a handful of everyday ingredients into an unforgettable chewy bite — and I’m thrilled to share every step with you!
Ingredients You’ll Need
The beauty of Milk mochi truly shines through its short and sweet list of ingredients. Each one plays a pivotal role: from the signature chewiness to the subtle richness, and even the golden color of each bite. Don’t be tempted to swap or skip; they all matter!
- Glutinous Rice Flour: This is the foundation for that classic chewy, stretchy texture that defines great Milk mochi (make sure you don’t use regular rice flour!).
- Cornstarch: Helps lighten the dough just a bit, giving the mochi pieces a delicately tender bite.
- Sugar: Adds a gentle sweetness, enhancing the milk’s flavor without making the mochi too rich.
- Corn Oil: Keeps the dough moist and supple, and prevents sticking as you knead and shape.
- Whole Milk: The secret to the luscious, creamy taste that makes Milk mochi stand out from other varieties.
- Cooked Glutinous Rice Flour (for dusting): Essential for rolling and cutting without sticking — it’s easily made by dry-toasting a little glutinous rice flour in a pan until it’s just cooked through, then cooling.
- Roasted Soybean Flour (Kinako): Adds a nutty, toasty flavor and a golden finish that makes the final presentation irresistible.
How to Make Milk mochi
Step 1: Mix Your Batter
Start by grabbing a roomy mixing bowl. Add glutinous rice flour, cornstarch, sugar, corn oil, and the whole milk. Use a sturdy spatula or a whisk to blend everything together until you have a super smooth batter with no streaks or lumps. At this point, if you want an extra silky texture, you can strain the mixture through a fine-mesh sieve — but this step is totally optional.
Step 2: Cook the Mochi Paste
Pour the batter into a non-stick pan — trust me, you’ll thank yourself later when cleanup is a breeze! Place the pan over low heat and stir continuously. The mixture will seem thin at first, but don’t worry; after a few minutes, you’ll notice it starting to thicken and pull away from the pan. Keep stirring and scraping the edges until it forms a shiny, sticky, and cohesive mass. It should feel bouncy and slightly sticky but not wet or loose.
Step 3: Knead Until Elastic
Let the mochi mixture cool down a bit to avoid burning your hands. Slip on disposable gloves (a lifesaver for sticky dough!), then knead the warm dough for about five full minutes. Stretch, fold, and pull until it feels smooth and elastic, almost like soft, pillowy bread dough.
Step 4: Shape and Cut
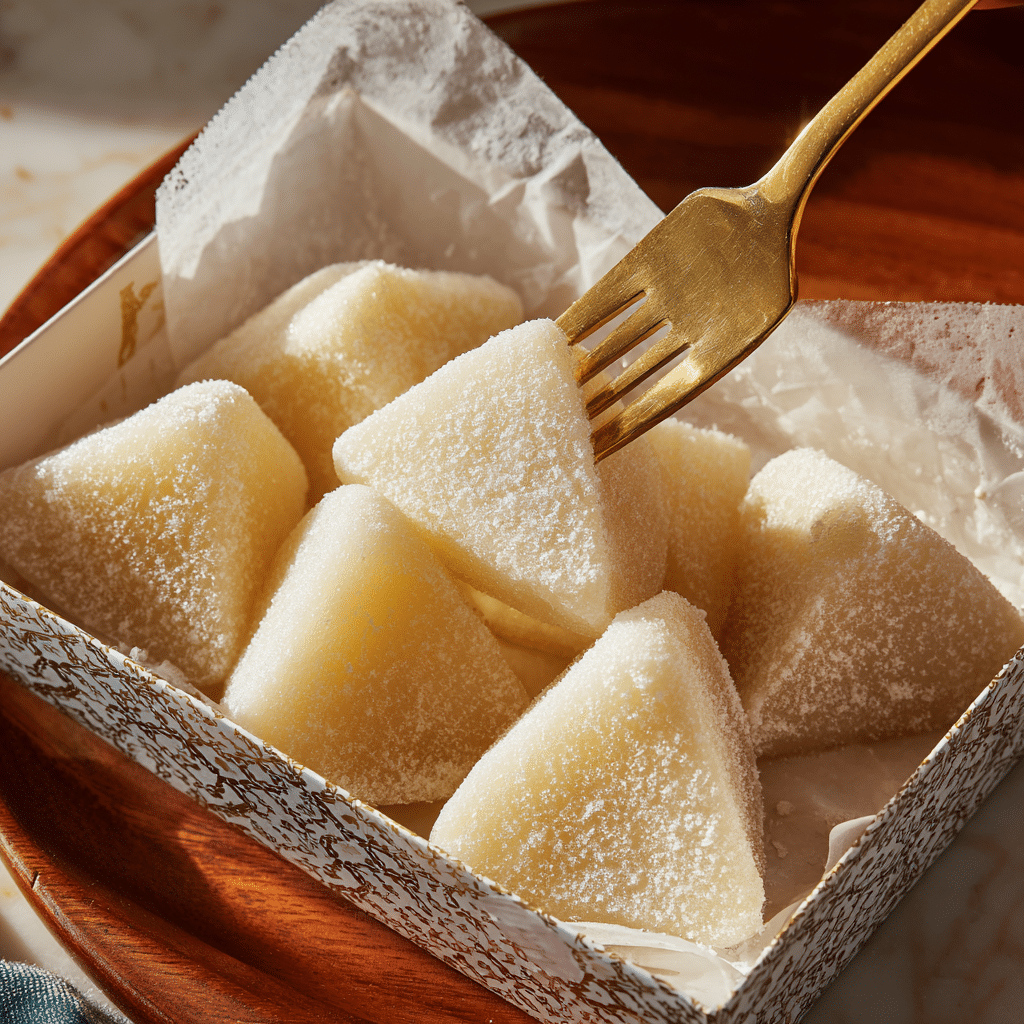
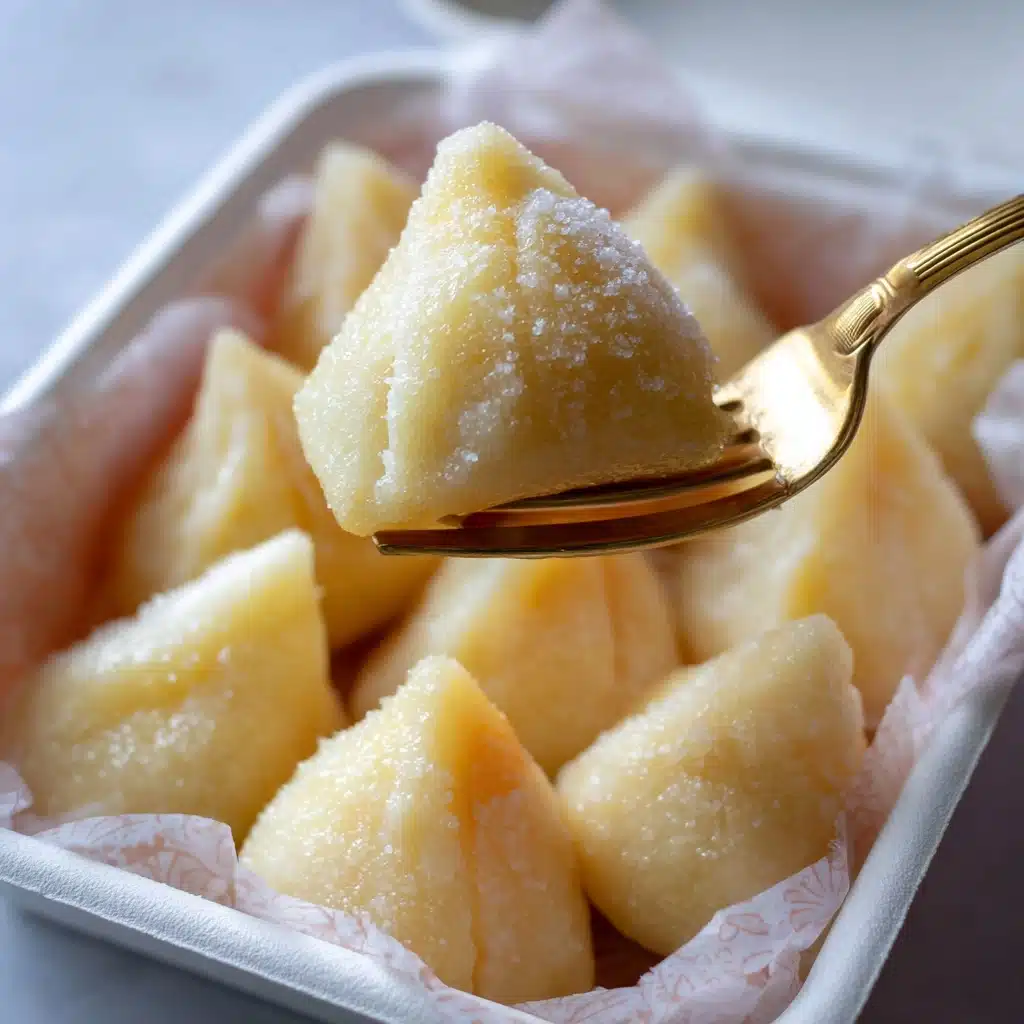
Now for the fun part! Roll your Milk mochi dough into a long, even strip on a clean surface dusted with cooked glutinous rice flour. This step prevents sticking and adds a delicate finish. Use a sharp knife or dough scraper to cut the log into triangles, or any other playful shapes that delight you. The mochi will be quite pliable, so get creative!
Step 5: Coat in Soybean Flour
Finish each piece by generously rolling them in roasted soybean flour. This final touch adds a rich, nutty aroma and keeps the pieces separate and easy to handle. Your Milk mochi is now ready to enjoy — but trust me, giving it just a few more minutes to cool rewards you with the best texture.
How to Serve Milk mochi
Garnishes
Milk mochi truly shines with a light dusting of roasted soybean flour, but if you’re feeling a little extra, add a sprinkle of matcha powder or a dusting of powdered sugar for color contrast. Chopped nuts, toasted sesame seeds, or even a drizzle of sweetened condensed milk can elevate your presentation and flavor profile beautifully.
Side Dishes
This treat pairs wonderfully with hot green tea, jasmine tea, or even iced milk tea for a cool, creamy complement to each chewy bite. For a delightful dessert spread, serve Milk mochi alongside fresh seasonal fruit or a scoop of vanilla or black sesame ice cream.
Creative Ways to Present
Milk mochi’s soft, pastel look makes it a sweet choice for parties: try layering the pieces neatly in bento-style boxes, or arrange them on a platter with little toothpicks for easy sharing. For a fun twist, stack them in mini “towers” with fresh berries or serve on skewers for a playful, modern touch.
Make Ahead and Storage
Storing Leftovers
Milk mochi keeps best when stored in an airtight container at room temperature for up to a day, especially if you plan to enjoy that chewy, fresh-made texture. If your home is particularly warm or humid, place the container in the fridge to extend freshness for up to three days. Remember, mochi can dry out easily, so be sure they’re well-covered and add a layer of plastic wrap directly over the surface if you like.
Freezing
Yes, you can freeze Milk mochi! Lay the pieces in a single layer on a baking sheet, freeze until firm, then transfer to a zip-top bag or airtight container. They’ll keep for up to a month. To enjoy, let them thaw at room temperature — avoid microwaving, as it can affect their tender, stretchy texture.
Reheating
If your mochi has firmed up a bit in the fridge or after freezing, revive its softness by letting it come to room temperature or gently steaming for just one to two minutes. Take care not to overheat, or you’ll lose the lovely chew and risk making them gooey.
FAQs
What’s the best way to prevent Milk mochi from sticking to my hands?
Dust your hands and work surface with cooked glutinous rice flour, and consider wearing disposable gloves for kneading and shaping. Keeping things cool and using a light touch makes all the difference.
Can I substitute regular milk or plant-based milk for whole milk?
Whole milk gives the mochi its signature creamy richness, but yes, you can swap in 2% milk or unsweetened plant-based milks such as oat or soy. Just note the texture may be a bit less luscious and slightly less springy.
Is there a way to make this recipe without pan-cooking?
If you’d rather not use a pan, you can steam the mixture instead — simply pour the batter into a heatproof dish, cover, and steam for about 20–25 minutes, stirring halfway through for even cooking. The result is just as chewy and delicious!
Why is my Milk mochi dough lumpy or tough?
This usually happens if the batter isn’t thoroughly combined before cooking or if it’s cooked over too high heat. Whisk the batter until completely smooth, and always cook low and slow, stirring gently and patiently.
Can I add flavors or mix-ins to Milk mochi?
Absolutely! Try adding matcha powder, a few drops of vanilla, or even a swirl of fruit puree to the batter. Finely chopped nuts or dried fruit are tasty additions, but stick to small amounts so you don’t weigh down the dough.
Final Thoughts
If you’re hoping to bring a little sweetness and surprise to your kitchen, making Milk mochi at home is pure joy. With its irresistible texture and gentle flavor, it’s the kind of snack that disappears in a flash — so don’t be surprised if you find yourself making it on repeat. Give this recipe a whirl, and share the delicious fun with your favorite people!
PrintMilk mochi Recipe

Enjoy the delightful chewiness of Milk Mochi, a sweet and satisfying treat perfect for any occasion. Made with simple ingredients, this recipe yields soft, pillowy mochi bites that are sure to please your taste buds.
- Prep Time: 15 minutes
- Cook Time: 20 minutes
- Total Time: 35 minutes
- Yield: Approximately 20 pieces 1x
- Category: Dessert
- Method: Pan-frying
- Cuisine: Asian
- Diet: Vegetarian
Ingredients
Dough:
- 150 g glutinous rice flour
- 30 g cornstarch
- 25 g sugar
- 20 g corn oil
- 290 g whole milk
Instructions
- Combine Ingredients: In a large bowl, mix glutinous rice flour, cornstarch, sugar, corn oil, and whole milk until well combined.
- Strain (Optional): Strain the mixture.
- Cook Mixture: Pour the mixture into a non-stick pan and cook over low heat until a cohesive mass forms.
- Cool and Knead: Remove from heat, cool, then knead the dough until elastic.
- Shape Mochi: Roll the dough, cut into desired shapes, and coat with roasted soybean flour.
Notes
- You can customize the shapes of the mochi to add a personal touch.
- Experiment with different coatings for varied flavors.
Nutrition
- Serving Size: 1 piece
- Calories: 80 kcal
- Sugar: 5g
- Sodium: 15mg
- Fat: 2g
- Saturated Fat: 1g
- Unsaturated Fat: 1g
- Trans Fat: 0g
- Carbohydrates: 14g
- Fiber: 0.5g
- Protein: 2g
- Cholesterol: 5mg
Keywords: Milk Mochi, Mochi Recipe, Asian Dessert, Sweet Treat

