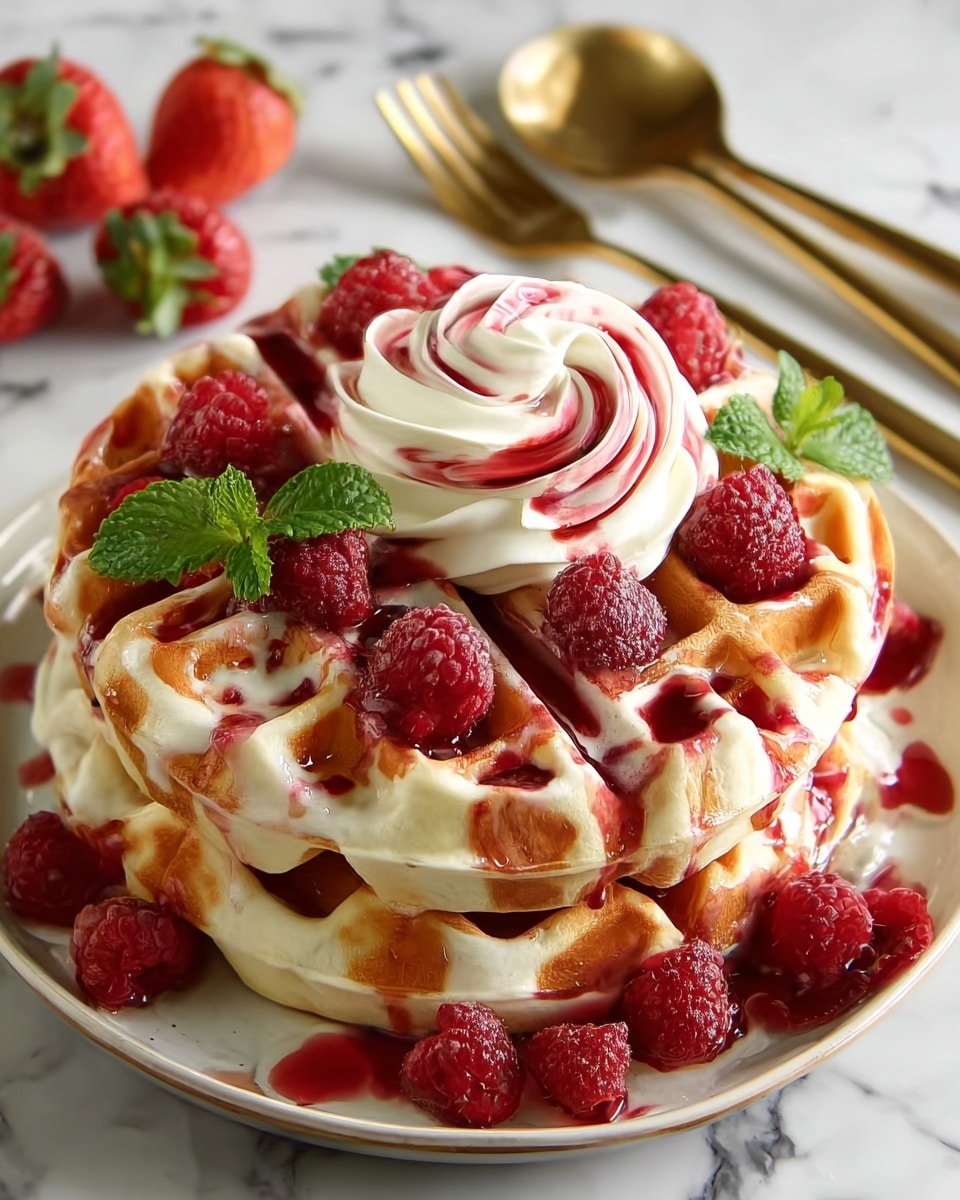
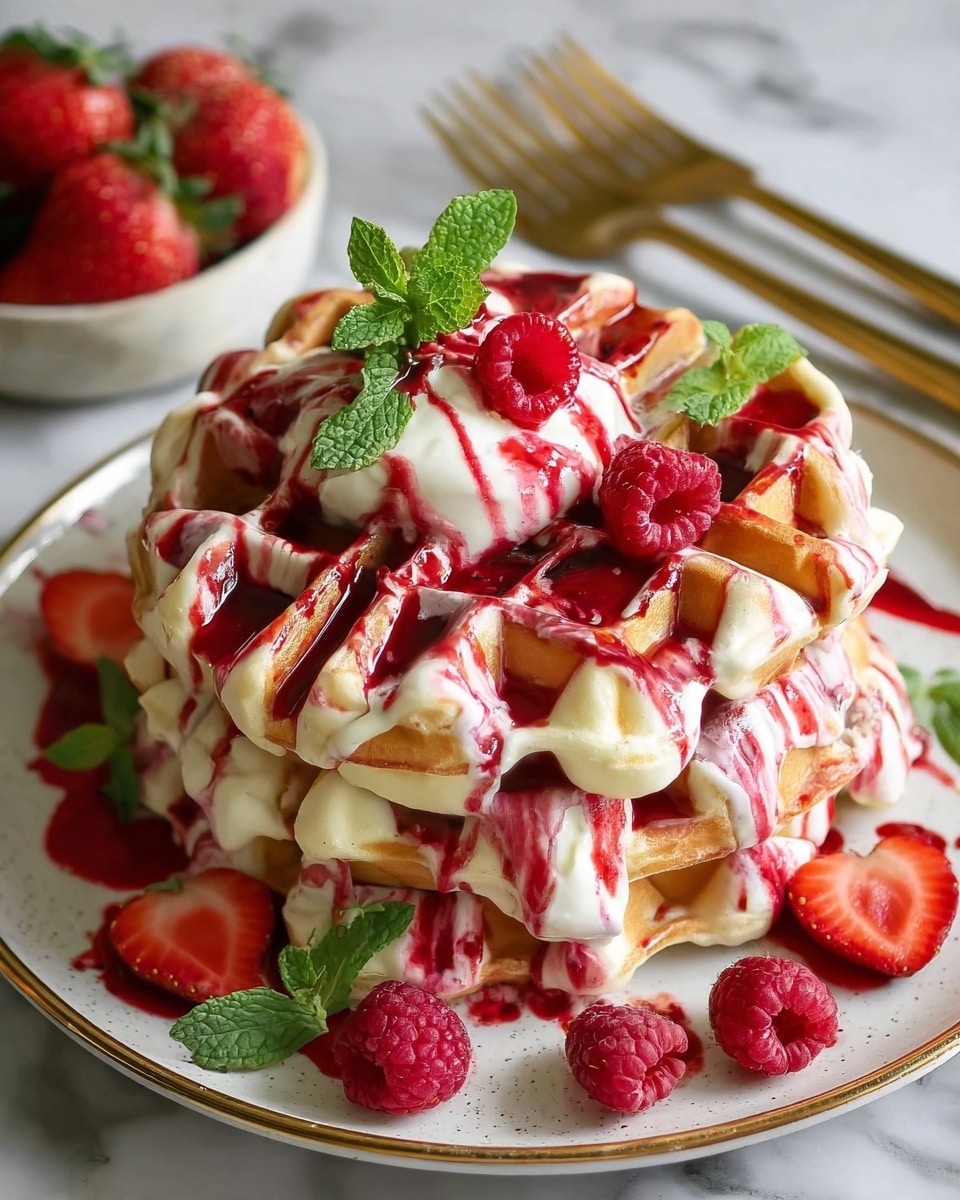
Red Velvet Marble Waffles: A Delightful Breakfast Treat Recipe
Introduction
These Red Velvet Marble Waffles combine the classic richness of buttermilk waffles with a vibrant red velvet twist. Perfectly tender with a beautiful marbled effect, they make a delightful breakfast or brunch treat that’s as fun to make as it is to eat.
Ingredients
- For the Classic Waffle Batter:
- 1 1/2 cups all-purpose flour
- 1 tablespoon sugar
- 1 teaspoon baking powder
- 1/2 teaspoon baking soda
- 1/4 teaspoon salt
- 1 cup buttermilk
- 2 large eggs
- 1/4 cup melted butter
- 1 teaspoon vanilla extract
- For the Red Velvet Batter:
- 1 cup all-purpose flour
- 2 tablespoons cocoa powder
- 1/4 cup sugar
- 1 teaspoon baking powder
- 1/2 teaspoon baking soda
- 1/4 teaspoon salt
- 3/4 cup buttermilk
- 1 large egg
- 1/4 cup melted butter
- 1 teaspoon vanilla extract
- 1 tablespoon red food coloring
Instructions
- Step 1: Prepare the Classic Waffle Batter by whisking together the flour, sugar, baking powder, baking soda, and salt in one bowl. In another bowl, whisk the buttermilk, eggs, melted butter, and vanilla extract together. Combine the wet ingredients with the dry and mix until just combined—avoid overmixing.
- Step 2: Prepare the Red Velvet Batter by whisking flour, cocoa powder, sugar, baking powder, baking soda, and salt in a separate bowl. In another bowl, whisk the buttermilk, egg, melted butter, vanilla extract, and red food coloring. Pour the wet ingredients into the dry and mix until just combined.
- Step 3: Preheat your waffle iron according to the manufacturer’s instructions and lightly grease it to prevent sticking.
- Step 4: To create the marbled effect, pour a small amount of the classic batter onto the hot waffle iron, then add a small amount of the red velvet batter. Use a toothpick or knife to gently swirl the two batters together.
- Step 5: Close the waffle iron and cook the waffles until golden brown and cooked through, following your waffle iron’s recommended cooking time.
- Step 6: Serve the waffles warm with toppings like whipped cream, fresh berries, or maple syrup for a delicious start to your day.
Tips & Variations
- For a more intense red velvet flavor, add a teaspoon of white vinegar or substitute a bit of the buttermilk with yogurt.
- Try using natural beet juice instead of red food coloring for a natural alternative.
- Serve with cream cheese frosting drizzle to enhance the red velvet taste.
Storage
Store leftover waffles in an airtight container in the refrigerator for up to 3 days. To reheat, toast them in a toaster or warm in the oven until crisp. They can also be frozen for up to 1 month; simply reheat from frozen using a toaster or oven.
How to Serve
Serve this delicious recipe with your favorite sides.
FAQs
Can I make the batter ahead of time?
It’s best to prepare the batter fresh for fluffier waffles, but you can make it a few hours ahead and keep it covered in the refrigerator. Give it a gentle stir before cooking.
What if I don’t have buttermilk?
You can make a buttermilk substitute by adding 1 tablespoon of lemon juice or white vinegar to 1 cup of milk. Let it sit for 5 minutes before using.
PrintRed Velvet Marble Waffles: A Delightful Breakfast Treat Recipe

Red Velvet Marble Waffles combine the classic fluffy waffle texture with the rich, vibrant flavors of red velvet cake, creating a delightful marbled breakfast treat that’s perfect for any occasion.
- Prep Time: 15 minutes
- Cook Time: 15 minutes
- Total Time: 30 minutes
- Yield: 6–8 waffles 1x
- Category: Breakfast
- Method: Stovetop
- Cuisine: American
- Diet: Vegetarian
Ingredients
Classic Waffle Batter:
- 1 1/2 cups all-purpose flour
- 1 tablespoon sugar
- 1 teaspoon baking powder
- 1/2 teaspoon baking soda
- 1/4 teaspoon salt
- 1 cup buttermilk
- 2 large eggs
- 1/4 cup melted butter
- 1 teaspoon vanilla extract
Red Velvet Batter:
- 1 cup all-purpose flour
- 2 tablespoons cocoa powder
- 1/4 cup sugar
- 1 teaspoon baking powder
- 1/2 teaspoon baking soda
- 1/4 teaspoon salt
- 3/4 cup buttermilk
- 1 large egg
- 1/4 cup melted butter
- 1 teaspoon vanilla extract
- 1 tablespoon red food coloring
Instructions
- Prepare the Classic Waffle Batter: In a mixing bowl, whisk together the flour, sugar, baking powder, baking soda, and salt. In a separate bowl, whisk together the buttermilk, eggs, melted butter, and vanilla extract. Combine the wet ingredients with the dry ingredients and mix until just combined, taking care not to overmix to maintain waffle lightness.
- Prepare the Red Velvet Batter: In another mixing bowl, whisk together the flour, cocoa powder, sugar, baking powder, baking soda, and salt. In a separate bowl, whisk together the buttermilk, egg, melted butter, vanilla extract, and red food coloring. Pour the wet ingredients into the dry ingredients and mix until just combined without overmixing.
- Preheat the Waffle Iron: Preheat your waffle iron according to the manufacturer’s instructions to ensure it reaches the optimal cooking temperature for crispy and fluffy waffles.
- Create the Marbled Effect: Lightly grease the waffle iron to prevent sticking. Pour a small amount of classic waffle batter onto the center of the iron, followed by a small amount of red velvet batter. Using a toothpick or knife, gently swirl the two batters together to create an attractive marbled pattern.
- Cook the Waffles: Close the waffle iron and cook the waffles according to the manufacturer’s recommended time until they turn golden brown and are cooked through, typically about 4-6 minutes.
- Serve: Carefully remove the waffles and serve warm. Top with your favorite accompaniments such as whipped cream, fresh berries, or maple syrup for an indulgent breakfast treat.
Notes
- Do not overmix the batter to ensure waffles stay light and fluffy.
- If a waffle iron is not available, a stovetop waffle maker or oven waffle pan can be used as an alternative.
- Adjust the amount of red food coloring based on the desired intensity of the red velvet color.
- Use fresh buttermilk for best flavor and texture.
- Waffles are best enjoyed immediately but can be kept warm in a low oven (200°F) for up to 30 minutes.
Keywords: Red Velvet, Waffles, Marble Waffles, Breakfast, Dessert Waffles, Sweet Waffles, Red Velvet Cake, Marbled Batter

