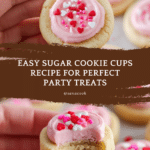
Sugar Cookie Cups with Vanilla Frosting and Sprinkles Recipe
Introduction
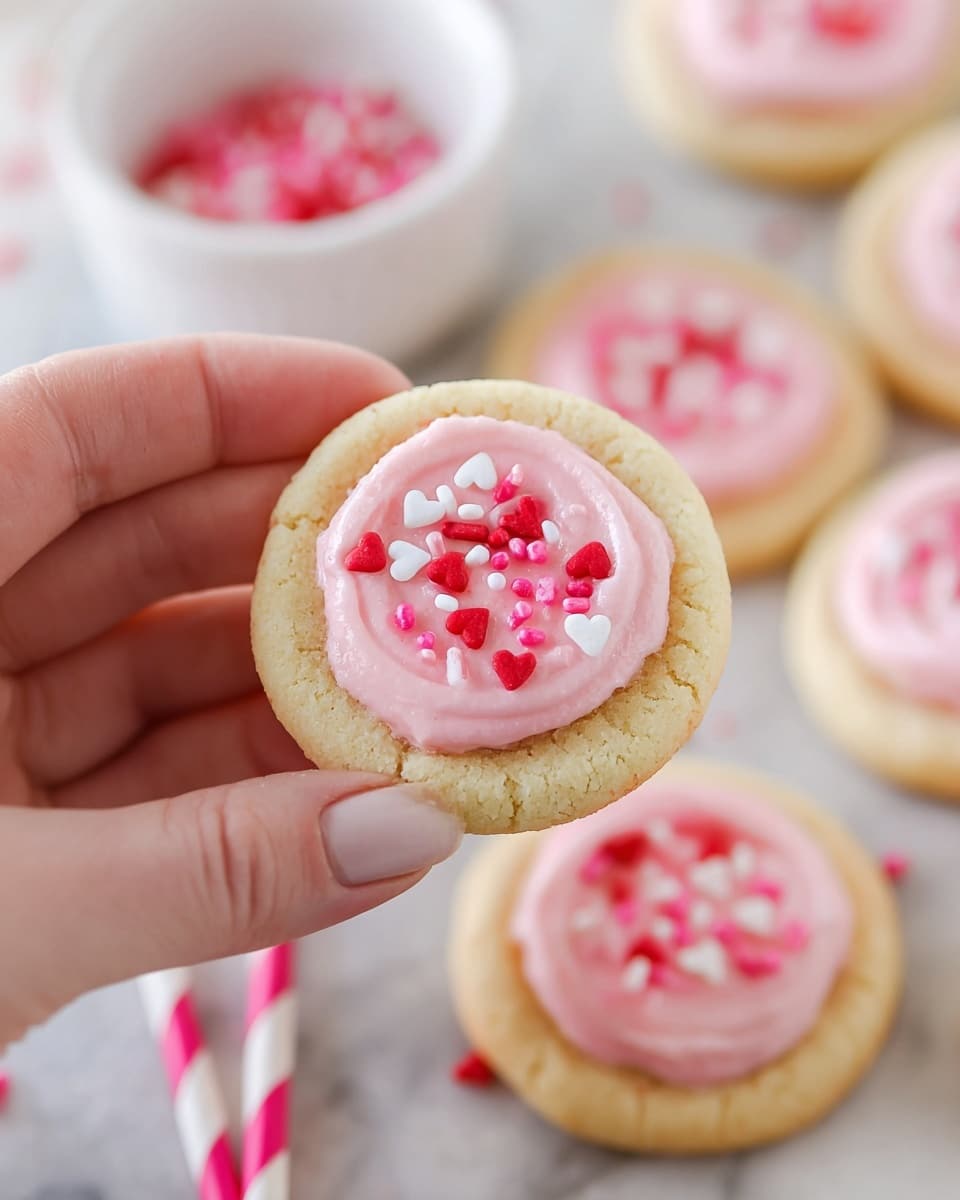
Sugar Cookie Cups are fun, bite-sized treats perfect for any occasion. These soft cookies shaped like little cups are filled with creamy frosting, making them both delightful and easy to eat. They’re a great way to enjoy classic sugar cookies with a playful twist.
Ingredients
- 3/4 cup salted butter (softened)
- 3/4 cup sugar
- 1 egg
- 1 teaspoon vanilla extract
- 1/4 teaspoon almond extract (optional)
- 1/2 teaspoon baking powder
- 2 cups all-purpose flour
- 1/4 cup salted butter (softened, for frosting)
- 1 1/3 cups powdered sugar
- 1/2 teaspoon vanilla extract (for frosting)
- 1 tablespoon milk or heavy whipping cream
- Food coloring (optional, for frosting)
- Sprinkles (optional, for decorating)
Instructions
- Step 1: Preheat your oven to 350°F (175°C) and grease 36 mini muffin cups with cooking spray.
- Step 2: In the bowl of a stand mixer, beat together 3/4 cup softened butter and sugar until well combined and fluffy.
- Step 3: Add the egg, vanilla extract, and almond extract if using, mixing until incorporated.
- Step 4: Stir in the baking powder and flour until just combined to form the dough.
- Step 5: Scoop the dough by rounded tablespoons (about 1 inch diameter) and roll into balls. Place one ball into each muffin cup and flatten gently with your fingers—no need to shape a cup yet.
- Step 6: Bake for about 10 minutes or until the cookies are golden brown around the edges.
- Step 7: Immediately after removing from the oven, press the center of each cookie with the cap of a bottle (such as a vanilla extract bottle) to form a cup shape.
- Step 8: Let the cookies cool in the pan for 5 minutes before transferring them to a wire rack to cool completely.
- Step 9: To make the frosting, beat 1/4 cup softened butter until smooth in a stand mixer bowl. Gradually add powdered sugar and vanilla extract, mixing to combine.
- Step 10: Add the milk or cream and beat until smooth, adding a little more milk if needed to reach your desired consistency. Stir in food coloring if you want to add color.
- Step 11: Fill a piping bag or resealable baggie with the frosting and pipe it into each cooled cookie cup.
- Step 12: Decorate the tops with sprinkles if desired, and serve.
Tips & Variations
- For a citrus twist, add a teaspoon of lemon or orange zest to the dough for extra flavor.
- Use different food coloring to make festive frosting for holidays or parties.
- If you don’t have a piping bag, a small spoon or plastic bag with a corner cut off will work fine for frosting.
Storage
Store the cookie cups in an airtight container at room temperature for up to 3 days. If your kitchen is warm, keep them refrigerated and bring to room temperature before serving. The frosting may firm up slightly when chilled, so a few minutes out of the fridge will soften it again.
How to Serve

Serve this delicious recipe with your favorite sides.
FAQs
Can I make the dough ahead of time?
Yes, you can prepare the dough and refrigerate it for up to 24 hours before baking. Let it sit at room temperature for a few minutes before scooping and baking.
Can I use gluten-free flour in this recipe?
Absolutely! Substitute with your favorite gluten-free all-purpose flour blend. You may need to adjust the amount slightly to get the right dough consistency.
PrintSugar Cookie Cups with Vanilla Frosting and Sprinkles Recipe

These delightful Sugar Cookie Cups are a fun twist on classic sugar cookies, baked into mini muffin tins to create perfect little cups filled with creamy frosting. Soft, buttery cookie bases with a smooth, sweet frosting make for a charming and delicious treat ideal for parties, holiday gatherings, or a special sweet snack.
- Prep Time: 15 minutes
- Cook Time: 10 minutes
- Total Time: 25 minutes
- Yield: 36 mini cookie cups 1x
- Category: Dessert
- Method: Baking
- Cuisine: American
- Diet: Vegetarian
Ingredients
For the Sugar Cookie Cups
- 3/4 cup salted butter, softened
- 3/4 cup sugar
- 1 egg
- 1 teaspoon vanilla extract
- 1/4 teaspoon almond extract (optional)
- 1/2 teaspoon baking powder
- 2 cups all-purpose flour
For the Frosting
- 1/4 cup salted butter, softened
- 1 1/3 cups powdered sugar
- 1/2 teaspoon vanilla extract
- 1 tablespoon milk or heavy whipping cream (plus up to 1 additional tablespoon as needed)
- Food coloring (optional)
- Sprinkles (optional)
Instructions
- Preheat and prepare muffin tin: Preheat your oven to 350°F (175°C) and generously grease 36 mini muffin cups with cooking spray to prevent sticking.
- Make the cookie dough: In the bowl of a stand mixer, beat 3/4 cup softened butter and sugar together until well combined and creamy. Then stir in the egg, vanilla extract, and almond extract if using. Add baking powder and flour and mix until a cohesive dough forms.
- Shape cookies in muffin cups: Using rounded tablespoons of dough (about 1 inch diameter), roll into balls and place one ball in each muffin tin cup. Flatten each ball gently with your fingers; there’s no need to form a deep cup at this point.
- Bake cookies: Bake for about 10 minutes or until the edges turn a light golden brown.
- Create cookie cups: Immediately after baking, press the cap of a bottle (such as a vanilla extract bottle cap) into the center of each cookie to form a shallow cup shape.
- Cool the cookie cups: Let the cookies cool in the pan for 5 minutes, then transfer them to a wire rack to cool completely.
- Prepare frosting: In a clean stand mixer bowl, beat 1/4 cup softened butter until smooth. Add powdered sugar and vanilla extract and mix to combine.
- Adjust frosting consistency: Add 1 tablespoon of milk or heavy cream and beat until smooth. Add an additional 1/2 to 1 tablespoon of milk if needed to achieve desired piping consistency. Optionally, stir in food coloring for a festive appearance.
- Fill cookie cups: Spoon frosting into a piping bag or a resealable baggie with the tip cut off and pipe the frosting into each cooled cookie cup.
- Decorate: Top each frosted cookie cup with sprinkles if desired for added color and texture.
Notes
- Ensure the cookies are slightly warm when pressing the bottle cap to form the cups, as this makes shaping easier.
- If you don’t have a stand mixer, a hand mixer or sturdy spoon can be used, though mixing times may vary.
- Feel free to use food coloring to customize the frosting colors for different occasions.
- These cookie cups can be stored in an airtight container at room temperature for up to 3 days.
- For a gluten-free version, substitute the all-purpose flour with a gluten-free flour blend that measures 1:1.
Keywords: sugar cookie cups, mini cookie cups, cookie cups with frosting, baked sugar cookies, easy cookie recipe, party desserts