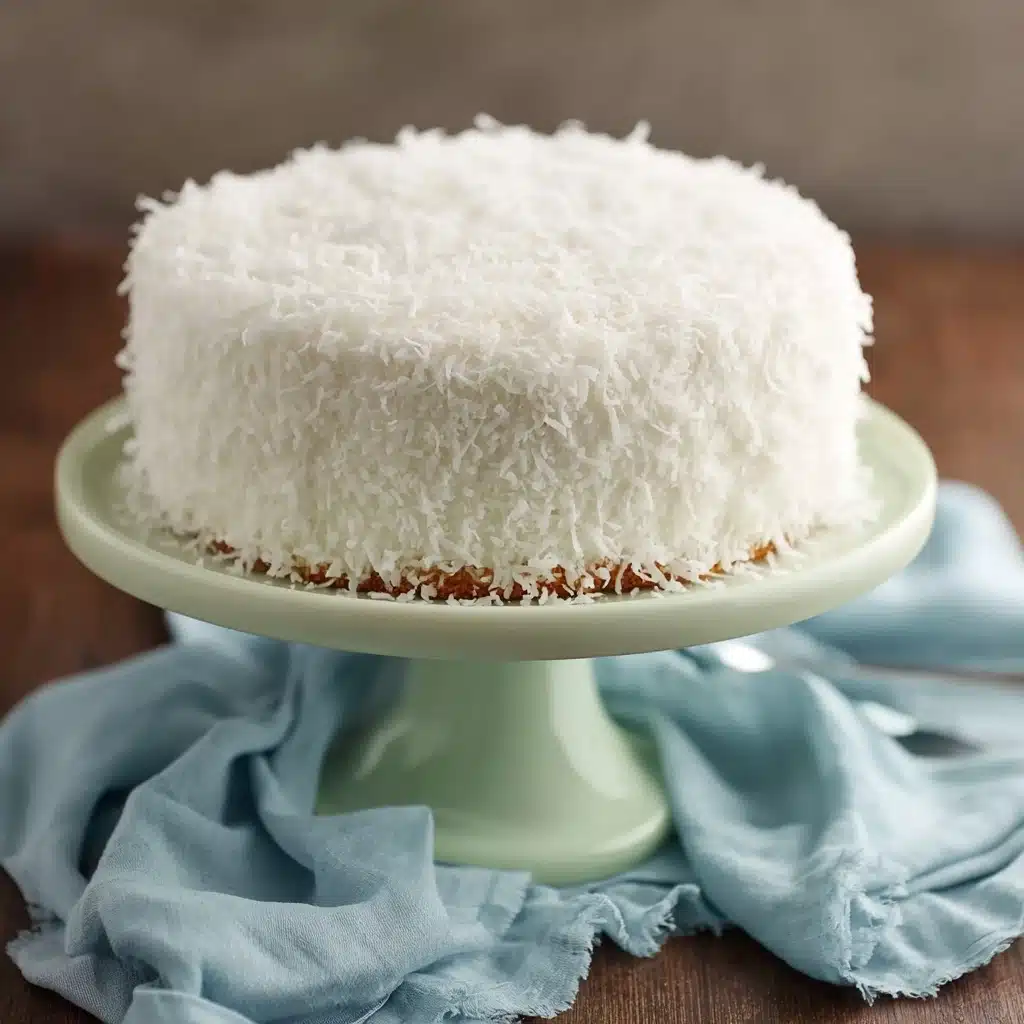
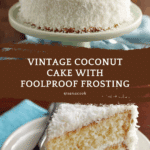
Tasty Old-Fashioned Coconut Cake Recipe
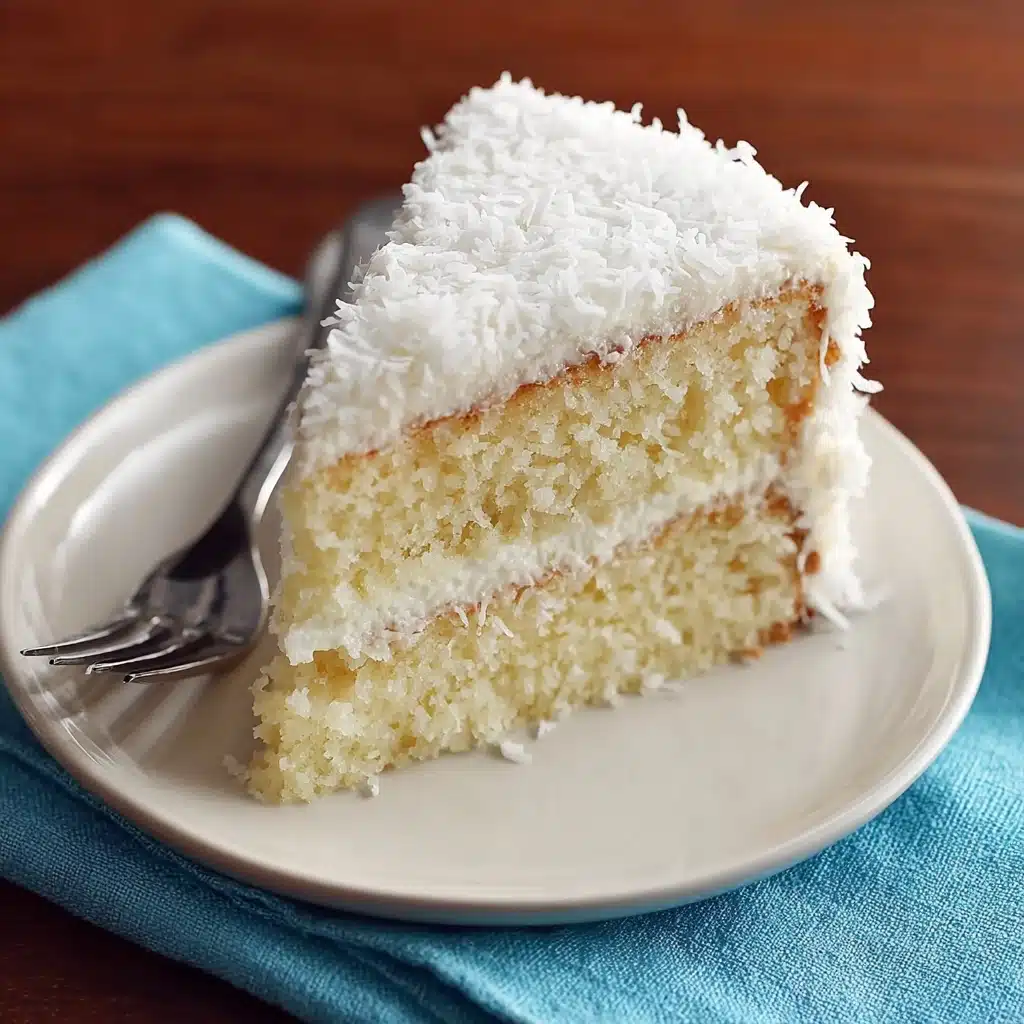
If you’re craving a dessert that’s both nostalgic and irresistibly decadent, this Tasty Old-Fashioned Coconut Cake absolutely delivers. Every tender forkful is a testament to traditional baking: moist layers, fluffy seven-minute frosting, and a generous snowy blanket of sweet coconut. Whether you’re planning a celebration, making Sunday dinner extra special, or just treating yourself, this coconut cake brings warmth, comfort, and plenty of smiles, all while being simple enough for any enthusiastic home baker to pull off. It’s a real showstopper that never goes out of style!
Ingredients You’ll Need
The key to a truly Tasty Old-Fashioned Coconut Cake lies in its down-to-earth ingredients, each selected to deliver the rich flavor and perfect texture this classic treat is known for. Take a moment to gather and prep everything; a streamlined workflow makes cake baking so much more enjoyable!
- Vegetable shortening and flour (for prepping pans): Ensures your cakes release flawlessly and gives you those beautiful, intact layers.
- 1 cup room temperature unsalted butter (two sticks): The base of any good cake—a must for rich, creamy flavor and soft crumb.
- 2 cups white sugar: Provides sweetness and helps cream together with the butter for that dreamy, velvety batter.
- 5 large eggs: Add structure and moisture, resulting in a wonderfully tender cake.
- 1 teaspoon vanilla essence: Lends a subtle warmth and depth, layering flavor throughout.
- 1 teaspoon coconut flavoring (usually near the vanilla essence in stores): The not-so-secret ingredient that gives the cake its unique coconut character.
- 2 1/2 cups regular all-purpose flour: The reliable foundation that holds everything together.
- 1 teaspoon baking soda: Works alongside baking powder for the perfect rise—a fluffy cake awaits!
- 1 teaspoon baking powder: Adds even more lift and lightness to your layers.
- 1/4 teaspoon salt: Balances the sweetness and brightens all the flavors.
- 1 cup buttermilk: Adds a tangy richness and keeps the cake exceptionally moist.
- Seven-minute frosting, guaranteed to work: Dreamy and cloud-like, it’s the perfect partner for coconut.
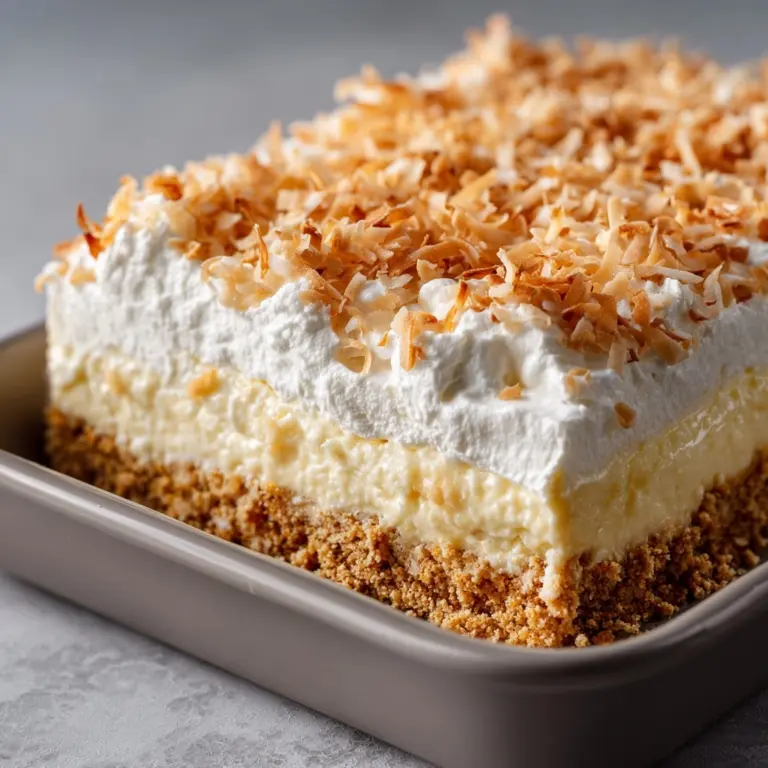
- 2 cups sweetened shredded coconut (for topping the cake): Creates that lush, classic coconut finish.
How to Make Tasty Old-Fashioned Coconut Cake
Step 1: Prepare the Cake Pans
Before you touch a speck of flour or crack an egg, preheat your oven to 350°F (175°C). Grab either two 9-inch round cake pans or one 9×13-inch pan—both work beautifully! Grease the pans lightly with vegetable shortening, then dust with flour. This little prep step makes cake removal a breeze and sets your Tasty Old-Fashioned Coconut Cake up for flawless assembly later on.
Step 2: Cream Butter and Sugar
Set your butter out ahead of time so it’s perfectly soft—this is key! In a large mixing bowl, beat the butter and sugar together using an electric mixer on medium speed. Don’t rush this: give it at least four minutes so the mixture is light, airy, and creamy. This simple process creates the foundation for a tender, melt-in-your-mouth cake.
Step 3: Mix in Wet Ingredients
Add in your eggs, plus the vanilla essence and coconut flavoring. Blend everything well so the batter becomes silky and uniform—no streaks or lumps. The coconut essence brings a big punch of nostalgia and flavor, giving your Tasty Old-Fashioned Coconut Cake the extra spark that really sets it apart.
Step 4: Combine Dry Ingredients
In a separate bowl, whisk together the flour, baking soda, baking powder, and salt. Take a minute to make sure these dry ingredients are fully mixed. Uniform distribution prevents pesky pockets of bitter baking soda or powder and ensures your layers rise evenly and taste just right.
Step 5: Blend the Cake Batter
Now it’s time for everything to come together! Add the dry flour mixture and the buttermilk to your creamed butter mixture. Alternate between the two, mixing on medium speed and pausing to scrape the sides of the bowl. The result should be a smooth, luscious batter. Beat until everything is well incorporated—about two to three minutes does the trick.
Step 6: Bake the Cake
Pour the cake batter evenly into your prepared pans. Slide them into the preheated oven and bake until a toothpick inserted into the center comes out clean: about 25–30 minutes for rounds, or up to 35 minutes for a 9×13. Your kitchen will start to smell like pure happiness—be patient, this step is well worth the wait!
Step 7: Cool and Frost the Cake
Once baked, let the cakes cool completely—this helps the delicate crumb set and makes frosting a cinch. Slather on a generous layer of seven-minute frosting, smooth it out, then shower the entire surface with sweetened shredded coconut. Press coconut gently into the sides for that beautiful, snowdrift look that’s both rustic and stunning.
Step 8: Storing the Cake
After frosting, keep your Tasty Old-Fashioned Coconut Cake covered at room temperature for up to two days. If you need to keep it longer, pop it in the fridge for up to a week—deliciousness preserved!
How to Serve Tasty Old-Fashioned Coconut Cake
Garnishes
A slice of this cake already looks gorgeous, but if you want to add an extra touch, try garnishing with a little extra shredded coconut on top just before serving. A few sprigs of fresh mint or a scattering of toasted coconut can add lovely color contrast, too. For special occasions, consider dressing each piece with an edible flower for a soft, springtime look.
Side Dishes
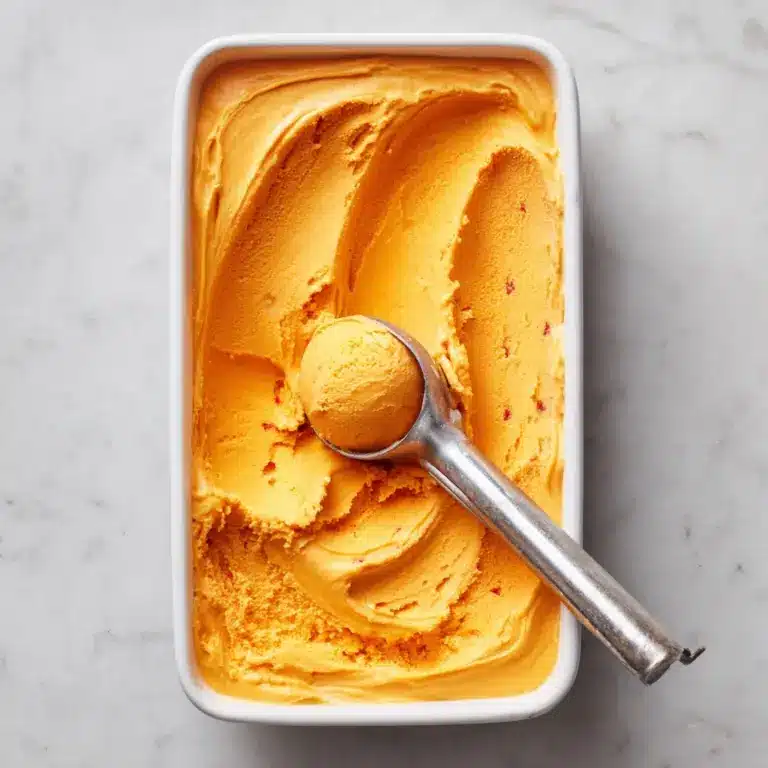
The Tasty Old-Fashioned Coconut Cake is rich and flavorful, so simple accompaniments work best. A scoop of vanilla bean ice cream or a dollop of lightly whipped cream highlights the coconut without overpowering it. If you love fruit, serve with sliced fresh pineapple or mango on the side for a tropical twist that complements the cake beautifully.
Creative Ways to Present
This cake shines whether you serve it at a family gathering or on a dessert buffet. Try slicing it into thin wedges for an elegant layered display, or stack the layers slightly off-center for a whimsical, rustic effect. For individual servings, cut squares or rounds and nestle them into cupcake liners, topping each with a swirl of frosting and a pinch of coconut.
Make Ahead and Storage
Storing Leftovers
Leftover Tasty Old-Fashioned Coconut Cake stores beautifully if handled right. Keep any slices you haven’t devoured tucked under a cake dome or in an airtight container at room temperature for up to two days. This helps maintain its moisture and texture without drying out.
Freezing
If you want to make the cake ahead (or save extra for later!), you can freeze it with great success. Wrap unfrosted cake layers tightly in plastic wrap and then in aluminum foil—this double layer keeps out freezer burn. For frosted cake, freeze slices spaced out on a tray before wrapping and storing. Thaw overnight in the refrigerator, and you’ll have perfect cake, anytime the mood strikes.
Reheating
Tasty Old-Fashioned Coconut Cake is best enjoyed at room temperature. If your cake has been in the fridge, give it an hour on the counter before serving so the frosting softens and the crumb becomes tender again. If you absolutely must warm it, use just a few seconds in the microwave on low power, being careful not to melt the frosting.
FAQs
Can I use unsweetened coconut instead of sweetened?
Absolutely, though it will change the overall sweetness and texture a little. Sweetened coconut gives the cake its signature, soft exterior and balances out the airy frosting, but unsweetened coconut is also lovely if you prefer something less sugary.
What is seven-minute frosting, and can I use another type?
Seven-minute frosting is a classic, marshmallow-like meringue that’s light, fluffy, and not overly sweet. If you’re in a pinch, you can use a simple buttercream or cream cheese frosting, but nothing quite matches the original’s delicate texture.
Can I make Tasty Old-Fashioned Coconut Cake gluten free?
Yes! Swap the regular all-purpose flour for a 1:1 gluten-free baking blend. The cake will remain moist and delicious—just ensure your baking powder and other ingredients are also gluten-free.
What makes this coconut cake “old-fashioned”?
It’s all about the classic techniques and flavor profile: creamed butter and sugar, a cloud-like frosting, and plenty of coconut inside and out. The recipe has stood the test of time because it’s so simple, reliable, and delicious!
Can I make the cake a day in advance for an event?
Definitely! In fact, the flavors meld together wonderfully if the cake sits overnight, making it even more delicious the next day. Just keep it covered until you’re ready to serve.
Final Thoughts
I hope you’ll try making this Tasty Old-Fashioned Coconut Cake soon—it’s a treat that brings people together and never fails to impress. One bite, and you’ll understand why it’s been a favorite for generations. Happy baking!
PrintTasty Old-Fashioned Coconut Cake Recipe
Indulge in the nostalgia of a classic coconut cake with this recipe that promises a moist and flavorful dessert topped with sweet shredded coconut. Perfect for any occasion, this old-fashioned treat will have your taste buds dancing with delight.
- Prep Time: 20 minutes
- Cook Time: 30 minutes
- Total Time: 50 minutes
- Yield: 1 9-inch round cake or 1 9×13-inch cake 1x
- Category: Dessert
- Method: Baking
- Cuisine: American
- Diet: Vegetarian
Ingredients
Cake:
- Vegetable shortening and flour (for prepping pans)
- 1 cup room temperature unsalted butter (two sticks)
- 2 cups white sugar
- 5 large eggs
- 1 teaspoon vanilla essence
- 1 teaspoon coconut flavoring (usually near the vanilla essence in stores)
- 2 1/2 cups regular all-purpose flour
- 1 teaspoon baking soda
- 1 teaspoon baking powder
- 1/4 teaspoon salt
- 1 cup buttermilk
Seven-Minute Frosting:
- 2 cups sweetened shredded coconut (for topping the cake)
Instructions
- Prepare the Cake Pans Preheat the oven to 350°F. Grease and flour the cake pans.
- Cream Butter and Sugar Cream together butter and sugar until smooth.
- Mix in Wet Ingredients Add eggs, vanilla, and coconut flavoring to the butter mixture and beat well.
- Combine Dry Ingredients Stir together flour, baking soda, baking powder, and salt in a separate bowl.
- Blend the Cake Batter Add dry ingredients and buttermilk to the butter mixture and beat until smooth.
- Bake the Cake Pour batter into pans and bake until a toothpick comes out clean.
- Cool and Frost the Cake Allow cakes to cool, frost with seven-minute frosting, and sprinkle coconut on top.
- Storing the Cake Keep covered at room temperature or refrigerate to maintain freshness.
Notes
- For a richer coconut flavor, add a bit of coconut extract to the frosting.
- Ensure the cake is completely cooled before frosting to prevent melting.
- Experiment with toasting the coconut for a nuttier flavor and crunch.
Nutrition
- Serving Size: 1 slice (1/12 of 9-inch cake)
- Calories: 380
- Sugar: 28g
- Sodium: 280mg
- Fat: 18g
- Saturated Fat: 12g
- Unsaturated Fat: 5g
- Trans Fat: 0g
- Carbohydrates: 51g
- Fiber: 1g
- Protein: 4g
- Cholesterol: 105mg
Keywords: Coconut Cake, Dessert, Homemade Cake, Coconut Dessert
