Viral Chicken Crust Caesar Salad Pizza Recipe
Introduction
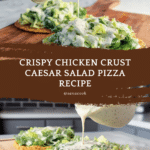
This Viral Chicken Crust Caesar Salad Pizza is a fun and flavorful twist on traditional pizza. Featuring a crispy chicken-based crust topped with a classic Caesar salad, it’s perfect for a low-carb meal that feels indulgent and fresh. Give this recipe a try for a crowd-pleasing dinner or impressive appetizer.
Ingredients
- 20 oz canned chicken (drained)
- 1 egg
- 2/3 cup parmesan cheese (grated)
- 1 teaspoon garlic powder
- 1/2 teaspoon crushed red pepper flakes
- 1/2 cup mayonnaise
- 1/4 cup parmesan cheese (grated)
- 2 tablespoons lemon juice
- 1 tablespoon Dijon mustard
- 1 teaspoon Worcestershire sauce
- 2 cloves garlic (minced)
- Salt and pepper (to taste)
- 9 oz bag of romaine hearts (roughly chopped)
- 2 tablespoons parmesan (grated, for garnish)
Instructions
- Step 1: Preheat your oven to 400°F (200°C). Line a baking sheet with parchment paper and set aside.
- Step 2: In a food processor, combine the drained canned chicken, egg, grated parmesan cheese, garlic powder, and crushed red pepper flakes. Mix until well combined.
- Step 3: Spread the chicken mixture onto the prepared baking sheet in two even piles. Shape each pile into a thin, even layer resembling a pizza crust.
- Step 4: Bake the chicken crusts for 20-25 minutes, or until golden brown and crispy around the edges.
- Step 5: Remove the chicken crusts from the oven and let them cool slightly while you prepare the Caesar dressing and salad.
- Step 6: In a food processor or small bowl, whisk together mayonnaise, grated parmesan cheese, lemon juice, Dijon mustard, Worcestershire sauce, minced garlic, salt, and pepper until smooth. Adjust seasoning to taste.
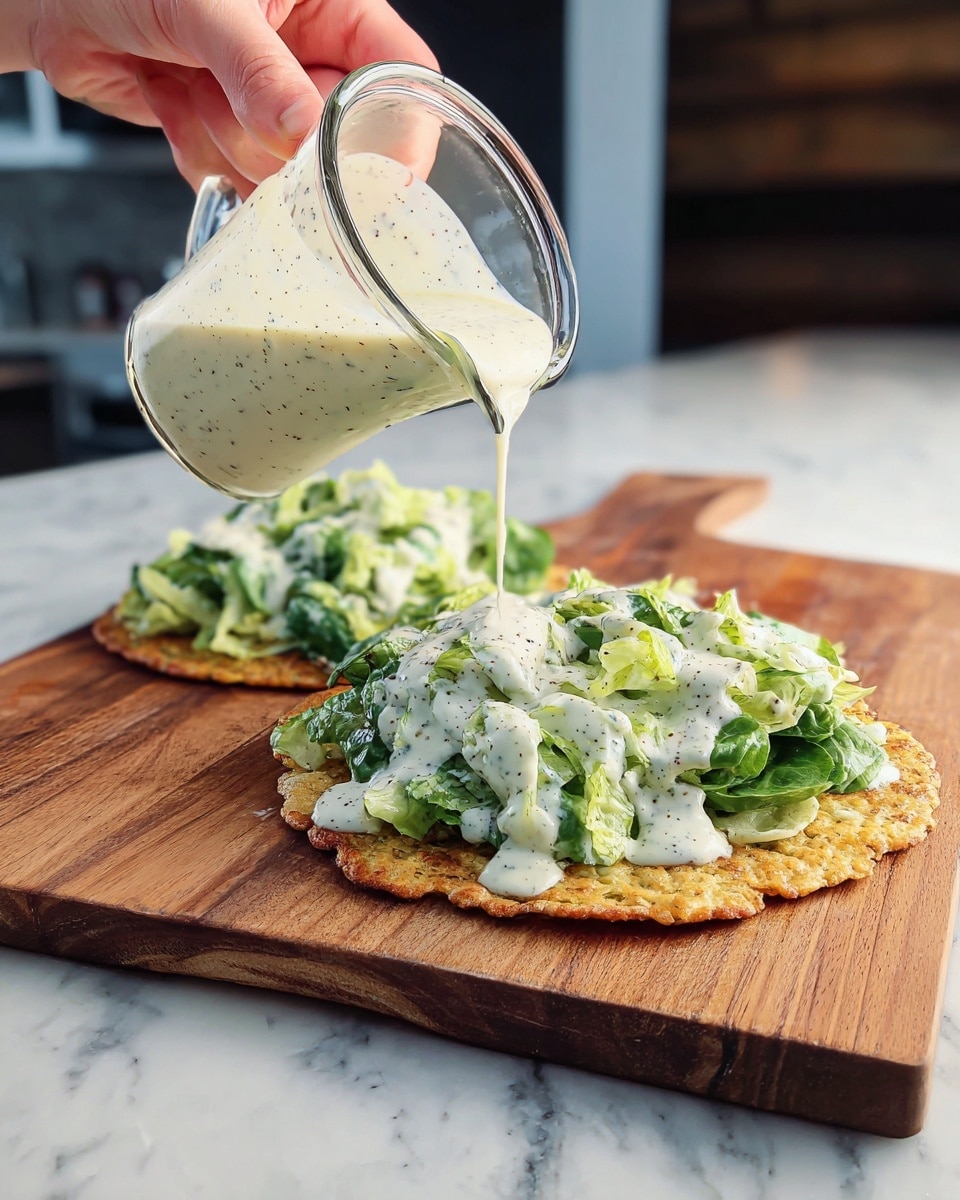
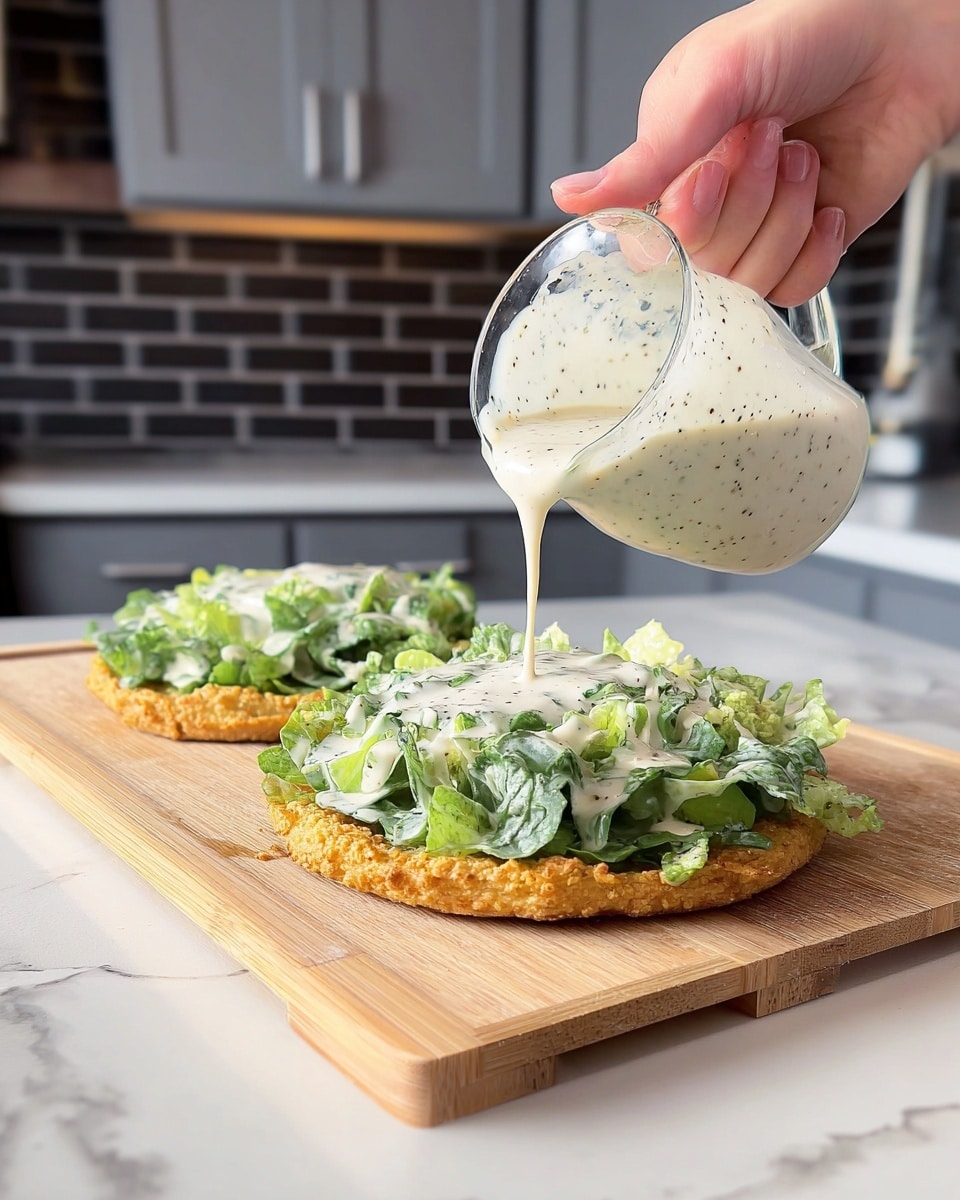
- Step 7: Toss the roughly chopped romaine hearts with the Caesar dressing in a large bowl until evenly coated.
- Step 8: Spread the dressed romaine salad evenly over each cooled chicken crust.
- Step 9: Garnish with additional grated parmesan cheese.
- Step 10: Slice the pizza into wedges and serve immediately.
- Step 11: Enjoy your Chicken Crust Caesar Salad Pizza with its crispy, flavorful crust and fresh, tangy topping!
Tips & Variations
- Use fresh grated parmesan for the best flavor and melting texture.
- Add anchovy paste to the dressing for a more authentic Caesar taste.
- For a spicier crust, increase crushed red pepper flakes or add a pinch of cayenne pepper.
- Try topping with cherry tomatoes or crispy bacon for extra texture and flavor.
- If you don’t have a food processor, finely chop the chicken and mix ingredients by hand, though the texture will be slightly different.
Storage
Store leftover chicken crusts and salad separately in airtight containers in the refrigerator for up to 2 days. Reheat the chicken crusts in a preheated oven at 350°F (175°C) for 5-7 minutes to restore crispiness. Add freshly dressed salad topping just before serving to keep it crisp and fresh.
How to Serve
Serve this delicious recipe with your favorite sides.
FAQs
Can I use cooked chicken instead of canned chicken?
Yes, you can use finely shredded cooked chicken as a substitute. Just make sure it’s drained well to avoid excess moisture in the crust.
Is this recipe low carb or keto-friendly?
Absolutely. Using chicken as the crust and fresh salad toppings makes this a tasty low-carb, keto-friendly option.
PrintViral Chicken Crust Caesar Salad Pizza Recipe

This Viral Chicken Crust Caesar Salad Pizza features a crispy chicken-based crust topped with fresh romaine lettuce tossed in a creamy Caesar dressing and garnished with Parmesan cheese. It’s a low-carb, protein-rich twist on traditional pizza that combines the flavors of a classic Caesar salad with an innovative, gluten-free chicken crust for a deliciously satisfying meal.
- Prep Time: 15 minutes
- Cook Time: 25 minutes
- Total Time: 40 minutes
- Yield: 2 individual pizzas 1x
- Category: Main Course
- Method: Baking
- Cuisine: American
- Diet: Gluten Free
Ingredients
Chicken Crust
- 20 oz canned chicken, drained
- 1 egg
- 2/3 cup grated Parmesan cheese
- 1 teaspoon garlic powder
- 1/2 teaspoon crushed red pepper flakes
Caesar Dressing
- 1/2 cup mayonnaise
- 1/4 cup grated Parmesan cheese
- 2 tablespoons lemon juice
- 1 tablespoon Dijon mustard
- 1 teaspoon Worcestershire sauce
- 2 cloves garlic, minced
- Salt and pepper, to taste
Salad Topping
- 9 oz bag of romaine hearts, roughly chopped
- 2 tablespoons grated Parmesan cheese (for garnish)
Instructions
- Preheat the Oven: Set your oven to 400°F (200°C) and line a baking sheet with parchment paper to prevent sticking and help with easy cleanup.
- Prepare the Chicken Crust Mixture: In a food processor, combine the drained canned chicken, egg, grated Parmesan cheese, garlic powder, and crushed red pepper flakes. Pulse until all ingredients are well incorporated into a uniform mixture.
- Form the Chicken Crusts: Spread the chicken mixture onto the prepared baking sheet. Divide into two equal portions and flatten each into a thin, round crust shape resembling a pizza base.
- Bake the Crusts: Place the baking sheet in the oven and bake the crusts for 20-25 minutes or until they turn golden brown and develop crispy edges.
- Cool the Crusts: Remove the chicken crusts from the oven and allow them to cool slightly, which makes them easier to handle for the next steps.
- Make the Caesar Dressing: In either the food processor or a small bowl, whisk together mayonnaise, grated Parmesan cheese, lemon juice, Dijon mustard, Worcestershire sauce, minced garlic, salt, and pepper. Blend until smooth and taste to adjust seasoning as needed.
- Toss the Romaine Lettuce: Place the roughly chopped romaine hearts in a large mixing bowl and toss thoroughly with the prepared Caesar dressing until well coated.
- Assemble the Pizza: Spread the dressed romaine salad evenly across the slightly cooled chicken crusts.
- Garnish: Sprinkle the tops with additional grated Parmesan cheese for an extra burst of cheesy flavor.
- Slice and Serve: Cut the finished pizza into wedges and serve immediately to enjoy the contrast of the crispy crust with the fresh, tangy Caesar salad topping.
- Enjoy Your Meal: Savor this inventive Chicken Crust Caesar Salad Pizza as a tasty low-carb alternative to traditional pizza with all the vibrant flavors of a classic Caesar salad!
Notes
- Ensure the chicken mixture is spread thinly and evenly to achieve a crispy crust.
- Use parchment paper to prevent sticking and facilitate easy cleanup.
- Adjust garlic and red pepper flakes according to your spice preference.
- This recipe is gluten-free and high in protein, ideal for low-carb diets.
- Serve immediately to maintain the crispiness of the crust and freshness of the salad.
Keywords: Chicken crust pizza, Caesar salad pizza, low-carb pizza, gluten-free pizza, chicken pizza crust, healthy pizza, keto friendly pizza


