White Poinsettia Cake Recipe
Introduction
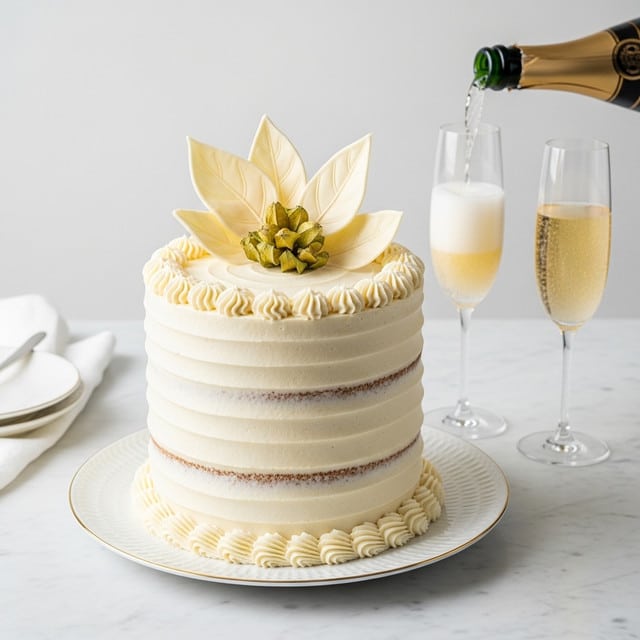
This White Poinsettia Cake is a stunning holiday centerpiece that tastes just as delightful as it looks. Layers of rich brown butter cake are filled and frosted with luscious cranberry-orange whipped cream and decorated with elegant white chocolate candy leaves and gold accents.
Ingredients
- Brown Butter Cake (prepared as directed)
- Whipped Cream Frosting, divided
- Cranberry-Orange Cake Filling
- White Chocolate Candy Leaves
- Gold Dragées
- Fresh Bay Leaves
Instructions
- Step 1: Prepare the Brown Butter Cake according to the recipe instructions. Once baked, use a serrated knife to trim the domed tops off each cake layer and discard the trimmings along with any parchment paper.
- Step 2: Place one cake layer on a serving plate with the trimmed side facing up. Spread 1/4 cup of the whipped cream frosting evenly over the top. Transfer 1 1/4 cups of frosting into a piping bag or a ziplock bag with a small 1/2-inch opening, and pipe a 1/2-inch tall border around the edge of the cake.
- Step 3: Spoon half of the cranberry-orange filling (about 3/4 cup) evenly inside the piped border. Place the second cake layer on top, repeat the frosting border and filling. Reserve the frosting in the piping bag for decoration.
- Step 4: Add the final cake layer with the cut side down. Thinly frost the top and sides of the cake with a crumb coat using the remaining frosting. Chill the cake uncovered for 30 minutes.
- Step 5: Spread the remaining frosting evenly over the top and sides of the chilled cake with an offset spatula. Using the reserved piping bag, pipe two small mounds of frosting about 6 inches apart on top of the cake.
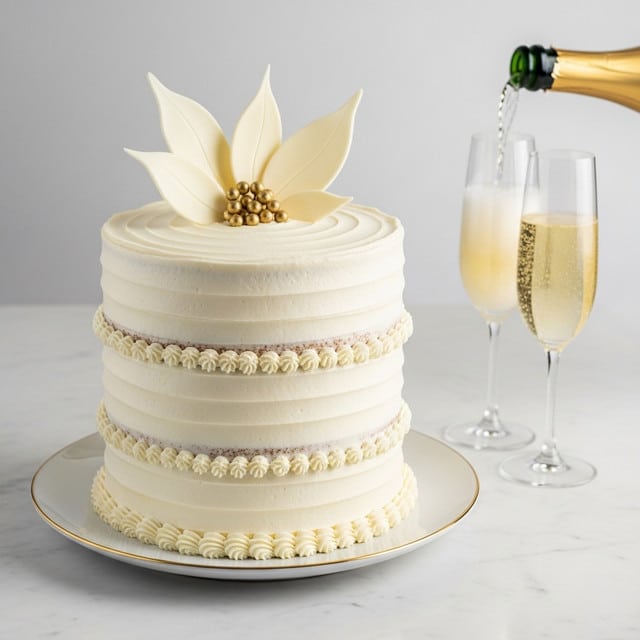
- Step 6: Insert white chocolate candy leaves into the frosting mounds in a star shape to create poinsettias. Layer leaves as desired, securing them with additional piped frosting if needed.
- Step 7: Pipe a small frosting dot in the center of each poinsettia and place gold dragées on top. Tuck fresh bay leaves around the flowers for extra decoration. Remove both dragées and bay leaves before serving.
- Step 8: For best results, prepare all components ahead of time but assemble and decorate the cake on the day you plan to serve it.
Tips & Variations
- Use a serrated knife to trim cake layers evenly without tearing the crumb for a smooth finish.
- Chill the cake between frosting steps to help set layers and prevent frosting from sliding.
- Substitute fresh cranberries and orange zest for a homemade cranberry-orange filling if preferred.
- Decorate the cake with silver dragées or edible glitter for a different festive look.
Storage
Store the assembled cake covered in the refrigerator for up to 3 days. Remove delicate decorations such as gold dragées and fresh bay leaves before storing to prevent moisture damage. Let the cake sit at room temperature for 20 minutes before serving to soften the frosting.
How to Serve
Serve this delicious recipe with your favorite sides.
FAQs
Can I make the cake layers ahead of time?
Yes, you can bake the brown butter cake layers up to 2 days in advance. Wrap them well and keep refrigerated until assembly.
Are the white chocolate candy leaves edible?
Yes, white chocolate candy leaves are edible and make a beautiful decoration, but be sure to remove the gold dragées and fresh bay leaves before eating.
PrintWhite Poinsettia Cake Recipe

This elegant White Poinsettia Cake is a stunning holiday centerpiece that combines a rich brown butter cake with a tangy cranberry-orange filling, all enveloped in luscious whipped cream frosting. Decorated with delicate white chocolate candy leaves and glistening gold dragées, it offers both visual appeal and festive flavors perfect for any celebration.
- Prep Time: 45 minutes
- Cook Time: 40 minutes
- Total Time: 1 hour 55 minutes
- Yield: 12 servings 1x
- Category: Dessert
- Method: Baking
- Cuisine: American
Ingredients
Brown Butter Cake
- Brown Butter Cake layers (prepared as directed in original recipe)
Whipped Cream Frosting
- Whipped Cream Frosting (amount divided as needed, approximately 3 to 4 cups total)
Cranberry-Orange Cake Filling
- 3/4 cup cranberry-orange filling (divided)
Decorations
- White Chocolate Candy Leaves
- Gold dragées
- Fresh bay leaves
Instructions
- Prepare the Cake Layers: Following the Brown Butter Cake recipe instructions, bake the cake layers. Once cooled, use a serrated knife to trim off the domed tops of each cake layer to create flat surfaces. Discard the trimmings and remove any parchment paper from the layers.
- Assemble First Layer: Place one cake layer on a serving plate with the trimmed side facing up. Evenly spread 1/4 cup of whipped cream frosting over the top surface of this layer.
- Pipe Frosting Border and Add Filling: Spoon 1 1/4 cups of whipped cream frosting into a piping bag or a resealable plastic bag with a 1/2-inch hole cut in the tip or corner. Pipe a 1/2-inch tall border of frosting along the edge of the cake layer. Within this border, spread half of the cranberry-orange filling (about 3/4 cup) evenly.
- Repeat for Second Layer: Place the second cake layer on top, trimmed side up, and repeat the frosting border and filling steps. Reserve remaining frosting in the piping bag for decoration.
- Add Top Layer and Crumb Coat: Place the final cake layer on top with the cut side down. Spread a thin layer of frosting over the top and sides of the entire cake to create a crumb coat. Chill the cake uncovered in the refrigerator for 30 minutes to set the crumb coat.
- Final Frosting Layer: Using an offset spatula, spread the remaining whipped cream frosting over the top and sides of the chilled cake to create a smooth, even finish.
- Create Poinsettia Bases: Use the reserved piping bag to pipe two small mounds of frosting on top of the cake, about 6 inches apart. These will serve as the bases to secure the decorative poinsettias.
- Decorate with Candy Leaves and Dragées: Arrange the white chocolate candy leaves into a star-shaped poinsettia pattern by tucking them into the frosting mounds and layering as desired. Use the piping bag to add small amounts of frosting to the backs of leaves to secure them in place. Pipe small dots of frosting in the centers of each poinsettia and place gold dragées on top.
- Final Touches: Tuck in fresh bay leaves around the poinsettias as additional decoration. Remove all gold dragées and fresh bay leaves before serving the cake.
- Preparation Tips: Cake components such as the cake layers, filling, and frosting can be prepared in advance. It is best to assemble and decorate the cake on the day you plan to serve it for optimal freshness and appearance.
Notes
- Trim the cake layers carefully to create flat surfaces, which help with stable layering and a neater finish.
- Use a piping bag with a 1/2-inch hole for precise frosting borders and decoration.
- The gold dragées and fresh bay leaves are decorative only and should be removed before eating.
- Chilling the crumb-coated cake is essential to set the frosting before the final layer is applied, ensuring a smooth finish.
- Prepare components ahead of time but assemble and decorate on the day of serving to maintain freshness.
Keywords: Holiday cake, white poinsettia cake, brown butter cake, cranberry orange filling, whipped cream frosting, festive dessert, Christmas cake, holiday dessert
